
Introduction
In the world of dirt biking, personalization is key, and one of the most effective ways to enhance your bike’s appeal is through aesthetic upgrades, particularly graphics installation. The right graphics not only transform the overall look of your bike, but they also allow riders to showcase their unique personality and style. Whether you’re a casual rider or a seasoned racer, custom graphics can reflect your individuality, making your bike stand out on the track or trail.
Moreover, investing in quality graphics serves a practical purpose beyond appearance. They can act as a protective layer for your bike’s plastic surfaces, shielding it from scratches and UV damage that can occur during rides. This dual benefit of appearance and protection underscores why graphics installation is an essential enhancement for every dirt bike. In this article, we will guide you through the process of installing dirt bike graphics, ensuring your ride looks exceptional while maintaining its integrity. For those looking to explore stunning designs, check out our list of top dirt bike wraps and custom dirt bike graphics.
Essential Tools for Installing Dirt Bike Graphics
Installing dirt bike graphics requires the right set of tools to ensure a smooth and professional finish. Here’s a list of essential tools you’ll need:
- Utility Knife or Precision Razor Blades: Perfect for trimming excess graphics for a clean look.
- Squeegee or Plastic Card: Used for applying even pressure over the graphics to remove air bubbles and ensure proper adhesion.
- Heat Gun or Hair Dryer: Helps to soften the vinyl, making it easier to conform to shapes and edges.
- Isopropyl Alcohol: Essential for cleaning the surface of your bike to remove dirt and grease prior to application.
- Microfiber Cloth: Ideal for cleaning the surface without scratching it.
- Masking Tape: Useful for aligning graphics accurately before applying them.
Using these tools not only facilitates the installation process but also contributes to a more durable finish that can withstand the rigors of dirt biking. For more tips on graphic designs, check out our top 10 dirt bike graphic tricks and best practices for installing graphics.
Preparing Your Bike for Graphics Application
When it comes to ensuring a successful graphics application on your motorcycle, proper surface preparation is critical. A clean surface not only enhances the look of your bike but also promotes better adhesion, resulting in a longer-lasting finish. Here’s a detailed guide on preparing your motorcycle before applying graphics:
Step-by-Step Cleaning Process
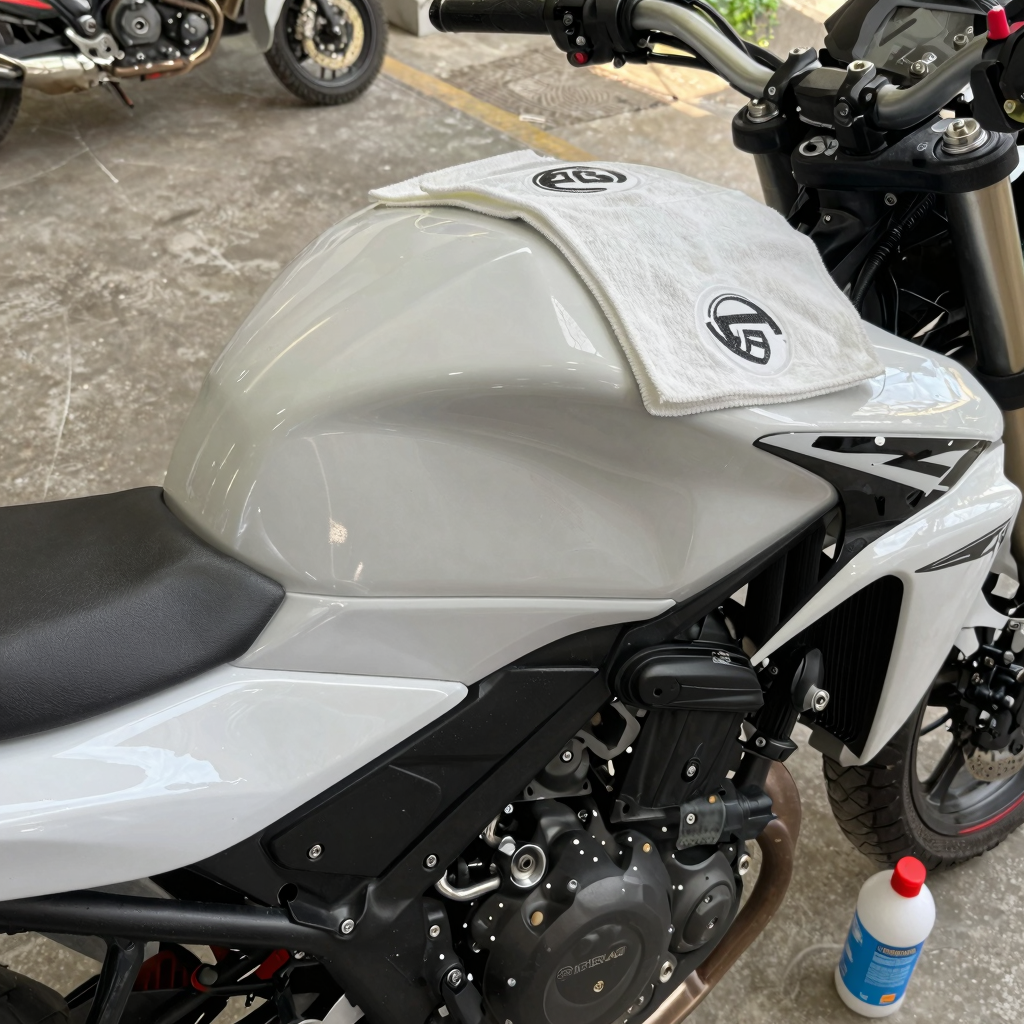
- Wash the Motorcycle: Start by washing your motorcycle thoroughly with a dedicated motorcycle cleaner and a soft microfiber cloth. This will help remove dirt, grease, and any wax residues from the surface.
- Important: Avoid using harsh chemicals that can damage the paint or plastics.
- Recommended Products: Use a pH-neutral motorcycle wash to prevent surface damage.
-
Rinse with Clean Water: After washing, rinse the motorcycle with clean water to remove any soap residues. Ensure that all areas, especially crevices, are rinsed well.
-
Dry Completely: Use a lint-free towel to dry the motorcycle completely. This step is critical as any trapped moisture can hinder the adhesion of graphics.
-
Inspect for Imperfections: Check the surface for any scratches, dents, or rough spots. If you notice any imperfections, lightly sand these with 1500-grit wet/dry sandpaper to smoothen the area before proceeding.
-
Clean with Isopropyl Alcohol: Finally, wipe down the entire surface with isopropyl alcohol (at least 70%) using a lint-free cloth. This will help ensure that all oils and contaminants are removed, promoting better adhesion.
- Drying Time: Allow the surface to air dry for 10-15 minutes before applying graphics.
Final Notes
- Avoid Direct Sunlight: Always work in a shaded area to prevent the adhesive from drying too quickly.
- Special Attention Areas: Pay extra attention to areas around the fuel tank, fenders, and handlebars, as these can accumulate more grime.
Following these steps will help you achieve a clean slate for your motorcycle graphics application. For additional tips and tricks to enhance your bike’s look, consider checking out our guide on custom dirt bike graphics.
How to Apply Dirt Bike Graphics: A Step-by-Step Guide
Applying graphics to your dirt bike can significantly enhance its appearance and even reflect your personal style. However, the installation process requires attention to detail for optimal results. Below is a comprehensive step-by-step guide to help you successfully apply dirt bike graphics.
Step 1: Gather Your Materials
Before you begin, ensure you have all the necessary materials:
- Dirt bike graphics kit
- Isopropyl alcohol or degreaser
- Clean cloths
- Masking tape
- Squeegee or credit card
- Heat gun or hair dryer (optional)
- Utility knife or scissors
Step 2: Prepare the Surface
Start by thoroughly cleaning the surface of your dirt bike:
- Use a degreaser to remove any oils, dirt, or debris from the plastic surfaces.
- Rinse with water and dry them completely.
- Optionally, sand the surfaces lightly with 800-1000 grit sandpaper to create a rough texture for better adhesion.
Step 3: Measure and Align
- Measure: Before applying, carefully measure the area where the graphic will be applied. Use a ruler or measuring tape for accuracy.
- Align: Remove the graphic from its backing and hover it over the surface to check its position. Use masking tape to temporarily secure the graphic in place for proper alignment.
Step 4: Peel Off the Backing
- Once you are satisfied with the alignment, carefully peel the backing off the graphic. Start at one edge and gradually peel while ensuring the graphic doesn’t stick to itself.
Step 5: Apply the Graphic
- Begin applying the graphic at one end while gently rolling it onto the surface. Use the squeegee or a flat tool to smooth it down, working from the center outward to eliminate air bubbles.
- If you encounter curves or areas where the graphic may wrinkle, gently warm the vinyl with a heat gun or hair dryer to make it more pliable.
Step 6: Smooth Out the Air Bubbles
- Use the squeegee to press out any air bubbles gently. Start from the center of the graphic and move towards the edges. If stubborn bubbles remain, you can poke a tiny hole with a pin and press the air out.
Step 7: Final Touches
- Trim any excess graphic material using a utility knife, particularly around edges and contours. Be careful not to cut too deeply.
- Allow the graphic to adhere properly by letting it cure for at least 24 hours before riding.
Tips for a Successful Application
- Environment: Ensure you apply graphics in a warm and dust-free environment for better adhesion. Avoid direct sunlight, as it can cause the adhesive to bond poorly.
- Patience: Take your time during the installation process. Rushing can result in misalignment and bubbles.
- Practice: If you are new to applying graphics, consider practicing on a spare panel before applying it to your bike.
By following these steps, you can achieve a professional look for your dirt bike with new graphics. For further assistance, check out our article on top dirt bike graphic kits. Good luck, and enjoy customizing your ride!
| Material Type | Durability | Cost Range | Best For |
|---|---|---|---|
| Non-Laminated Vinyl | 1-3 years | $45 per bike | Casual riders, short-term use |
| Standard Vinyl | 6-12 months | $75 per bike | General use with moderate durability |
| Laminated Vinyl | 3-7 years | $120-$180 per bike | Long-term use, serious riders |
Key Insights:
- Non-Laminated Vinyl: The most affordable option, suitable for indoor applications or riders who don’t engage in heavy-duty use. However, it tends to fade, chip, and delaminate quickly under outdoor conditions.
- Standard Vinyl: Offers better durability than non-laminated versions but can still degrade from UV exposure and surface scratches over time.
- Laminated Vinyl: Represents the best investment for serious riders looking for longevity and vibrant graphics. It features a protective topcoat that resists damage from dirt, mud, and chemicals, ensuring your bike maintains a fresh appearance for years. The initial higher cost is justified by its extended lifespan and reduced need for replacements.
For those looking to dive deeper into the world of dirt bike graphics, you can explore top dirt bike wraps or custom dirt bike graphics.
Common Mistakes to Avoid During Installation of Dirt Bike Graphics
Installing graphics on a dirt bike may seem straightforward, but beginners often encounter pitfalls that can lead to unsatisfactory results. Here are some common mistakes to avoid during the installation process, along with tips to ensure a successful application.
1. Insufficient Surface Preparation
One of the most frequent errors is failing to clean the surfaces properly before installation. Any grease, dust, or moisture can cause the graphics to bubble or peel off shortly after application. Make sure to wash the surface thoroughly and let it dry completely. Using a degreaser can also help ensure a clean base. This preparation step is crucial for a durable adhesion.
2. Improper Alignment
Another common mistake is misaligning the graphics during installation. Beginners may skip checking the fit before applying the adhesive, leading to crooked placements. To avoid this, consider using alignment guides or painter’s tape to mark where the graphics should go. Take your time during this phase-measuring twice can save you from frustrations later.
3. Rushing the Process
Many installers tend to rush through the application, but taking your time is essential. Use a squeegee or a similar tool to smooth out the graphics and push out any air bubbles. Rushing could lead to wrinkles or misplacement; patience will yield a more professional finish. Also, allow the adhesive to cure properly before using the bike to ensure everything sticks as it should, as riding right after installation can compromise adhesion.
4. Incorrect Application Temperature
Temperature plays a critical role in the installation process. Applying graphics in extreme heat or cold can affect the adhesive’s performance. Ideally, the application should be done within a temperature range of 60-75°F (15-24°C). If conditions aren’t just right, the graphics may not adhere well or could warp, leading to dissatisfaction.
5. Using Sharp Tools
It’s tempting to use sharp tools for trimming edges, but this can damage the vinyl film. Instead, opt for a soft squeegee or a plastic card that minimizes the risk of cutting into the graphics. Being thoughtful about your tools can help maintain the integrity of the installation.
These common mistakes can be easily avoided by taking the time to prepare adequately, follow the correct steps, and remain patient during the installation process. For comprehensive guides and tips, check out our articles on the top ten dirt bike wraps and custom dirt bike graphics.
By being aware of these common pitfalls and armed with the right information, you can achieve stunning results and give your dirt bike a refreshed and personalized look.
The Impact of Graphics on Dirt Bike Appeal
In the world of dirt biking, the aesthetics of your ride can sometimes be as important as its performance. A well-designed graphics kit not only enhances the visual appeal of your bike but can also reflect your personality and style as a rider.
“The graphics aren’t just stylish – they enhance the sense of speed and danger. You feel like you’re riding through a time capsule of old-school dirt biking.”
- Dirt Bike Enthusiast
This sentiment emphasizes how graphics can elevate the riding experience, making each ride feel unique and thrilling.
For more insights about how to elevate your dirt bike’s look, check out our guide on top dirt bike graphics tricks or explore our custom dirt bike graphics options.
Conclusion
In summary, installing dirt bike graphics can significantly enhance the look and feel of a motorcycle, making it imperative to apply them correctly. Key steps involve thorough preparation of the bike’s surface, careful alignment of graphics, and a patient application process to avoid bubbles and misalignments. As highlighted in this guide, attention to detail can transform not only the bike’s aesthetic appeal but also its functional characteristics.
Correct application is not just about looks; it’s vital for maintaining the integrity of the graphics. Properly installed graphics are less likely to peel or fade, ensuring longevity and a polished appearance. Moreover, as riders increasingly personalize their bikes, high-quality graphics reflect their identity and professionalism. This trend is discussed extensively here, emphasizing that well-executed designs contribute to a rider’s recognition and brand image, particularly in competitive scenarios.
Ultimately, investing time and effort into the correct application of dirt bike graphics not only elevates the motorcycle’s visual appeal but also enhances its value and the rider’s overall enjoyment. As the dirt biking community continues to evolve, embracing aesthetics through distinctive graphics will remain a vital part of the riding experience.
Custom graphics for dirt bikes offer an array of benefits that enhance not only the visual appeal but also the performance and identity of the motorcycles. Investing in custom decals can turn a standard bike into a standout machine that represents the rider’s personality, style, and even brand affiliation. In this article, we will explore the multiple advantages of custom graphics, particularly focusing on performance enhancements, aesthetic improvements, and the creation of a unique identity.
Enhanced Aesthetics
Custom graphics are primarily known for their aesthetic benefits. They provide an avenue for riders to express their individuality. With a variety of design options available-from bold colors to intricate patterns-riders can tailor their bikes to reflect their personality. This customization helps dirt bike enthusiasts stand out in competitions or group rides.
According to a survey by Motorcycle.com, 78% of motorcycle owners cite unique identity as the main reason for opting for custom graphics. Riders can select designs that resonate with their style, whether they prefer sleek and modern, rugged and outdoorsy, or vibrant and flashy looks. Custom graphics can also incorporate sponsorship logos for racing teams, further enhancing the bike’s professional appearance.
For more creative inspiration, check out the top 10 dirt bike wraps, showcasing some of the best design choices in the industry.
Performance Improvements
Beyond looks, custom graphics can positively impact bike performance. The use of specialized materials and designs can improve aerodynamics, which is crucial for high-speed riding. Graphics can be designed to smooth airflow over the bike, reducing drag and potentially increasing top speed. Some studies suggest that well-optimized custom graphics can lead to performance improvements of up to 2% under certain conditions.
Moreover, the right choice of materials can aid in heat dissipation. High-quality vinyl used in custom graphics withstands the rigors of off-road environments, maintaining performance by protecting the underlying surfaces from scratches and weather damage. This enhances the longevity and functionality of the bike, ensuring that it performs well over time.
For further exploration of custom graphics and performance benefits, visit Motorcycle Mechanics Magazine.
Unique Identity and Connection
One of the most significant advantages of custom graphics lies in their ability to create a unique identity for dirt bikes. A custom-designed bike becomes more than just a mode of transportation; it transforms into a personal statement about the rider. This connection is particularly crucial for competitive riders who often ride to express their individuality and team spirit.
Personalized graphics reflect a rider’s preferences and affiliations, deepening their emotional connection to the motorcycle. In racing, a striking graphic can also attract attention from sponsors, enhancing brand visibility and recognition, which is vital within the dirt biking community. This aspect fosters a sense of pride and belonging among riders, motivating them to perform at their best.
For ideas on how to make your dirt bike stand out, the article on customizable dirt bike graphics can provide valuable insights.
Installation of Custom Graphics
To get started with custom graphics, it’s essential to know how to install them properly to ensure longevity and performance benefits. Installing custom graphics is generally a straightforward process, but it requires attention to detail to achieve a professional finish. Key steps include:
- Preparation: Clean the bike’s surface thoroughly to remove dirt and grease.
- Alignment: Make sure the graphics are correctly aligned before applying them.
- Application: Use a heat gun or hairdryer to aid in applying the vinyl smoothly, avoiding bubbles.
- Sealing: Finish off by applying a sealant to protect the graphics against weather conditions and to enhance durability.
For a detailed guide on installation, check out this infographic on how to install dirt bike graphics.
Conclusion
In summary, custom graphics provide numerous benefits for dirt bike enthusiasts. They enhance aesthetics, improve performance, and create a unique identity for riders. Whether for personal expression, competitive racing, or simply adding a personal touch, investing in custom graphics can significantly uplift the experience of owning and riding a dirt bike.
For more information on custom graphics, explore the range of custom dirt bike graphics kits available to turn your bike into a one-of-a-kind machine.