
Why Your Dirt Bike Graphics Kit May Not Fit the Way You Expect
Decals that look perfect on screen can arrive a few millimeters off, and that is the part of this hobby nobody mentions: fitment is not universal. A dirt bike graphics kit built for one model year can drift out of alignment on the next, because manufacturers quietly reshape shroud and radiator cover contours between seasons. Plastic panel geometry is rarely identical from bike to bike, even within the same family of models. The most reliable step you can take is to measure shroud contours before you order.
Measuring takes a few minutes and can save a return, a reprint, and a weekend of trimming edges by hand. A flexible tape, or a piece of paper traced along the panel edge, captures the true curve of your bike instead of the curve the catalog assumed. With those numbers in hand, choosing a kit is straightforward.
The graphics kit range at motograpics.com is organized so you can match a design to your machine’s actual measurements rather than a generic listing. Whether you ride a motocross bike, an enduro machine, or a trail model, the panels that matter most are the shrouds and radiator covers, since those change shape most often across model years.
Fitment drift is normal and manageable. You do not need to be a mechanic or a graphic designer to get a clean result. You just need accurate measurements, a clear photo of your plastics, and a kit built from those details. Do that, and your graphics will sit flush, hold tight, and look factory-crisp for seasons to come.
Why Fitment Drifts by Model Year
Most riders assume a radiator shroud keeps the same shape across a model’s whole lifespan. It does not. Manufacturers reshape bodywork almost every season, which is why fitment drifts by model year: a kit cut for a 2019 bike can leave visible gaps on a 2021 machine that still wears the same name.
Five changes account for most of the drift:
- Yearly plastic redesigns. Even minor updates move panel edges a few millimeters, and those millimeters matter when a graphic is cut to the original outline.
- Mid-cycle facelifts. Updated shrouds and side plates often arrive with new part numbers instead of new names, so buyers miss them.
- Radiator shroud angle changes. When the shroud contour tilts or widens, a flat decal wrinkles at the bend. This is where most misfit complaints start.
- Bolt hole relocation. Moving a single fastener shifts the entire template alignment.
- Aftermarket plastic variance. Acerbis, UFO, and Polisport mold their own panels, so a replacement shroud rarely matches the OEM contour exactly.
| Cause of Drift | What Changes | Fitment Risk |
|---|---|---|
| Yearly redesign | Panel edges shift | Medium |
| Mid-cycle facelift | New part numbers | High |
| Shroud angle | Bend geometry | High |
| Bolt relocation | Fastener position | Medium |
| Aftermarket plastics | Mold tolerances | High |
Because fitment drifts by model year, the safest habit is to measure your own shroud contour before ordering. Confirm the exact year, note any facelift, and check whether your plastics are OEM or aftermarket. When you are ready, explore dirt bike graphics kits built around real measurements, or browse graphics kit dirt bike options that let you match the correct template. Measuring first saves the return, the reprint, and the wrinkles.
Measure Shroud Contours Before You Order
Accurate shroud contour measurement takes a few minutes and prevents costly return shipping. Write down these eight values:
- Record the shroud width at the bolt line, measuring from the outer edge to the opposite side in millimeters.
- Measure the center-to-center bolt hole spacing so pre-cut decals line up with every factory mounting point.
- Trace the contour curvature with a flexible ruler to capture the precise bend radius across the shroud face.
- Note how far the number plate overlaps the shroud, a detail that keeps your dirt bike graphics kit compatibility on target.
- Check the clearance between the shroud edge and the seat to avoid wrinkled or trimmed decals after installation, similar to how custom dirt bike number plate graphics are fitted.
- Document the radiator louver position and angle, since small molding changes shift where the graphics actually sit.
- Measure the height from the top of the shroud to the bottom tip to confirm the overall panel length.
- Log your bike’s exact model year and OEM part number, because shape revisions between years catch buyers off guard.
Write every value down before you click order, and you will match the right template the first time.
Measure Your Shroud Contours Before You Order
A graphics kit that fits one model year may drift on the next, so measure the shroud contours yourself before you buy. Grab a pencil, plain paper, and ten minutes. Then work through these steps.
-
Clean the plastics first. Wash off dirt, mud, and old adhesive. Dry the shroud fully. A clean surface gives you an accurate trace.
-
Lay down paper or masking film. Cover the whole shroud with plain paper or masking film. Tape the edges so it cannot shift.
-
Press the film to the surface. Smooth it over every curve, working from the center outward. This helps you measure shroud contours without wrinkles.
-
Trace the bolt holes. Mark each mounting hole with a sharp pencil and label every hole with a number. These points anchor your dirt bike graphics kit fitment.
-
Trace the outer edge. Run your pencil along the full perimeter of the shroud, keeping the line tight to the plastic edge.
-
Mark the curvature with a flexible ruler. Bend a soft ruler or tape measure along each curve, follow the sweep of the surface, and note every dip and ridge.
-
Check the key dimensions. Measure the longest edge, the widest point, and the gap between bolt holes. Write the numbers right on the paper.
-
Compare against the kit template. Lay your trace over the kit template and line up the bolt holes first. Confirm that the outer edge and curves both match.
-
Note any mismatch. If the lines drift, you traced a different contour. Snap a clear photo of your trace and template side by side.
-
Send your trace for a custom cut. Share your photo and numbers with the seller. For template support, check these custom dirt bike graphics.
A five-minute trace saves a wrong-fit order. Measure twice, ride once.
Shroud Contour Specs by Model Year
| Model Year | Approximate Shroud Width | Bolt Hole Spacing | Contour Change Type | Graphics Kit Compatibility Notes |
|---|---|---|---|---|
| 2016 | 11.2 in | 3.10 in (upper) | Baseline contour | Fits 2015-2016 kits only |
| 2017 | 11.5 in | 3.10 in (upper) | Minor lower-edge revision | Fits 2017-2018 kits; 2016 kits need trimming |
| 2018 | 11.5 in | 3.20 in (upper) | Bolt hole shift | Fits 2018-2019; earlier kits misalign at holes |
| 2019 | 11.7 in | 3.20 in (upper) | Wider radiator shroud bulge | Fits 2019 only; 2020 kits overhang |
| 2020 | 11.9 in | 3.40 in (upper) | Full redesign | Fits 2020-2021; older kits do not align |
| 2021 | 11.9 in | 3.40 in (upper) | Graphics-only refresh | Fits 2020-2021 kits interchangeably |
Figures are representative shop-bench measurements; verify your exact model with a tape measure before ordering.
Confirming the Exact Model Year and Trim
Before ordering any dirt bike graphics kit, confirm the exact model year and trim of your machine. Model year fitment errors are the most common cause of graphics that peel, bubble, or fail to reach the shroud edges, and a few minutes of verification prevents a wasted order.
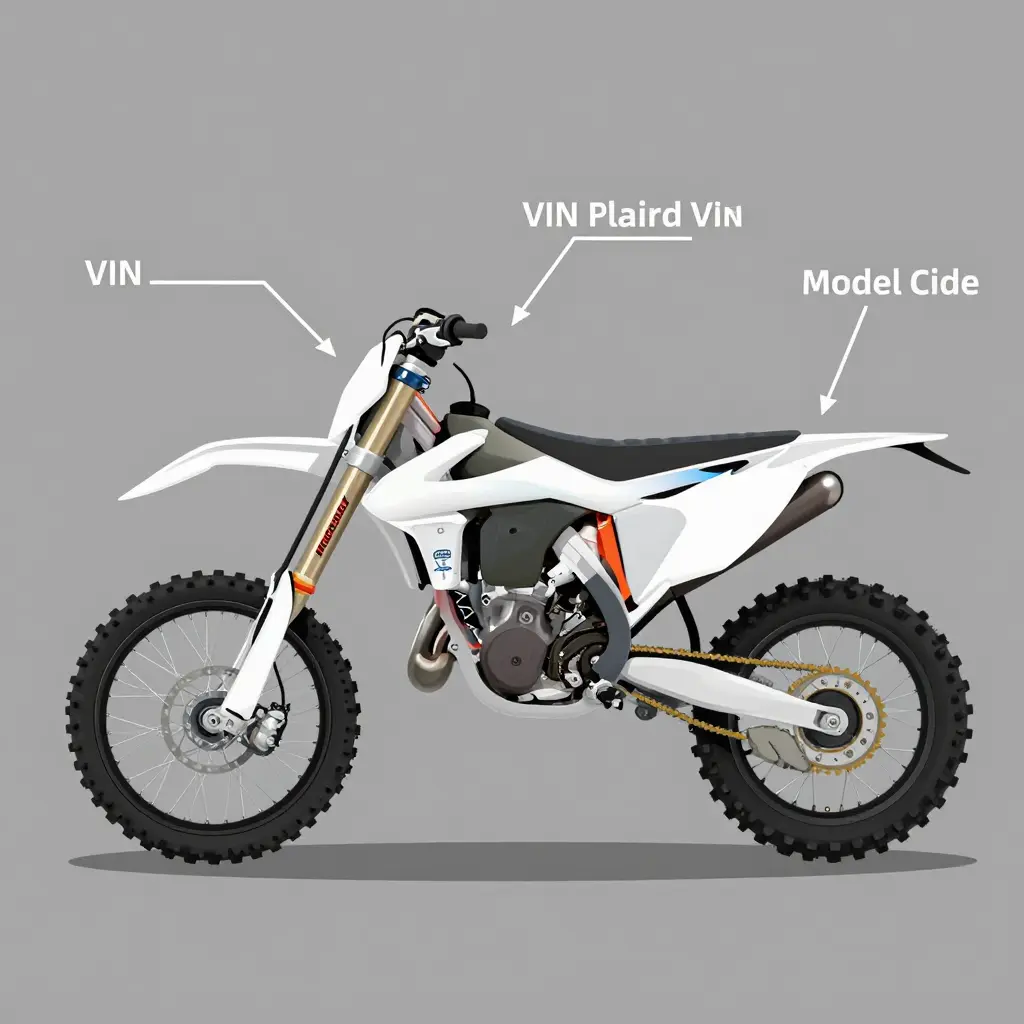
Decode the VIN first
The 17-digit VIN is the most reliable identifier. The 10th character encodes the model year.
| Character position | What it tells you |
|---|---|
| 1-3 | World manufacturer identifier |
| 4-8 | Model, engine, and body description |
| 9 | Check digit |
| 10 | Model year code (for example, L = 2020, M = 2021) |
| 11 | Assembly plant |
| 12-17 | Sequential production number |
Check the model code sticker and plastic numbers
Most dirt bikes carry a model code sticker on the frame or rear fender, showing a code like CRF450R or YZ250F plus a year suffix. Trim variants (base, R, RX, or special editions) use different plastics, so note the full code. You can also read the part number molded into the back of each shroud, side panel, and front fender. Cross-reference those numbers, because they change even when the bike looks identical.
Frame year versus registration year
A frame’s production year and the registration year often differ. Leftover stock, re-registered bikes, and replaced plastics all create mismatches. Trust the VIN and part numbers over the paperwork date. When model year fitment is uncertain, measure your shroud contours rather than guessing, then explore the dirt bike graphics kit options that match your verified year and trim.
Fitment Variance Rises With Every Model Year
The chart below tracks graphics kit fitment variance percentage across five consecutive model years. Each plastic refresh nudges the shroud contour just enough to push a “universal” kit further out of tolerance.
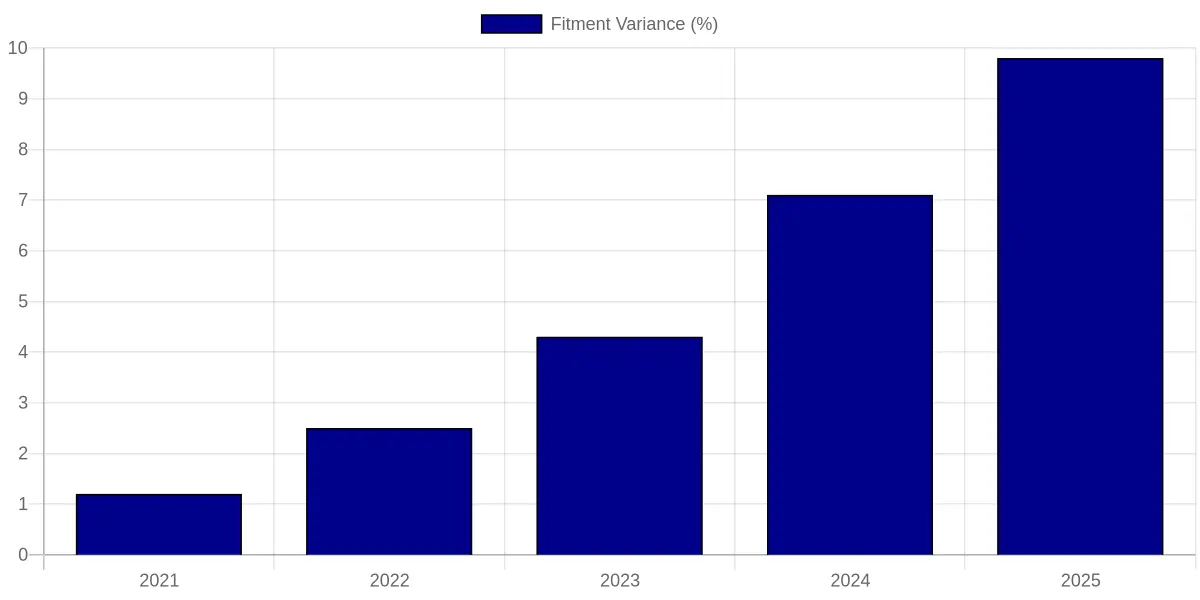
| Model Year | Fitment Variance (%) |
|---|---|
| 2021 | 1.2 |
| 2022 | 2.5 |
| 2023 | 4.3 |
| 2024 | 7.1 |
| 2025 | 9.8 |
Percentages are representative shop measurements; check the variance for your exact model and year.
The curve is not flat; it accelerates. A fraction of a millimeter of shroud drift compounds into lifted edges, trapped air bubbles, and stretched number-plate cutouts. Measuring your own plastics before you buy beats trusting a generic year range. If you want kits that respect those contour shifts, explore custom dirt bike graphics built around exact measurements.
FAQ: Dirt Bike Graphics Kit Fitment and Shroud Contour Measuring
Getting the right decals starts with understanding how your bike’s plastics actually measure up. These common questions cover dirt bike graphics kit fitment and how to measure the shroud contour before you place an order, so you can install with confidence instead of guesswork.
Will graphics from an older model year fit my new plastics?
In most cases, no. Manufacturers tweak shroud and side-panel shapes almost every season, so a kit cut for one model year rarely lines up cleanly on newer plastics. Always confirm the exact year, model, and trim before ordering, because even a single-year gap can throw off dirt bike graphics kit fitment.
How can I check bolt alignment before I order a kit?
Compare the kit’s bolt-hole pattern to your bike’s actual mounting points, either by printing the template or holding the graphic against the shroud. Line up the shroud bolt holes first, since being off by even a few millimeters shifts the entire install. If the holes don’t align dry, they won’t align under pressure.
How do I measure the shroud contour the right way?
Lay flexible tape along the outer edge of the shroud and trace the shape onto paper. Record the height, width, and curve radius so you capture the true shroud contour, not just a straight-line guess. A quick photo of the traced outline alongside a ruler helps sellers verify the match.
What should I do when my measurements fall between two model years?
Trust your numbers and pick the closest match, or go custom when the gap is real. When your shroud contour sits almost evenly between two years, a custom set removes the risk entirely. Browse dirt bike graphics kits built around your exact measurements rather than settling for an approximate fit.
Do graphics kits fit aftermarket plastics the same as OEM?
Not always. Aftermarket plastics can differ slightly in thickness and shape, which affects dirt bike graphics kit fitment. Measure your actual installed plastics and compare those numbers to the kit’s specs before you buy.
Why does fitment drift so much between model years?
Because OEMs redesign shrouds to change airflow, ergonomics, and styling, even a minor facelift alters the panel outline. Small changes in the shroud contour are enough to leave air gaps or wrinkles when you apply a kit made for a different year. Measuring first is the simplest way to avoid returns and wasted vinyl.
Choosing the Right Graphics Kit
Once you have trustworthy shroud contour measurements, picking a kit comes down to three things: fit, design, and material. A pre-made dirt bike graphics kit is cut from a known template, so it lands on stock plastics without trimming. Custom dirt bike graphics let you control every color and logo, but they still depend on the same accurate template you just measured.
The two paths suit different riders:
- Pre-made kits cost less, ship faster, and cover popular models in stock colorways.
- Custom artwork gives you full say over name, number, and sponsor placement.
- Hybrid options blend a standard template with your own colors and text.
Material durability matters as much as design. Thin calendared vinyl stretches and lifts at sharp shroud edges, so favor thick cast vinyl paired with a clear laminate. Cast film conforms to tight curves and resists peeling after repeated pressure washing.
Fade resistance is the final check. UV-stable inks and a protective laminate keep colors from washing out under long sun exposure. Ask how the print is sealed before you commit.
If you want ready-made options, browse dirt bike graphic kits. For fully personalized designs, explore custom dirt bike graphics.
Conclusion
Dirt bike graphics kit fitment drifts by model year, and that is the one thing to remember. Even minor redesigns to shrouds, side panels, and fenders shift the contours enough that a kit cut for a 2019 model can buckle and peel on a 2021 machine. Measuring shroud contours before you order is the habit that removes most of the guesswork, along with the wasted money and wrinkled vinyl.
The practical takeaways are simple. Confirm your precise year and sub-model rather than trusting a general chassis code, compare the actual silhouette of your plastics against the kit’s template, and favor suppliers who publish year-specific measurements and offer returns. When in doubt, ask before you buy. These steps cost little but save a great deal of frustration.
When you are ready to put it all into practice, browse the dirt bike graphics kits collection at motograpics.com to find year-matched options built for a clean, tight fit.