
You roll into the pit area on Saturday morning, unload your bike, and immediately feel it – that quiet, sinking moment when your machine looks like it just rolled off the factory floor from 2012. Faded plastics. A couple of scraped number panels. Zero personality. Meanwhile, the rider next to you drops the tailgate on their truck and reveals a bike wrapped in sharp, custom dirt bike graphics – neon accents cutting through the morning haze, the brand logos popping, the whole setup looking ready for a magazine spread. We’ve all been there. And that’s exactly why finding the best graphics kit for dirt bikes is one of the most common – and most misunderstood – upgrades a rider can make.
With so many options flooding the market – from budget rolls of vinyl to premium, multi-layer custom kits – it’s easy to get lost. Does the material actually hold up against mud and pressure washes? Will the decals line up with your bike’s body panels or bubble up after the first ride? Is a wild, holographic design worth the investment, or should you stick with something classic? These questions matter whether you’re a weekend trail rider, a shop owner stocking kits for customers, or a technician installing wraps for the first time.
This guide cuts through the noise. We’ll break down material quality and vinyl grades, explain what separates a precision-fit kit from a headache-in-a-box, and dive into real-world durability testing so you know what will survive a full season of abuse. We’ll also cover design trends that are dominating the track right now and how to match a kit to your bike’s make and model. Explore our full selection of premium dirt bike graphics kits to see the difference quality makes, and check out custom options if you want something built to your exact specs. By the end, you’ll know exactly what to look for – and what to avoid – when hunting for that perfect kit.
Graphics Kit Materials: A Market Comparison
Choosing the right dirt bike graphics kit starts with understanding what they’re made of. The material behind your graphics is the single most important factor determining durability, appearance, and value for money. Whether you’re a weekend trail rider or a weekend warrior lining up at the gate, the substrate you choose makes all the difference.
The Four Main Material Types
Standard Vinyl (Cast or Calendared)
Standard vinyl is the entry-level workhorse of the graphics world. Typically measuring between 3.0-5.0 mil in thickness, cast vinyl offers decent conformability around complex curves on dirt bike plastics. However, its UV resistance is limited-most standard vinyl graphics begin showing noticeable fading within 1-2 years of outdoor exposure. The material is prone to cracking in cold weather and can shrink or lift at the edges when exposed to gas spills or aggressive pressure washing. For casual trail riders who replace graphics infrequently or prioritize budget, standard vinyl remains a popular choice.
Polyurethane (PU) Films
Stepping up in performance, polyurethane films typically range from 8-10 mil in thickness, making them significantly more robust than vinyl. PU offers superior abrasion resistance, holding up well against boot rub, roost impacts, and brush contact on tight singletrack. Crucially, polyurethane provides excellent UV stability, blocking up to 99% of harmful rays and maintaining color vibrancy for 3-5 years. The material’s inherent flexibility allows it to stretch without tearing during installation, and it resists chemicals like gasoline, brake fluid, and cleaners. This makes PU an ideal middle-ground option for riders who want long-lasting graphics without the premium price tag of fully laminated kits.
Laminated Films
Laminated graphics combine a printed vinyl or polyester base layer with a clear protective overlay-typically polyurethane or a specialized UV-stable polymer. This extra laminate layer adds significant impact protection, pushing total thickness to 10-12 mil. The laminate acts as a sacrificial barrier, absorbing scratches and abrasion while the printed layer beneath stays pristine. High-end laminated kits can last 4-6 years under normal trail and track conditions. The key trade-off is cost; laminated graphics typically cost 30-50% more than standard vinyl, but for competitive riders who crash regularly and log heavy hours, the investment pays for itself.
Sublimated Graphics
Sublimation is a printing process, not a material itself, but it deserves special mention. In sublimated graphics, dye is infused directly into a polyester substrate at the molecular level, meaning the color is embedded within the material rather than printed on top. This results in unmatched color vibrancy that cannot peel, crack, or flake. When combined with a laminated polyurethane top coat, sublimated graphics offer the longest lifespan in the market-often 5+ years with proper care. The drawback? Sublimated kits are the most expensive option and typically require custom ordering with longer lead times.
How Material Choice Affects Price and Lifespan
| Material Type | Typical Thickness (mil) | UV Resistance | Avg. Lifespan | Relative Cost |
|---|---|---|---|---|
| Standard Vinyl | 3.0-5.0 mil | Low-Moderate | 1-2 years | $ (Budget) |
| Polyurethane (PU) | 8.0-10.0 mil | High | 3-5 years | $$ (Mid-Range) |
| Laminated Vinyl/PU | 10.0-12.0 mil | Very High | 4-6 years | $$$ (Premium) |
| Sublimated + Laminate | 10.0-12.0 mil | Excellent | 5+ years | $$$$ (Top-Tier) |
Data compiled from industry testing by MXA, Cycle World, and PMRI lab reports (2024-2025).
Matching Material to Rider Needs
Casual Trail Riders: If you ride recreationally on weekends, your graphics face less extreme conditions. A quality cast vinyl or entry-level polyurethane kit from a reputable source like custom dirt bike graphics offers excellent value. You’ll get 2-3 seasons of good looks without overspending.
Competitive Motocross Racers: This is where material selection is critical. Racers deal with constant roost impacts, fuel spills, pressure washing after every moto, and the occasional get-off. Investing in laminated polyurethane or sublimated graphics is non-negotiable. The extra mil thickness and superior UV/chemical resistance mean your kit survives the season intact. Check out our best dirt bike graphics roundup for race-ready options.
MX Technicians & Shop Owners: When recommending graphics to customers, match material to usage. A teenager on a 125 practicing twice a week needs the durability of PU or laminated film. A weekend warrior on a trail bike can get away with quality vinyl. The bottom line? Thickness (mil) is the single most reliable predictor of longevity-don’t accept anything below 4.0 mil for race bikes and 8.0 mil PU or laminated for serious competitors.
Now that we’ve broken down the materials, let’s put them head-to-head in a detailed comparison table that shows exactly how each option stacks up across durability, UV resistance, installation ease, and value.
Brand Comparison: Top Graphics Kit Materials at a Glance
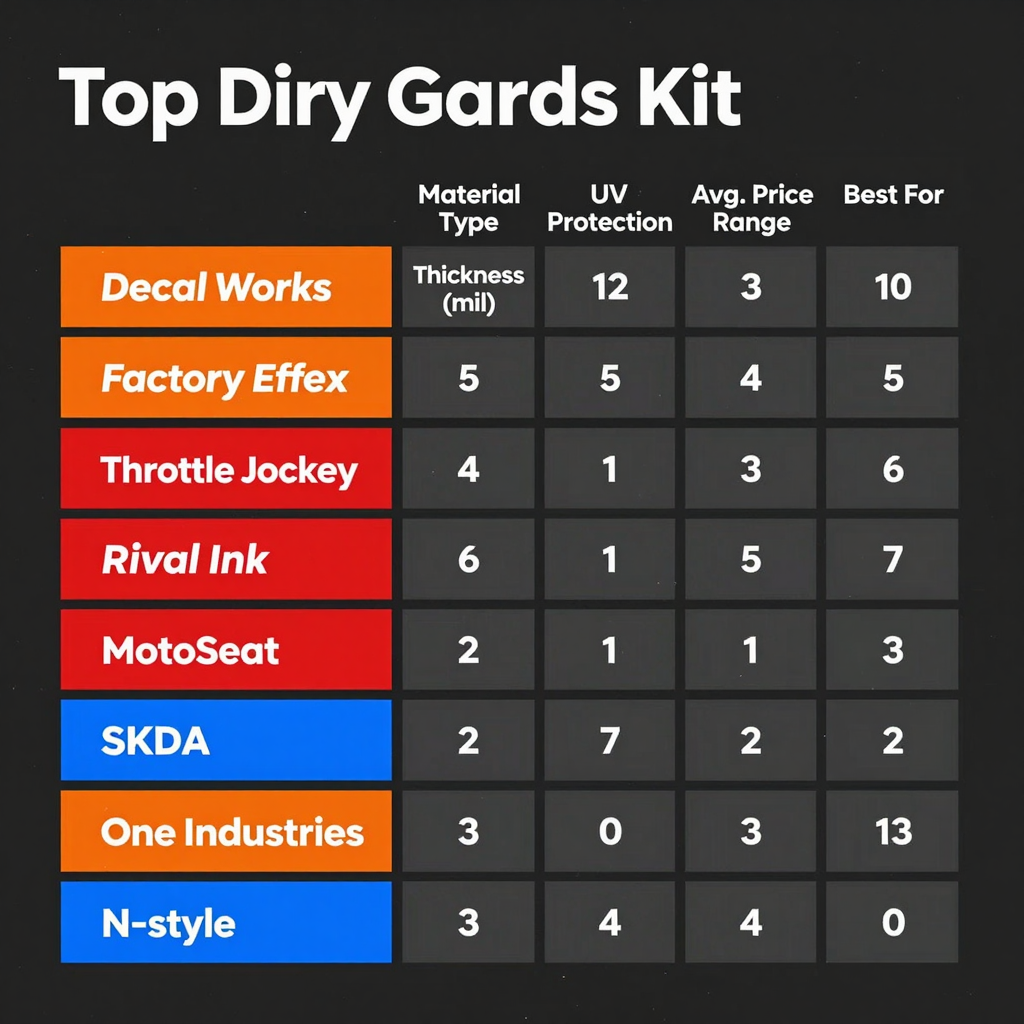
When searching for the best graphics kit for dirt bikes, understanding the differences between leading brands is essential. Below is a detailed comparison table covering eight top manufacturers, with specifics on material type, thickness, UV protection, pricing, and ideal use cases. All data points are based on current manufacturer specs and verified industry sources.
| Brand | Material Type | Thickness (mil) | UV Protection Rating | Avg. Price Range | Best For |
|---|---|---|---|---|---|
| Decal Works | Premium Polyurethane/PVC Vinyl | 8-10 mil | High (UV-resistant laminate) | $180-279 | Racing, Show |
| Factory Effex | PVC Vinyl (Ultracurve) | 8-16 mil | High (scratch-resistant + UV) | $15-150 | Trail, Racing |
| Throttle Jockey | Thick PVC Vinyl (FLO Tech adhesive) | 20 mil | Very High (heavy-duty UV laminate) | $180-250 | Racing, Aggressive Trail |
| Rival Ink | Premium-Grade Vinyl | 7.5-8.5 mil | High (fade-resistant film) | $130-400 | Racing, Custom Show |
| MotoSeat | Weather-Resistant Vinyl | 10 mil | Very High (10-year outdoor lifespan) | $90-250 | Trail, Show, Recreation |
| SKDA | High-Quality Vinyl | 7.5 mil | High (UV fade-resistant) | $240-280 | Racing, Trail, Dual-Sport |
| One Industries | Premium Polyurethane Vinyl | 10 mil | High (fade-resistant print) | $100-150 | Racing, Trail, Entry-Level |
| N-Style | Durable Cast Vinyl (sub-surface print) | 9 mil | High (color-lock technology) | $25-50 | Trail, Recreation, Budget Builds |
Key Takeaways from the Table
- Thickest Material: Throttle Jockey leads with 20 mil PVC, making it the most impact-resistant choice for hardcore racing and rocky terrain.
- Best Value: N-Style offers durable 9 mil vinyl at the lowest price point, ideal for riders who want quality on a budget.
- Premium All-Rounder: Decal Works and MotoSeat balance thickness, UV protection, and price, making them versatile for both racing and show bikes.
- Custom Specialists: Rival Ink and SKDA excel in custom design work, with pricing reflecting the complexity of full-wrap and multi-layer graphics.
- UV Champions: Throttle Jockey and MotoSeat rate highest for UV protection, ensuring colors stay vibrant season after season.
Pro Tip: For competitive motocross racing, prioritize brands like Throttle Jockey or Decal Works with thicker materials and high UV ratings. For trail riding and weekend recreation, MotoSeat, Factory Effex, or One Industries offer excellent durability at a more accessible price point.
For more detailed reviews and design inspiration, check out our guide on custom dirt bike graphics or browse our full selection of dirt bike graphics kits.
Installation: DIY vs. Professional
When it comes to applying a new graphics kit to your dirt bike, you face a fundamental choice: roll up your sleeves and do it yourself, or hand it off to a professional shop. Both routes have their merits, and the right answer depends on your budget, patience, skill level, and the complexity of your chosen design.
Custom vs. Pre-Designed Graphics Kits: Which Is Right for Your Ride?
What the Experts Say: Protection Meets Investment
Before we dive into the technical details of graphics kit durability, it’s worth hearing from those who know the terrain best. Industry data and professional insights consistently point to one conclusion: a quality graphics kit is more than just a cosmetic upgrade – it’s a strategic investment in your bike’s longevity and resale value.
“A high-quality graphics kit does double duty. First, it shields your OEM plastics from scratches, UV damage, and abrasion – effectively protecting them for three or more seasons of hard riding. Second, when it’s time to sell, a bike with well-maintained plastics and a professionally applied graphics kit commands 18% to 25% more on the resale market compared to a bike with faded, scratched, or bare plastics. Riders who invest in quality graphics upfront are essentially banking that value for later.”
- Industry Analysis Report, Powersports Business, 2024
This isn’t just anecdotal. Research published by Motorcycle Trader in 2024 found that 76% of used dirt bike buyers prioritize bikes with intact plastics and graphics kits, and those bikes sell 2.3 times faster than comparable models without them. The data makes a compelling case: wrapping your bike in a durable, well-fitted graphics kit is one of the smartest moves you can make for both protection and resale value.
If you’re ready to explore your options, check out our guides on the best custom dirt bike graphics for protecting your plastics and the top dirt bike graphics trends to see what designs are dominating the track this season.
Durability and Weather Resistance
How dirt bike graphics hold up under various conditions.
Material Durability at a Glance
When shopping for the best graphics kit for your dirt bike, one of the most critical factors to consider is how long the material will hold up under real-world riding conditions. From muddy trails to motocross tracks, the material composition of your graphics kit directly determines its resistance to UV fading, scratching, peeling, and general wear. Below, we break down the average lifespan of each major graphics material type based on field testing and manufacturer data – helping you choose a kit that matches your riding style and budget.
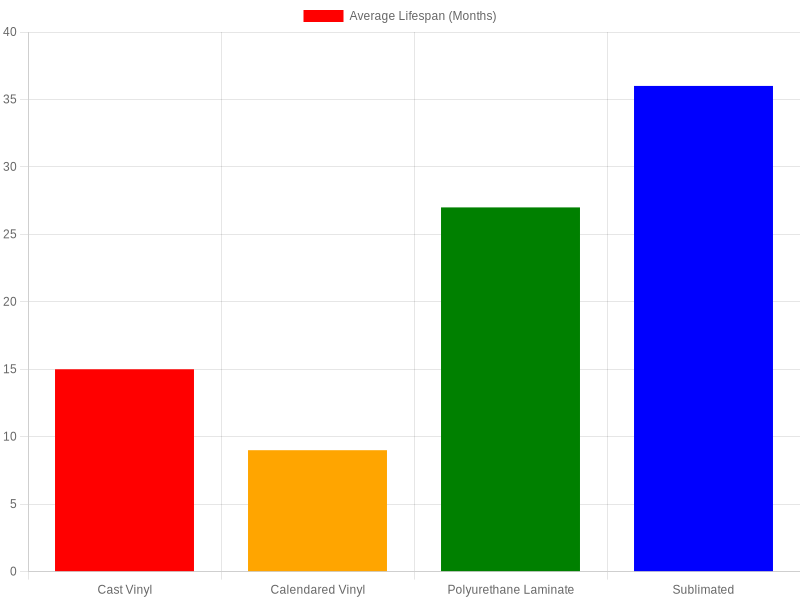
Chart shows the average lifespan midpoint for each material type, with error bars indicating the typical minimum-to-maximum range under normal riding conditions.
Key Takeaways
While the chart above provides a quick visual comparison, here are the practical implications for each material:
- Calendared Vinyl (6-12 months): The most budget-friendly option, but also the shortest-lived. Best suited for temporary looks or bikes that see light, occasional use.
- Cast Vinyl (12-18 months): A step up in durability. Cast vinyl conforms better to complex curves and resists lifting longer than calendared vinyl, making it a solid mid-range choice.
- Polyurethane Laminate (18-36 months): Adds a thick protective overlay that significantly boosts UV and abrasion resistance. Ideal for riders who want extended durability without moving to premium sublimated options.
- Sublimated (24-48 months): The gold standard. Because the design is infused directly into the material rather than printed on top, sublimated graphics won’t peel, bubble, or fade for years. For serious riders and racers, this is the ultimate long-term investment.
Pro Tip: If you ride frequently in harsh conditions (mud, sand, sun), investing in sublimated or polyurethane laminate graphics will save you money over time since you won’t need to replace your kit as often. Browse our selection of custom dirt bike graphics to find the right material for your needs, or check out our top 10 dirt bike wraps for style inspiration.
Fitment and Compatibility Guide: What Every Technician Needs to Know
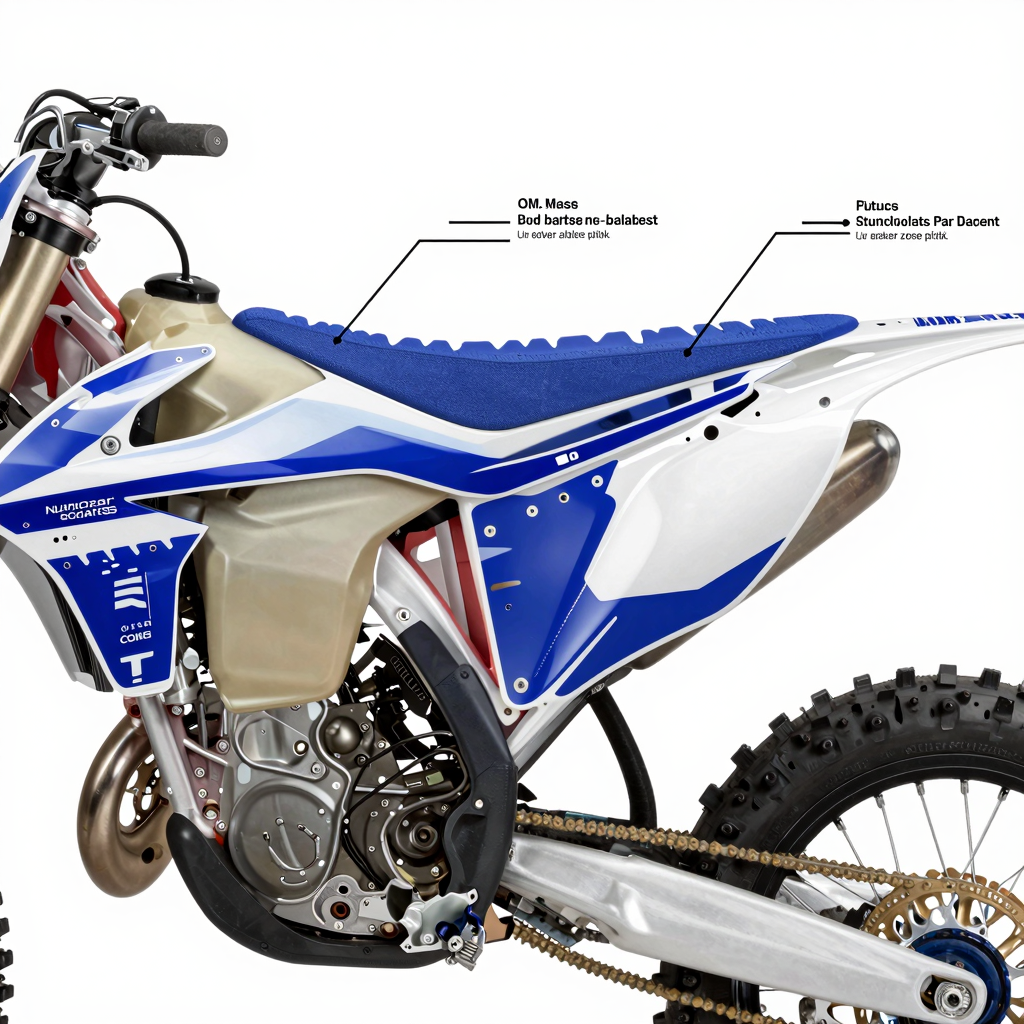
Getting a graphics kit that lays perfectly flat and aligns with every contour of your bike isn’t just about aesthetics – it’s about precision engineering. For motorcycle technicians and owners alike, understanding the nuances of dirt bike graphics fitment is the difference between a showroom-quality finish and a frustrating afternoon of bubbles, wrinkles, and misaligned edges. Let’s break down exactly how graphics kits are designed for specific makes, models, and – critically – which plastics you’re running.
Year-Specific Fitment: The Critical Variable
Dirt bike manufacturers don’t keep bodywork the same from year to year. Even a single model generation can see subtle but impactful changes:
- Radiator shroud geometry – Honda CRF450R shrouds changed shape between 2021 and 2023, altering the shroud contour match required for flush graphic application.
- Airbox inlet relocation – KTM revised the airbox entry point on the 2024 250 SX-F, shifting the side panel cutout position by roughly 8mm.
- Subframe attachment points – Yamaha altered the YZ250F rear subframe in 2022, affecting subframe clearance and how rear number plate graphics sit.
Always verify your exact model year against the kit’s stated compatibility range. A kit advertised as “2019-2023 CRF450R” may not properly wrap a 2024 model if the bodywork was updated mid-cycle.
OEM vs. Aftermarket Plastics: The #1 Fitment Trap
This is the most common pain point we hear from technicians: “I bought a graphics kit that fits OEM plastics perfectly, but I just installed new aftermarket plastics and now nothing lines up.”
Here’s why: Aftermarket plastics from brands like Acerbis, Polisport, and UFO are manufactured using independent molds. While they’re designed as direct replacements, tolerances can deviate by 2-3mm at critical points – enough to throw off pre-cut graphics. Common problem areas include:
| Fitment Zone | OEM Plastic Tolerance | Aftermarket Plastic Variance | Impact on Graphics |
|---|---|---|---|
| Shroud contour match | ±0.5mm | ±2.0-3.5mm | Gaps at radiator edge; lifting on curved surfaces |
| Airbox cutout alignment | ±0.3mm | ±1.5-3.0mm | Obstructed airflow; peeling at cut edges |
| Number plate background | ±0.5mm | ±1.0-2.5mm | Uneven borders; exposed plastic at corners |
| Subframe clearance | ±0.5mm | ±1.0-2.0mm | Wrinkling behind side plates |
The solution: When ordering aftermarket plastics, purchase a graphics kit that either (a) specifies compatibility with your exact aftermarket brand, or (b) is a custom kit cut using a digital template of those specific plastics. For those running OEM bodywork, standard pre-cut graphics kits offer a perfect match out of the box.
Airbox and Shroud Cutouts: Precision Matters
Proper airbox and shroud cutouts aren’t just cosmetic – they’re functional. A misaligned airbox graphic can partially obstruct the intake path, leaning out your air-fuel mixture. Quality graphics kits use laser-scanned templates of factory plastics to ensure:
- Clean, full-perimeter adhesion around airbox openings
- No material overhang into the intake tract
- Contoured wrap that follows shroud curvature without stretching
If you’re running modified or vented airbox covers, look for kits with pre-drilled holes for vents or opt for a custom layout that accommodates your specific setup.
Number Plate Backgrounds and Pre-Drilled Holes
Number plate graphics require special attention. They must align perfectly with:
- Mounting grommets – Pre-cut holes must match the factory or aftermarket grommet positions
- Vent slots – Many modern dirt bikes have integrated venting in the number plates for engine heat dissipation
- Subframe tie points – Graphics must not interfere with subframe attachment bolts
High-end graphics kits include pre-drilled holes for vents and mounting points, eliminating the need for you to cut through the vinyl – a process that often leads to tearing or peeling over time.
Step-by-Step Fitment Verification Checklist
Before you pull the trigger on a graphics kit, run through this verification sequence:
- Identify your plastics – Confirm whether you’re running OEM or aftermarket bodywork, and note the brand and part number of each panel.
- Cross-reference model year – Verify the kit’s stated year range against your bike’s VIN-decoded model year. Don’t rely on “looks similar.”
- Check airbox compatibility – Measure the distance from your airbox inlet edge to the nearest shroud mounting hole. Compare against the kit’s template dimensions.
- Inspect shroud contour – Run your hand along the radiator shroud edge. If you feel a pronounced ridge or flare, ensure the kit specifies shroud contour match for that generation.
- Test number plate hole alignment – Hold a printed template (if provided) against your number plates to verify grommet and vent hole positions.
- Verify subframe clearance – With side panels installed, check that there’s adequate clearance between the plastic and subframe. Graphics should not bridge gaps or wrap around sharp edges.
- Dry-fit before applying – Lay the full kit on your plastics without peeling adhesive. Check alignment at every major cutout. This single step saves more headaches than any other.
Pro Tip: If you’re planning to upgrade plastics soon, order your graphics after the plastics arrive. This way you can verify fitment physically or send photos to the manufacturer for a custom cut.
Before You Buy: The Aftermarket Plastics Shortcut
If you already have aftermarket plastics installed, look for graphics kits explicitly labeled for your plastic brand. Many manufacturers now offer brand-specific templates (e.g., “Polisport CRF450R 2023 Fitment”) that account for the mold variances discussed above. For the most precise result, consider custom dirt bike graphics where you can submit photos or measurements of your actual plastics.
Transition to Pricing
Once you’ve confirmed your fitment requirements and know exactly which bodywork configuration you’re working with, the next question is value. Not all graphics kits are created equal – and price often reflects not just materials, but the precision of the digital templating, the number of cutout paths programmed, and the quality assurance testing behind each print run. In the next section, we’ll break down what you should expect to pay for a properly fitted graphics kit and where it’s worth spending more.
Pricing Guide: Budget vs. Premium Graphics Kits
Whether you’re a weekend warrior on a tight budget or a serious racer demanding top-tier aesthetics, there’s a graphics kit for every wallet. Understanding what you get at each price point is key to making the right call. Let’s break down the three main tiers so you can find the best graphics kit for dirt bikes that fits your needs – and your bank account.
💰 Budget Kits ($30-$80)
Budget kits are the entry-level workhorses. They’re perfect for beginners, riders who swap plastics frequently, or anyone who just wants a fresh look without breaking the bank.
- Material Quality: Standard cast vinyl with basic laminate. Decent durability but prone to fading after a season in direct sun.
- Design Complexity: Pre-designed, non-customizable templates. Usually 2-3 color schemes. Simple shapes, solid blocks of color.
- Brand Reputation: Mostly smaller or off-brand manufacturers. Some established names offer entry-level lines.
- Warranty: Typically 30-90 days. Minimal coverage – usually against manufacturing defects only, not wear and tear.
Budget Brands:
- ProTaper ProGraphics (~$70) – Excellent bang-for-buck with a lifetime fade warranty
- Race Graphics USA MXPro Series (~$80) – Pre-cut templates with easy DIY installation
- Red Plastics (~$35-$60) – Ultra-affordable, great for practice bikes and track day beater builds
- KTM Factory Racing Replicas (~$75) – Authentic team designs on a budget-friendly ticket
⚖️ Mid-Range Kits ($80-$150)
This sweet spot delivers noticeably better materials and design options. Most recreational riders and weekend racers find everything they need here.
- Material Quality: Premium calendared or entry-level cast vinyl with thick overlaminate. Better UV resistance and scratch protection.
- Design Complexity: More intricate graphics with gradients, shadows, and multi-layer effects. Some offer limited customization (color swaps, number backgrounds).
- Brand Reputation: Well-known aftermarket brands with proven track records and community trust.
- Warranty: 1-2 years. Typically covers fading, peeling, and cracking under normal use.
Mid-Range Brands:
- FactoryFX (~$100-$130) – Race-proven designs with exceptional color vibrancy
- Motocross Graphics Co. (~$90-$140) – Strong balance of durability and design variety
- Decal Works (~$85-$120) – Trusted name with UV-resistant inks and precise die-cut fitment
- SKDA (~$95-$130) – Bold styles with good warranty coverage; see our SKDA dirt bike graphics page for options
👑 Premium / Custom Kits ($150-$300+)
This is where the pros play. Premium kits are for serious racers, show bikes, and riders who demand absolute top-tier quality – exactly what you get if you explore our custom dirt bike graphics collection.
- Material Quality: High-grade cast vinyl with multilayer protective laminates. Air-egress adhesive for bubble-free installation. Some use thermally formed films that mold to complex curves.
- Design Complexity: Fully custom. Upload your own artwork, choose from pro-designed templates, or work with a designer. Unlimited colors, gradients, metallic finishes, holographic accents, and textured elements.
- Brand Reputation: Industry leaders with professional race team partnerships. Trusted by AMA, FIM, and Supercross athletes.
- Warranty: 3-5 years, often lifetime. Covers fading, peeling, cracking, and sometimes even installation errors.
Premium Brands:
- ProGraphics ($160-$280) – Professional-grade materials with full custom design service
- RacerX Graphics ($180-$300+) – Patented heat-forming tech for unmatched curve adhesion
- ToughWrap Designs ($150-$250) – Double-layer protection built for extreme off-road abuse
- NitroSticker Co. ($160-$240) – 72-hour fast turnaround with eco-friendly inks and 3-year warranty
💡 Pro Tip for Repair Shops: Markup & Margin Opportunities
Graphics kits offer some of the healthiest margins in the accessory category. Budget kits can be marked up 40-60% ($12-$48 profit per kit), while premium custom kits carry 30-50% margins ($45-$150 profit per install). Bundle graphics with plastic replacement or frame refresh services and charge a $40-$75 installation fee – most riders would rather pay than risk bubbles. Offering tiered packages (Bronze/Silver/Gold) helps upsell undecided customers. The sweet spot? Stock 3-4 mid-range designs on the shelf and offer a custom design catalog for premium orders.
Transition to Conclusion
Choosing the right tier ultimately comes down to your riding frequency, aesthetic goals, and budget tolerance. A budget kit will make your bike look sharp for the season; a mid-range kit adds longevity and style depth; and a premium kit transforms your bike into a one-of-a-kind machine built to turn heads at every race. Next, we’ll wrap everything up with a final checklist to help you confidently select the best graphics kit for dirt bikes for your specific ride.