
Adding a graphics kit to a dirt bike is more than just an aesthetic upgrade; it’s a smart investment that serves multiple purposes for motorcycle owners, repair shops, and technicians alike. A graphics kit enhances the bike’s visual appeal, allowing riders to express their unique style and personality on the track or trail. Beyond appearance, these kits provide crucial protective benefits, safeguarding the bike’s surface from scratches, dirt, and debris during rides. For repair shops and technicians, offering graphic kits can become an essential value-add service, attracting customers seeking personalization options while potentially increasing shop revenue. Whether it’s for a flashy look or practical protection, understanding the importance of a graphics kit can help dirt bike enthusiasts make informed decisions. Explore our selection of various graphics kits tailored for different models and styles to transform your ride today!
Tools and Materials for Applying a Graphics Kit
Applying a graphics kit to your dirt bike can significantly enhance its appearance and protect its surfaces. Here’s a comprehensive list of necessary tools and materials you will need for successful application:
Essential Tools
- Heat Gun or Hair Dryer: Used to gently warm the graphics, making them more pliable for easier application and conformability to contours.
- Squeegee: A plastic tool to help smooth out bubbles and ensure a flat application.
- Utility Knife or Craft Knife: For trimming any excess graphics after application.
- Measuring Tape: Useful for measuring areas prior to applying graphics, ensuring proper alignment.
- Spray Bottle: For applying a soapy water mixture (optional) on the surface before placement, which allows for repositioning.
Cleaning Supplies
- Rubbing Alcohol or Adhesive Remover: Essential for cleaning the surface of your dirt bike before application. It removes grease, dirt, and old adhesive residues, ensuring a clean surface for the new graphics.
- Soft Cloth or Microfiber Cloth: To wipe down surfaces, ensuring no lint or debris is present before applying the graphics.
Other Supplies
- Graphics Kit: The main material needed, which includes the adhesive decals specific to your dirt bike model. You can find a variety of graphics kits at MotoGraphics.
- Soapy Water or Windex: Optional for easier repositioning of the graphics during application.
Gather these tools and materials before starting your project to ensure a smooth and professional installation of your graphics kit. For detailed application techniques, check out this guide on installing graphics kits.
Preparation Steps Before Applying a Graphics Kit on a Dirt Bike
Applying a graphics kit to your dirt bike increases style and enhances its protection. Proper preparation is key to ensuring a smooth application and longevity of the graphics. Here are the essential steps to take before you start:
1. Cleaning the Bike
- Rationale: Dirt and grease can compromise adhesion, leading to bubbles and peeling graphics. A clean surface ensures that the graphics firmly adhere to the plastic. According to Dirt Bike Empire, thorough cleaning prevents air bubbles and guarantees a longer-lasting finish.
- How to Clean: Use a soft cloth or sponge with warm, soapy water to wash the surfaces. For tougher grime, using a dedicated motorcycle cleaner is advisable.
2. Drying the Surface
- Rationale: Moisture can prevent the graphics from sticking properly. Even slight dampness can cause bubbling under the graphics. Ensuring a completely dry surface is crucial for optimal adhesion.
- How to Dry: After cleaning, wipe the surfaces with a clean, dry cloth and allow them to air dry for at least 30 minutes. Using a heat gun on a low setting can aid in this process but be careful not to overheat any plastics.
3. Ensuring a Smooth Surface
- Rationale: Any imperfections, such as scratches or bumps, can affect the application of the graphics, leading to a less aesthetically pleasing finish and might affect durability. A smooth surface provides a better base for the graphics to adhere to.
- How to Smooth the Surface: Inspect the plastics for any imperfections and sand down rough spots carefully. If necessary, apply a plastic polish to enhance the finish.
4. Preheating the Plastics
- Rationale: Applying heat can make plastics more pliable, allowing the graphics to conform better. This step helps in achieving a perfect fit and reduces the risk of wrinkles.
- How to Preheat: Use a heat gun or hairdryer gently over the plastic areas. Make sure to keep the heat source at a safe distance to avoid melting the plastic.
5. Gathering Tools and Materials
- Rationale: Having all your equipment handy before starting minimizes interruption during the application.
- What to Prepare: Ensure you have the graphics kit, a squeegee, a utility knife, and potentially rubbing alcohol for final surface cleaning.
Following these preparation steps will not only enhance the overall appearance of your dirt bike but also ensure that the graphics last longer and perform better. For quality graphics kits, check out our selection for various dirt bikes to choose the perfect design for your ride!
Starting Point for Applying Graphics to a Dirt Bike
To effectively apply a graphics kit on a dirt bike, it’s crucial to start with a clean and simple canvas. Below is an image of a dirt bike depicted without any graphics, allowing you to visualize the base before beginning the application process.
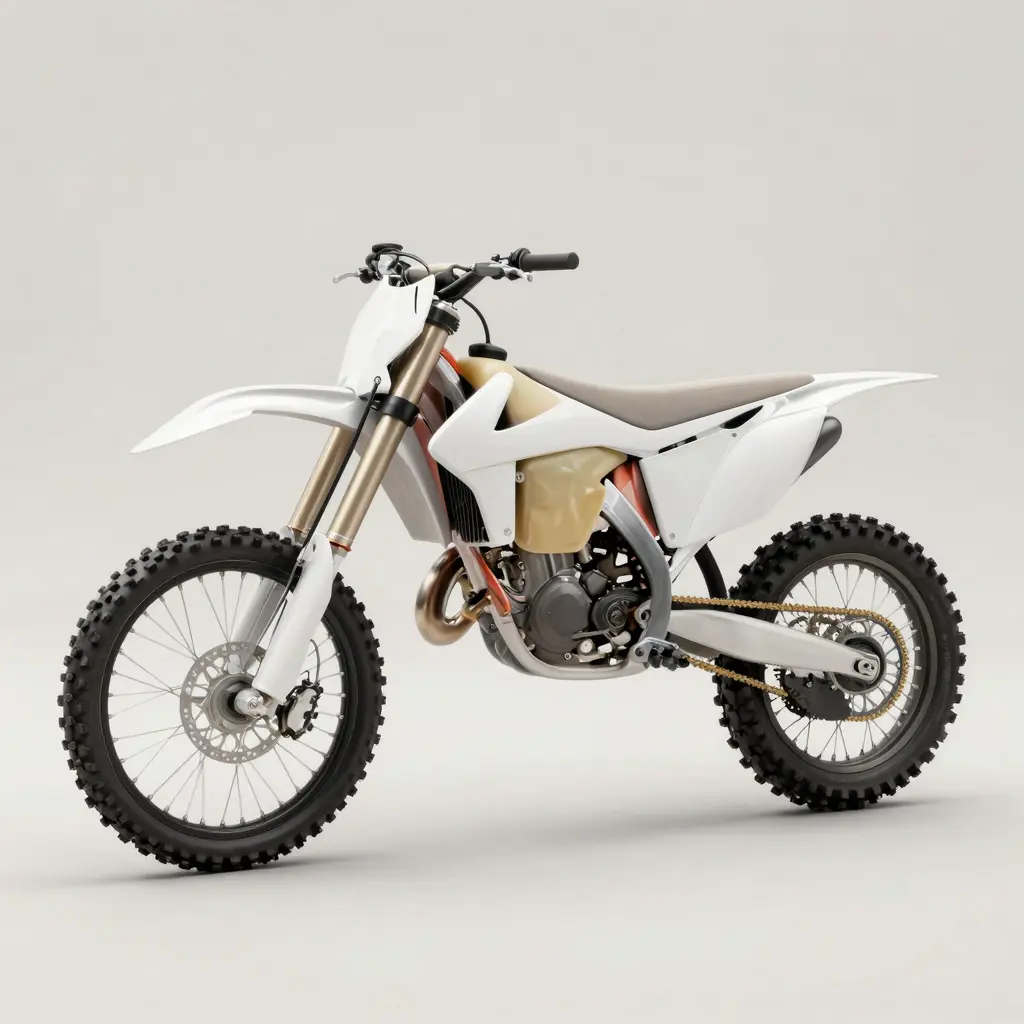
This initial step is vital for ensuring that the graphics adhere properly and look professional. Before proceeding, make sure to clean the surface and prepare it as needed for optimal results. For a wide range of graphics kits suitable for various dirt bike models, check out our collection of bike graphics here.
How to Apply a Graphics Kit on a Dirt Bike
Transforming your dirt bike with an eye-catching graphics kit is not only about aesthetics; it also protects the plastic surfaces of your bike. Applying the kit correctly ensures longevity and a professional finish. Here’s a comprehensive, step-by-step guide on how to put a graphics kit on your dirt bike.
Step 1: Gather Your Materials
Before starting, it’s essential to gather all necessary materials for a smooth installation process. You’ll need:
- A quality graphics kit specific to your dirt bike model (browse our graphics kit selection here).
- A clean cloth or microfiber towel.
- Rubbing alcohol or a similar surface cleaner.
- A heat gun or hairdryer (optional but recommended).
- A squeegee or credit card for applying pressure.
- A utility knife or scissors.
Step 2: Clean the Surface
Cleaning is crucial for proper adhesion. Remove any dirt, grease, or old graphics:
- Wash your dirt bike thoroughly to remove loose debris.
- Use rubbing alcohol on a cloth to clean the surfaces where the graphics will be applied. Ensure the surfaces are completely dry before moving to the next step.
Step 3: Pre-fit the Graphics
Unpack your graphics kit and lay out the graphics on the respective areas of the bike without removing the backing:
- This helps to visualize how each piece fits and ensures correct placement.
- Adjust as needed before they make contact with the bike surface.
Step 4: Align and Mark
To ensure precision:
- Mark the center line of the graphics and the bike’s surface lightly with a pencil.
- Use painter’s tape to hold the graphics in place temporarily while you align them accurately.
Step 5: Apply the Graphics
Start applying the graphics:
- Peel back a small section of the backing paper and hold it alongside the graphics, aligning it with your center marks.
- Gradually peel off more of the backing while pressing the graphic onto the surface.
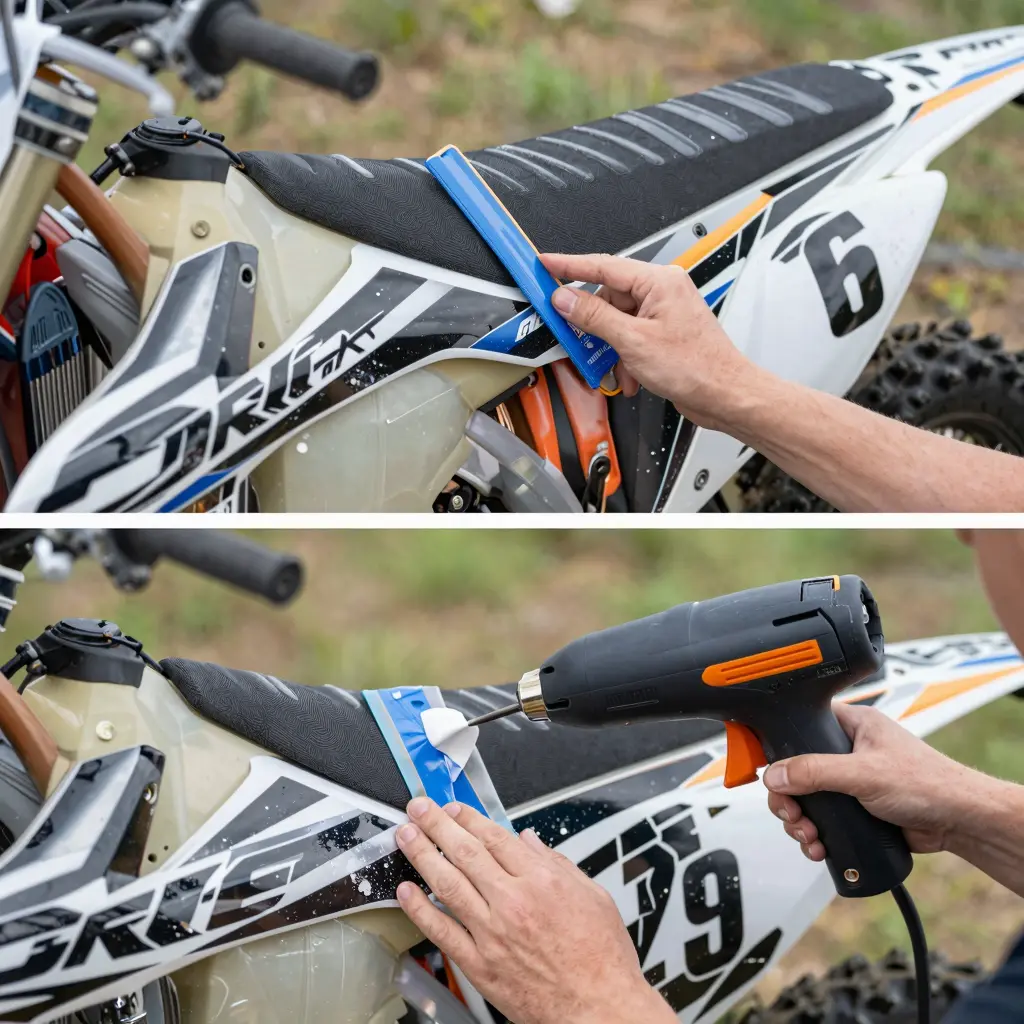
- Use a squeegee or credit card to push out air bubbles and ensure strong adhesion. Start from the center moving outward.
Step 6: Heat and Secure
To enhance adhesion, particularly in cooler temperatures:
- Use a heat gun or hairdryer to gently heat the applied graphic, making it more pliable.
- Apply pressure with the squeegee again after heating to secure the graphics completely.
- Pay special attention to edges and corners to avoid lifting over time.
Step 7: Trim the Edges
Once all the graphics are applied, trim any excess that overlaps edges with a utility knife or sharp scissors:
- Be careful to avoid cutting into your bike’s plastic.
- Smooth out any rough edges with the squeegee.
Step 8: Final Inspection
Look over the installed graphics:
- Ensure there are no bubbles or wrinkles.
- Make additional adjustments as necessary. A well-applied graphics kit should look seamless.
Additional Tips:
- It’s best to apply the graphics in a warm environment, as this helps the adhesive bond better.
- Avoid washing the bike for at least 24 hours after installation to let the adhesive set.
Conclusion
With these steps, your dirt bike will not only look fantastic but the graphics will also provide a layer of protection for the plastics. For more graphic kit options, visit our store here.
Comparison of Graphics Kit Brands
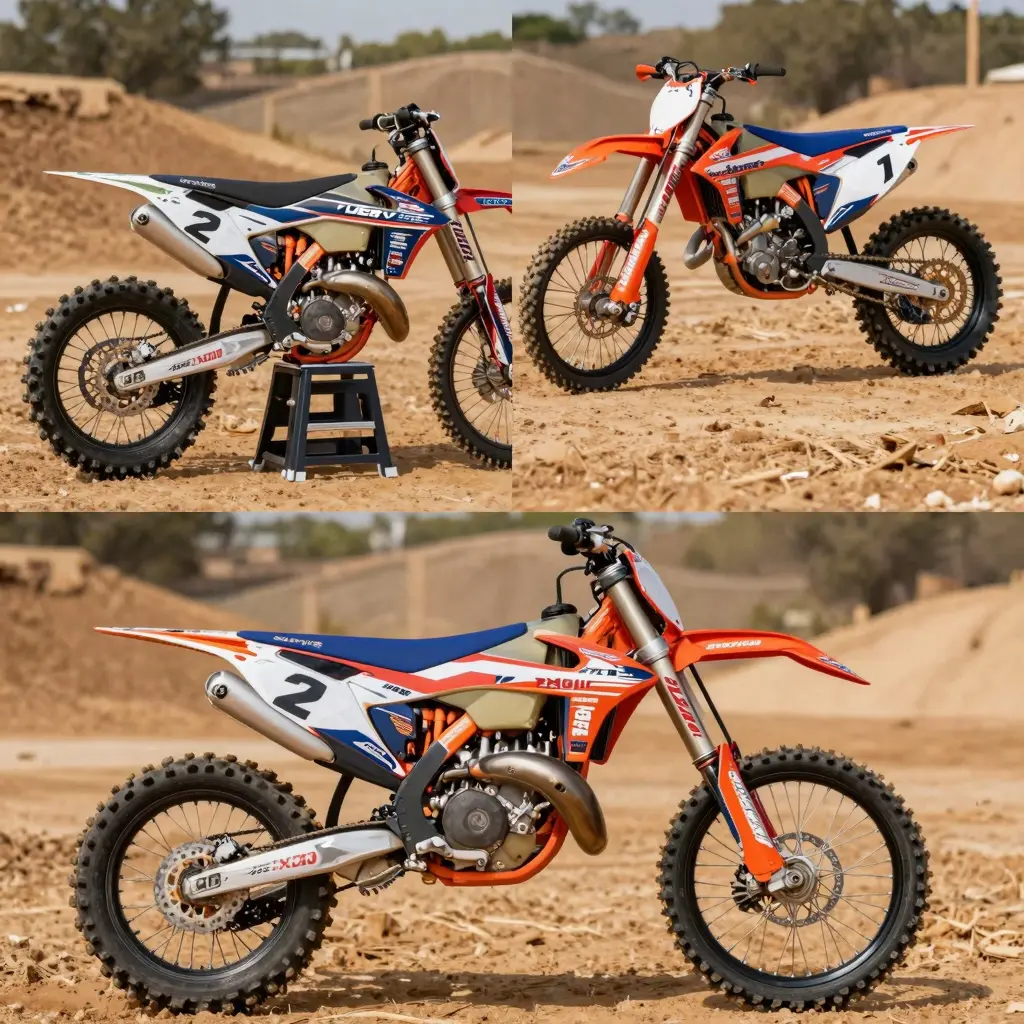
Choosing the right graphics kit can significantly enhance the appearance and durability of your dirt bike. Below is a comparison table showcasing various brands along with their pros and cons based on factors like cost, quality, ease of application, and design variety.
| Brand | Cost | Quality | Ease of Application | Design Variety | Pros | Cons |
|---|---|---|---|---|---|---|
| OMX Graphics | Moderate | High | Easy | Extensive | High durability and aesthetic appeal, easy to apply, various designs | Moderate pricing |
| MXProDecals | Slightly higher | Excellent | Moderate | Custom options | Customization options available, sturdy materials | Higher cost than stock |
| Factory Effex | Moderate to high | High | Easy | Diverse | Known for high quality, extensive choice of designs | Price may be prohibitive for some |
| Decal Works | Moderate | High | Easy | Varied | High-resolution graphics that resist wear, numerous designs | Limited to pre-existing kits |
| BikeGraphics | Economical | Decent | Moderate | Basic | Affordable pricing, simplistic designs available, good for beginners | Limited design variety |
Key Takeaways
- OMX Graphics and MXProDecals are excellent picks for those who prioritize quality and design variety despite moderate to slightly higher costs.
- Factory Effex is a great choice for riders looking for high-quality graphics with a lot of options.
- Decal Works offers durability and good design choices, while BikeGraphics is suitable for those on a budget that are not demanding extreme customization.
Investing in quality graphics can greatly enhance your bike while providing a personal touch. If you’re looking for a vast array of options, check out OMX Graphics and MXProDecals for more information on the best kits available.
Consumer Testimonials About Graphics Kits
When it comes to customizing your dirt bike, graphics kits can play a significant role in how your bike stands out and represents your personal style. Many motorcycle owners have shared their satisfaction with upgrading their bikes aesthetically through these kits. Here’s a quote that encapsulates the excitement of owners:
“Adding a graphics kit completely transformed the look of my dirt bike. It’s like giving the bike a brand new personality! The vibrant colors and unique designs really make it stand out on the trails.”
Graphics kits not only enhance the aesthetics but also allow you to express your individuality. For a wide range of designs, you can explore options like KTM graphics or even check out various bike graphics.
Troubleshooting Common Issues When Applying Graphics Kits to Dirt Bikes
Applying graphics kits to your dirt bike can dramatically enhance its aesthetic appeal and protect its surfaces. However, like any installation process, common issues can arise, such as air bubbles and misalignment. Below are some effective troubleshooting tips to handle these problems.
Air Bubbles
Air bubbles can form under the graphics during application, leading to an unappealing look and potentially affecting the longevity of the graphics. Here are some ways to prevent and eliminate air bubbles:
- Clean the Surface: Ensure the surface of your dirt bike is clean and free from oil, dirt, or grease, as these residues can trap air under the graphic. Learn more about cleaning techniques.
- Warm the Graphics: Before applying the graphics, warm them using a blow dryer or heat gun on a low setting. This makes the vinyl more pliable and helps to eliminate the chance of bubbles forming. A warm environment during application can similarly prevent bubbles from cropping up. According to MotoSport, practicing the application process in a warm space can lead to better results.
- Use a Squeegee: Once the graphic is placed, use a plastic squeegee or a credit card to push out any air trapped underneath. Start from the center and work your way to the edges for optimal effectiveness.
- Release Air: If air bubbles still appear after application, puncture them with a small pin, then gently push the air out with your fingers. Seal the area with heat once the bubble is flat.
Misalignment
Misalignment during the application of graphics is another common issue that can ruin the overall look of your bike. Here’s how to tackle this:
- Align Carefully: Before permanently affixing the graphic, position it without peeling off the backing. Align it visually to other graphics or the components of the bike to ensure it sits correctly. This visual guide can help in achieving perfect alignment.
- Mark Guidelines: If necessary, use a piece of masking tape to mark boundaries or alignment points. This can serve as a guide during the application process.
- Practice: If you’re new to applying graphics, consider practicing on older surfaces or scrap materials. Familiarizing yourself with the application techniques can help you avoid misalignment in the future.
- Reposition Gently: If you notice misalignment after applying a graphic, gently peel it back and realign it. Be careful to apply heat to the area beforehand if the vinyl has cooled and become rigid.
Conclusion
Successfully applying graphics kits to your dirt bike requires patience and attention to detail. By following these troubleshooting tips for air bubbles and misalignment, you can achieve a clean and professional look for your bike. For graphics kits tailored to various dirt bike models, explore the options available at MotoGraphics.
By adhering to these practices, you can enhance both the appearance and durability of your bike’s graphics and enjoy a ride that looks as good as it performs.
Conclusion: Enhance Your Ride with a Graphics Kit
Applying a graphics kit to your dirt bike not only boosts its aesthetic appeal but also provides essential protective benefits. These kits serve as a versatile and cost-effective alternative to pricey paint jobs, allowing you to revamp the look of your bike quickly and affordably. With a wide array of designs and customizable options available here, you can express your personal style while enhancing the overall appearance of your motorcycle.
Moreover, graphics kits protect the underlying paintwork from scratches, dirt, and debris, ensuring that your bike looks great for longer. They offer an added layer of durability while allowing you to easily change designs, especially beneficial for races or special events. If you’re keen on making your bike stand out while ensuring it remains in top condition, a graphics kit is the perfect solution. Check out more options from our extensive collection here and discover how you can elevate your riding experience!
Don’t wait – give your dirt bike the makeover it deserves and ride in style!
Longevity and Maintenance Needs of Graphics Materials
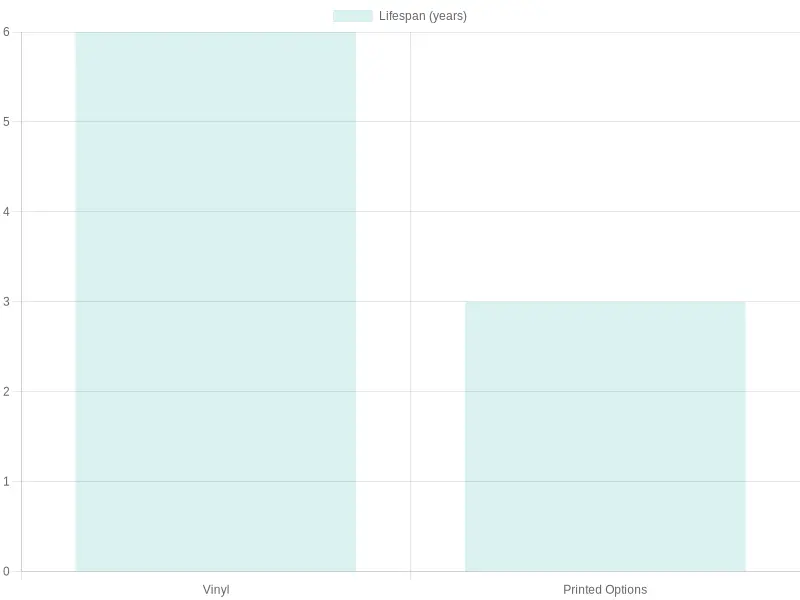
When it comes to choosing a graphics kit for your dirt bike, selecting the right material is crucial for ensuring durability and reducing maintenance needs. Below is a comparative chart that illustrates the longevity and maintenance requirements of common graphics materials, specifically vinyl and printed options.
Comparative Data Chart
| Material Type | Lifespan (years) | Maintenance Frequency | Resistance to Weather | Cost Effectiveness |
|---|---|---|---|---|
| Vinyl | 5-7 | Annual | High | More Cost Effective |
| Printed Options | 2-4 | Bi-annual | Moderate | Less Cost Effective |
Key Insights:
- Vinyl graphics are known for their longer lifespan of 5 to 7 years, requiring annual maintenance, making them a cost-effective choice for many motorcycle owners.
- Printed options, on the other hand, may last 2 to 4 years and require upkeep every six months, which can lead to higher costs over time due to their shorter longevity.
In conclusion, if you are looking for a durable and low-maintenance graphics kit for your dirt bike, check out our vinyl options. They not only withstand harsh conditions better but also save you time and money in the long run.
For those interested in a variety of choices, feel free to explore other graphics available.