
Introduction to Custom Dirt Bike Graphics
Full custom dirt bike graphics play a transformative role in the world of motocross and dirt biking. For motorcycle owners, these graphics not only serve as a visual upgrade but also as a powerful medium for self-expression and brand identity. In a sport where individuality matters, customizing your dirt bike can make it stand out on the track, showcasing your personality or aligning with a specific brand image. Whether you’re a hobbyist looking to personalize your ride or a professional racer wanting to attract attention, custom graphics can significantly enhance the overall appearance and impact of your motorcycle. Moreover, motorcycle repair shops are increasingly offering these custom graphics services to meet the growing demand among riders, providing an opportunity for enhanced customer loyalty and engagement. By investing in full custom dirt bike graphics, riders can ensure their bikes capture attention while reflecting their unique preferences in style and design. Explore our selection at MotoGraphics to find the perfect graphics that resonate with your vision.
Benefits of Custom Dirt Bike Graphics
Custom dirt bike graphics offer a plethora of advantages that enhance the overall rider experience. Here are some key benefits:
-
Improved Aesthetics: Custom graphics allow you to personalize your bike with unique colors and designs. This transformation can make your ride stand out, reflecting your personality and style. A bike adorned with vibrant, custom graphics immediately turns heads on the track or trails, making you feel proud of your machine. According to Trek Inspire, these graphics are a cost-effective way to enhance your bike’s visual appeal without needing expensive mechanical upgrades.
-
Protection for Your Bike: Custom graphics serve not just as decoration but also as a protective layer for your bike’s body. They shield the underlying paint from scratches and debris, preserving its pristine condition. This dual functionality ensures your investment remains in top shape, which is essential for maintaining the bike’s value.
-
Brand Recognition: For professional riders, custom graphics can promote brand identity. By displaying logos and designs that represent sponsors or personal brands, riders can enhance visibility and recognition. This is especially beneficial in competitive scenarios where distinctiveness can lead to greater brand loyalty and opportunities.
-
Personalization: Every rider has a unique identity, and custom graphics allow for a personal touch. Whether you prefer bold patterns or subtle tones, you can tailor the graphics to suit your preferences. This level of customization fosters a deeper connection between the rider and their bike, enhancing the overall riding experience.
In summary, investing in custom dirt bike graphics not only boosts the aesthetic appeal of your bike but also offers protection, aids in brand building, and allows for personal expression. For more information or to explore various options, check out the wide range of bike graphics available at MotoGraphics.
Popular Vendors for Custom Dirt Bike Graphics
Choosing the right vendor for custom dirt bike graphics is essential to ensure quality, design, and pricing that fits your needs. Below is a comparison of popular vendors in the market:
| Vendor Name | Pricing | Offerings | Customer Ratings |
|---|---|---|---|
| Backyard Design USA | Starting at $199 | Fully customizable graphics tailored per model | 4.5/5 |
| OMX Graphics | Starting at $150 | Custom graphics for all major brands, free customization | 4.7/5 |
| DeCal Works | Starting at $175 | Semi-custom and fully custom designs available | 4.6/5 |
| Motocal | Starting at $160 | User-friendly custom decals for motorcycles | 4.5/5 |
| Evolve MX | Starting at $120 | Graphics specifically for MX with design studio | 4.4/5 |
These vendors offer a wide range of options, ensuring that you can find something that fits your style and preferences. For more details you can explore specific offerings like E-Ride Graphics or Talaria Graphics.
The Design Process for Custom Dirt Bike Graphics
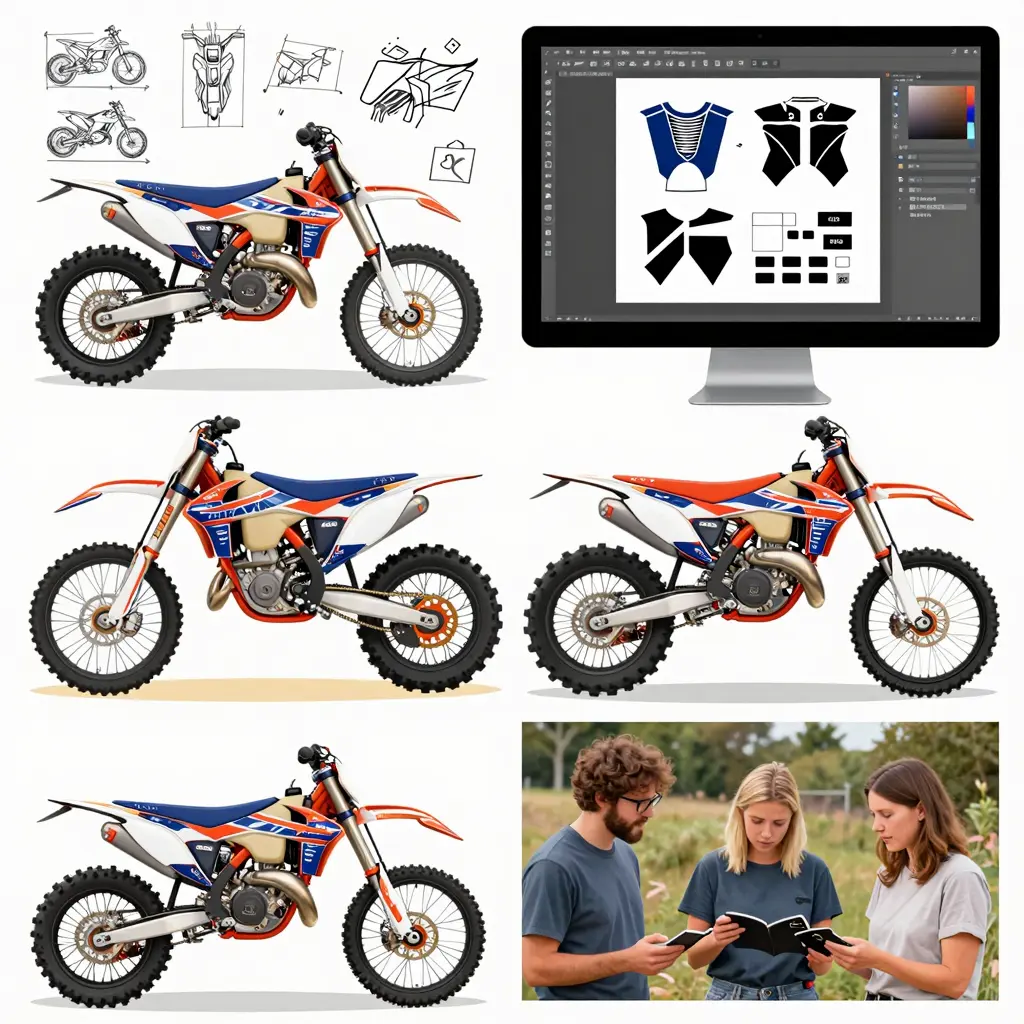
Designing custom graphics for dirt bikes is a creative and technical process that enhances the aesthetic and branding of the motorcycle. It involves multiple steps, including ideation, sketching, digital design, and feedback. Below, we outline these steps to help you understand how to create standout dirt bike graphics for your ride.
1. Ideation
The design process begins with ideation, where ideas are generated based on the client’s requirements, preferences, and brand identity. This can be done through brainstorming sessions, mood boards, or research into current graphic trends in the motocross community. The goal is to develop a unique concept that reflects the rider’s personality and motorcycle style.
Key Considerations:
- Color Schemes: Choose colors that will stand out on the track and align with any existing branding.
- Themes: Explore themes that resonate with the rider; this can include anything from sporty designs to whimsical graphics.
- Audience: Keep in mind who the graphics are intended for, as this will guide the overall direction of the design.
2. Sketching
After settling on a concept, the next step is sketching. Designers typically create rough drafts on paper or digital software to visualize the layout and elements of the graphics. During this stage, it’s essential to consider the placement of logos, patterns, and texts that will be included depending on the bike’s model and shape.
3. Digital Design
Once the sketches are finalized, the design transitions to digital software for a more refined look. Programs like Adobe Illustrator or Photoshop are commonly used to create detailed vector graphics that accurately represent the final product. Designers can experiment with various textures, colors, and designs to ensure the graphics will look great when printed.
Important Steps in Digital Design:
- Template Creation: Shaping the graphics precisely to fit the contours of the dirt bike model, ensuring optimal coverage and aesthetic appeal.
- Incorporating Feedback: Often, feedback from the rider or stakeholders is integrated during this phase to make necessary adjustments.
4. Review and Feedback
After the initial digital designs are completed, the graphics undergo a review process. It’s helpful to present the designs to the client for feedback. This stage can lead to further adjustments based on the client’s tastes and preferences, ensuring satisfaction before printing.
5. Printing and Installation
Once the design is approved, the final artwork is printed on high-quality vinyl material using advanced printing technology. This material is durable and specially designed for graphics installation on dirt bikes. Installation is a meticulous process, requiring clean surfaces and precise application to avoid air bubbles.
Resources for Installation:
- How to Install Dirt Bike Graphics – A comprehensive guide to ensure perfect installation.
- Step-by-Step Graphic Installation – Learn the essential techniques for flawless graphics application.
Conclusion
Creating custom dirt bike graphics is an intricate process that combines artistic flair with technical skills. By following these steps-from ideation to installation-you can create vibrant and unique graphics that not only look fantastic but also provide a way for riders to express themselves on the track. If you are looking to explore various graphics options, check out our full custom dirt bike graphics collection.
User Reviews of Custom Dirt Bike Graphics
Positive Feedback
-
Customizability:
Many users appreciate the extensive customization options offered by various vendors. Services like OMX Graphics allow riders to tailor graphics to their preferences, often noting that such personalization helps achieve a unique and stylish look for their bikes. Clients commend platforms like Backyard Design, where they can utilize online configurators to design their graphics, ensuring that they reflect individual styles. -
Quality and Durability:
Reviewers frequently remark on the high quality and durability of the materials used in custom graphics kits. Brands such as Rivalink and DeCal Works receive positive ratings for their craftsmanship, emphasizing how the graphics withstand the rigors of outdoor riding without fading or peeling. Users report that they are thrilled with the longevity of their designs, which often remain vibrant after extensive use. -
Customer Service:
Friendly and responsive customer service is highlighted in numerous reviews. For instance, OMX Graphics is noted for its efficient order processing and fast shipping-some users even report receiving their graphics within days. This aspect complements the positive experiences, showcasing a reliable purchasing journey.
Negative Feedback
-
Complexity of Design Tools:
While customization is generally well-received, some users find design tools overwhelming or unintuitive. A few riders on forums like USCutter express frustration at the learning curve associated with using advanced configurators. This can lead to delays in finalizing designs, with some customers wishing for simpler alternatives. -
Inconsistent Quality:
A minority of reviews mention inconsistencies in product quality. For example, while some users rave about their graphics quality, others report receiving graphics that did not meet their expectations in terms of color vibrancy or adherence. This can sometimes lead to disappointment, especially if riders expect uniform quality based on glowing reviews. -
Price Concerns:
Some riders comment on the price of custom graphics. They suggest that while quality is paramount, prices can be steep compared to simpler options. Users express a desire for more budget-friendly choices without compromising on aesthetics or durability.
Conclusion
In conclusion, the consensus among users is largely positive, driven by high quality, extensive customization options, and good customer service. However, potential clients should remain mindful of the learning curve associated with design tools, occasional quality inconsistencies, and cost factors when considering their options. For those looking to enhance the appearance of their dirt bikes, exploring different vendors, such as Rivalink or DeCal Works, may provide valuable insights into offerings that suit their needs.
This summary offers a balanced view of the custom graphics services available, ready to help motorcycle owners and enthusiasts make informed decisions about upgrading their bikes with striking graphics.
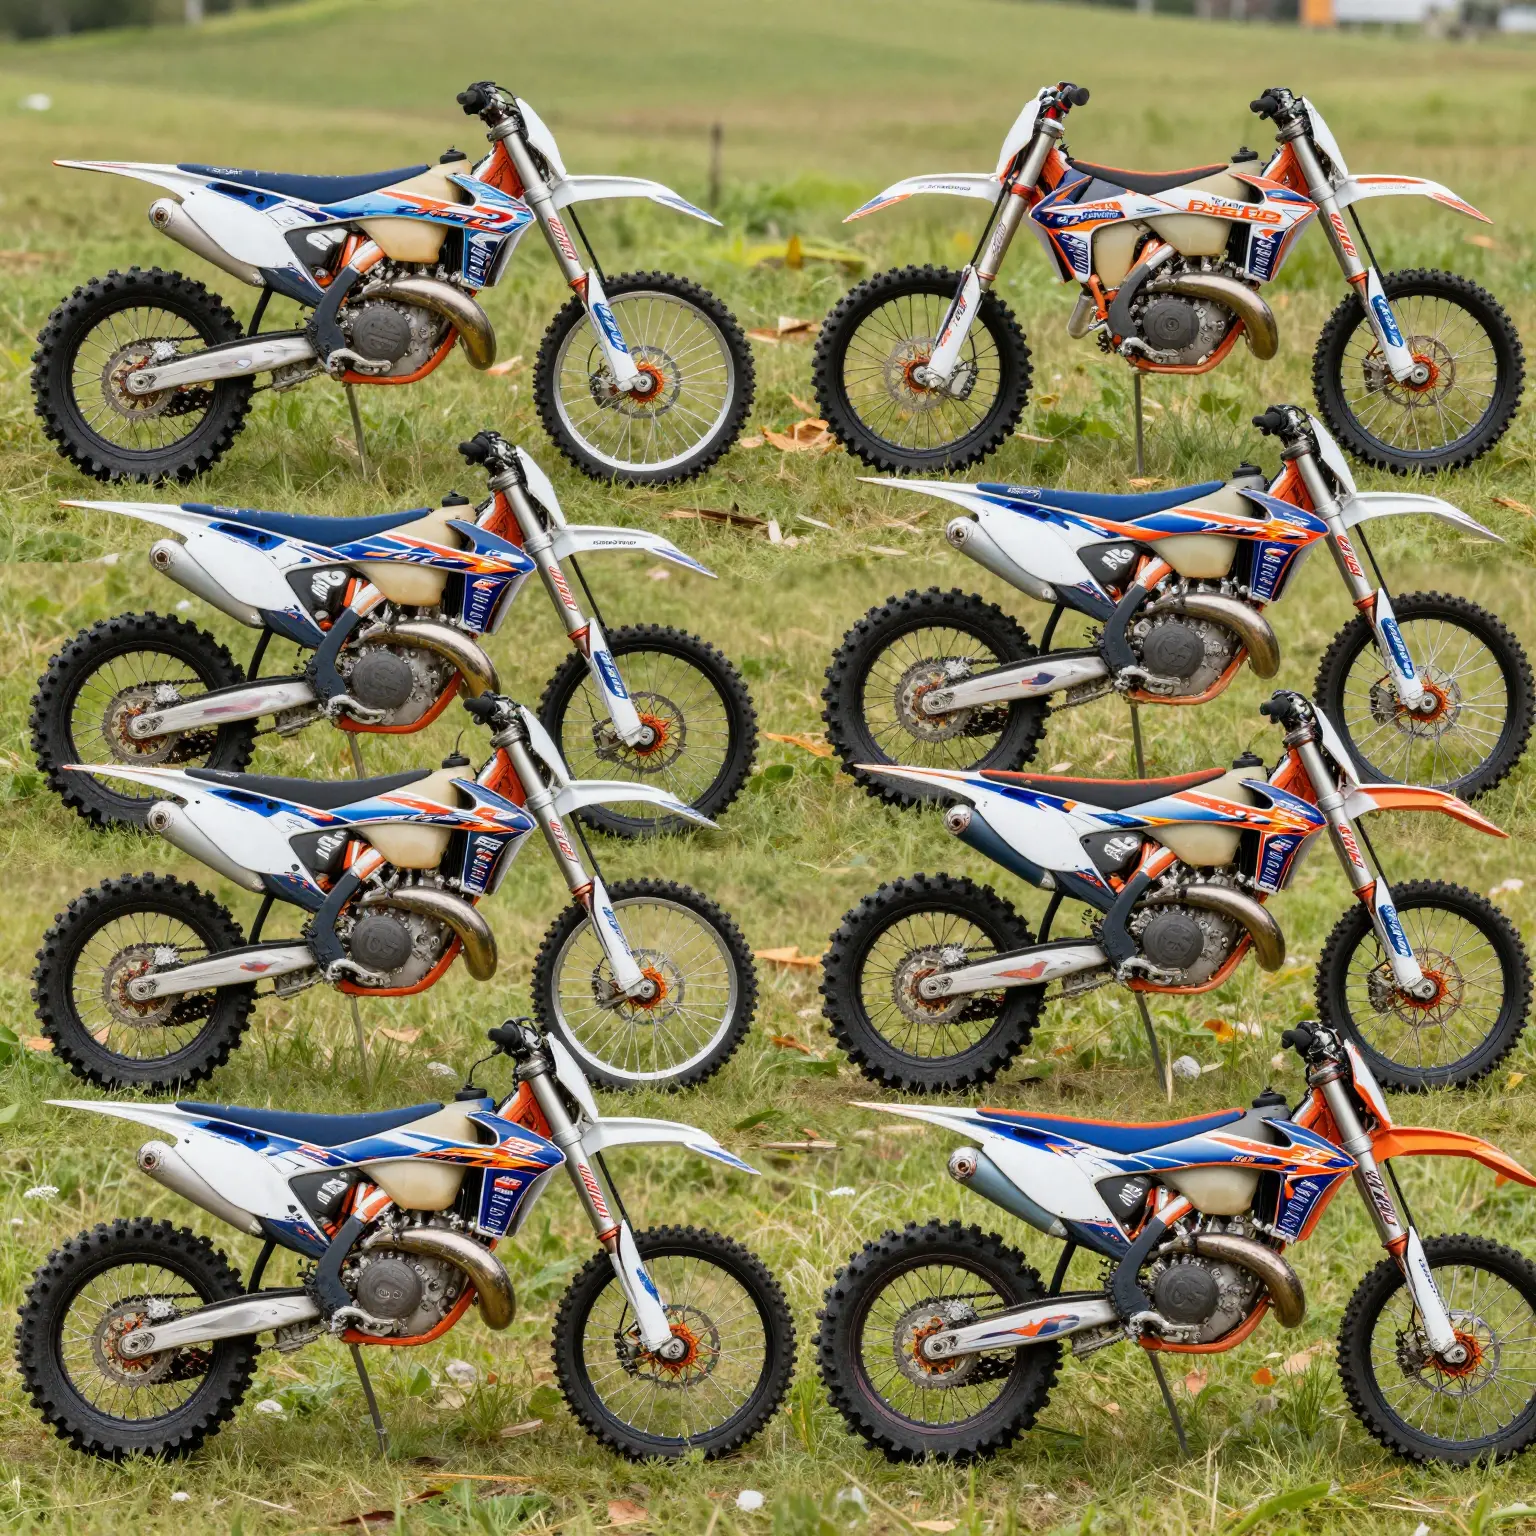
Explore a stunning array of custom dirt bike graphics designed to elevate your riding experience. These graphics not only enhance the aesthetics of your bike but also reflect your personality and style on the trails. Different models can showcase a variety of vibrant designs, ensuring that there is something for every motocross enthusiast.
For even more stunning designs, you can check out our collection of bike graphics and Surron graphics to find the perfect fit for your motorcycle.
Whether you’re customizing for performance or style, custom graphics are perfect for making your dirt bike stand out. Discover endless customization options today!
Installation Tips for Custom Dirt Bike Graphics
Installing custom dirt bike graphics can be a challenging yet rewarding task. With proper preparation and techniques, you can achieve a professional look. Here’s a detailed guide on how to install custom graphics on your dirt bike effectively.
1. Surface Preparation
Before you start the installation, it’s crucial to prepare the surface of your dirt bike. Follow these steps:
- Clean the Surface: Use soap and water to clean the plastics thoroughly. Remove any dirt, grime, and previous graphic residues. For better adhesion, you can also use a dedicated plastic cleaner or rubbing alcohol.
- Dry the Surfaces: Ensure that the plastics are completely dry before applying any graphics. Moisture can cause bubbling and peeling later.
- Inspect for Damage: Check for any cracks or damages on the plastics. Repair them as needed to ensure a smooth application.
2. Application Techniques
Once the surface is clean and dry, it’s time to apply the graphics.
- Work in a Controlled Environment: Avoid extreme temperatures. An ideal temperature for installation is between 70°F and 80°F. Cold or hot conditions can affect adhesion.
- Use a Heat Gun or Hair Dryer: Slightly warm the graphics before application. This makes them more pliable and easier to work with. Be careful not to overheat them.
- Align Properly: Position the graphics without removing the backing. Once satisfied, peel off a small section of the backing while applying the graphic. This will help you position it accurately.
- Smooth Out Bubbles: Use a squeegee or a credit card covered with a soft cloth to push out bubbles from the center to the edges. If you encounter stubborn bubbles, use a small needle to prick them and push the air out.
3. Troubleshooting Common Issues
Even with careful preparation, issues can arise during installation. Here are some common problems and solutions:
- Bubbling: If you see bubbles after application, gently lift the graphic and re-smooth. Consider using a heat source to soften the area before trying again.
- Peeling Edges: Ensure the edges are firmly pressed down. If edges are lifting, applying a small amount of clear vinyl adhesive can help.
- Incorrect Alignment: If graphics are off-center, gently peel them back and reposition them before they fully adhere, but do this cautiously to prevent damaging the material.
By following these steps, you can achieve a stunning look for your dirt bike that lasts. For a variety of graphics options, check out our selection of custom dirt bike graphics that cater to all styles.
For more tips on installation and maintenance, refer to our guide on avoiding common mistakes during installation. With dedication and the right techniques, your bike can boast a fresh, customized look that’ll make you stand out on the track.
“Customization allows riders to express their individuality while enhancing visibility on the track. Custom graphics not only forge a personal connection between the rider and their bike but also create a distinct brand identity that stands out in the competitive world of dirt biking.”
– Craig Vetter, Renowned Motorcycle Designer
This quote encapsulates the idea that personalized graphics can elevate a rider’s experience and brand presence, aligning with the objectives of offering full custom dirt bike graphics at MotoGraphics.
Timeline for Custom Dirt Bike Graphics
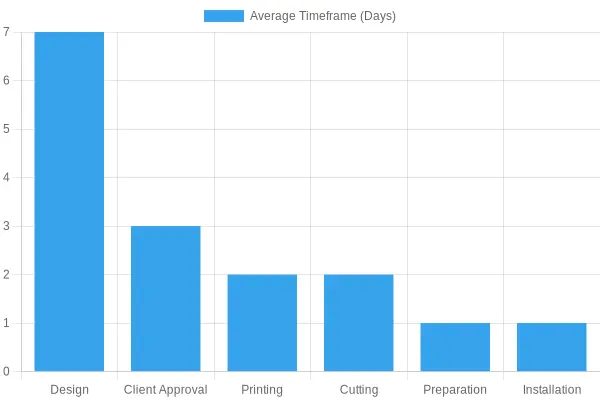
The process of transforming a design into installation for custom dirt bike graphics involves several important milestones. Understanding this timeline can ensure smooth execution and satisfaction. The average timeframes for each stage are as follows:
| Stage | Average Timeframe |
|---|---|
| Design | 1 Week |
| Client Approval | 3 Days |
| Printing | 2 Days |
| Cutting | 2 Days |
| Preparation | 1 Day |
| Installation | 1 Day |
Key Stages Explained
- Design: This is where the initial creative concept is developed. It typically takes about a week to finalize.
- Client Approval: After the design is presented, it often takes about 3 days for clients to review and approve.
- Printing: Once approved, printing can be completed in approximately 2 days.
- Cutting: After printing, the graphics need to be cut to size, which also takes about 2 days.
- Preparation: The graphics must be prepared for installation, taking around 1 day.
- Installation: Finally, the installation itself generally takes about 1 day.
Understanding this timeline can help motorcycle owners, repair shops, and technicians plan effectively for their graphic needs. For custom graphics options, check out the full selection of dirt bike graphics.
Conclusion
In conclusion, full custom dirt bike graphics are essential not just for aesthetics but also for enhancing the identity and visibility of motorcycles on and off the track. By allowing riders to express their uniqueness, these graphics serve as a canvas for personal branding, making them stand out in a competitive environment. According to various sources, the ability to customize your bike with graphics significantly improves its visual appeal, which is crucial for both enjoyment and performance.
Custom graphics also offer practical benefits; they can help protect the motorcycle’s bodywork from scratches and damage while reducing the effects of fading from sunlight exposure. Regular maintenance can keep these graphics looking fresh, ensuring a long-term investment in style and bike longevity. Moreover, the economic aspect of custom graphics is appealing; with kits available for as low as $35, they are a cost-effective way to transform your bike’s look.
For motorcycle owners and repair shops, investing in full custom graphics not only enhances the appearance of bikes but also adds value and marketability. As personal expression becomes increasingly important in the motorcycle community, it is vital to adopt custom graphics that reflect your style and enhance your biking experience.
To explore our range of products and learn more about how custom graphics can transform your dirt bike, visit MotoGraphics today! Embrace the opportunity to stand out on the track and let your bike reflect who you are as a rider!