Introduction to Dirt Bike Graphics Kits
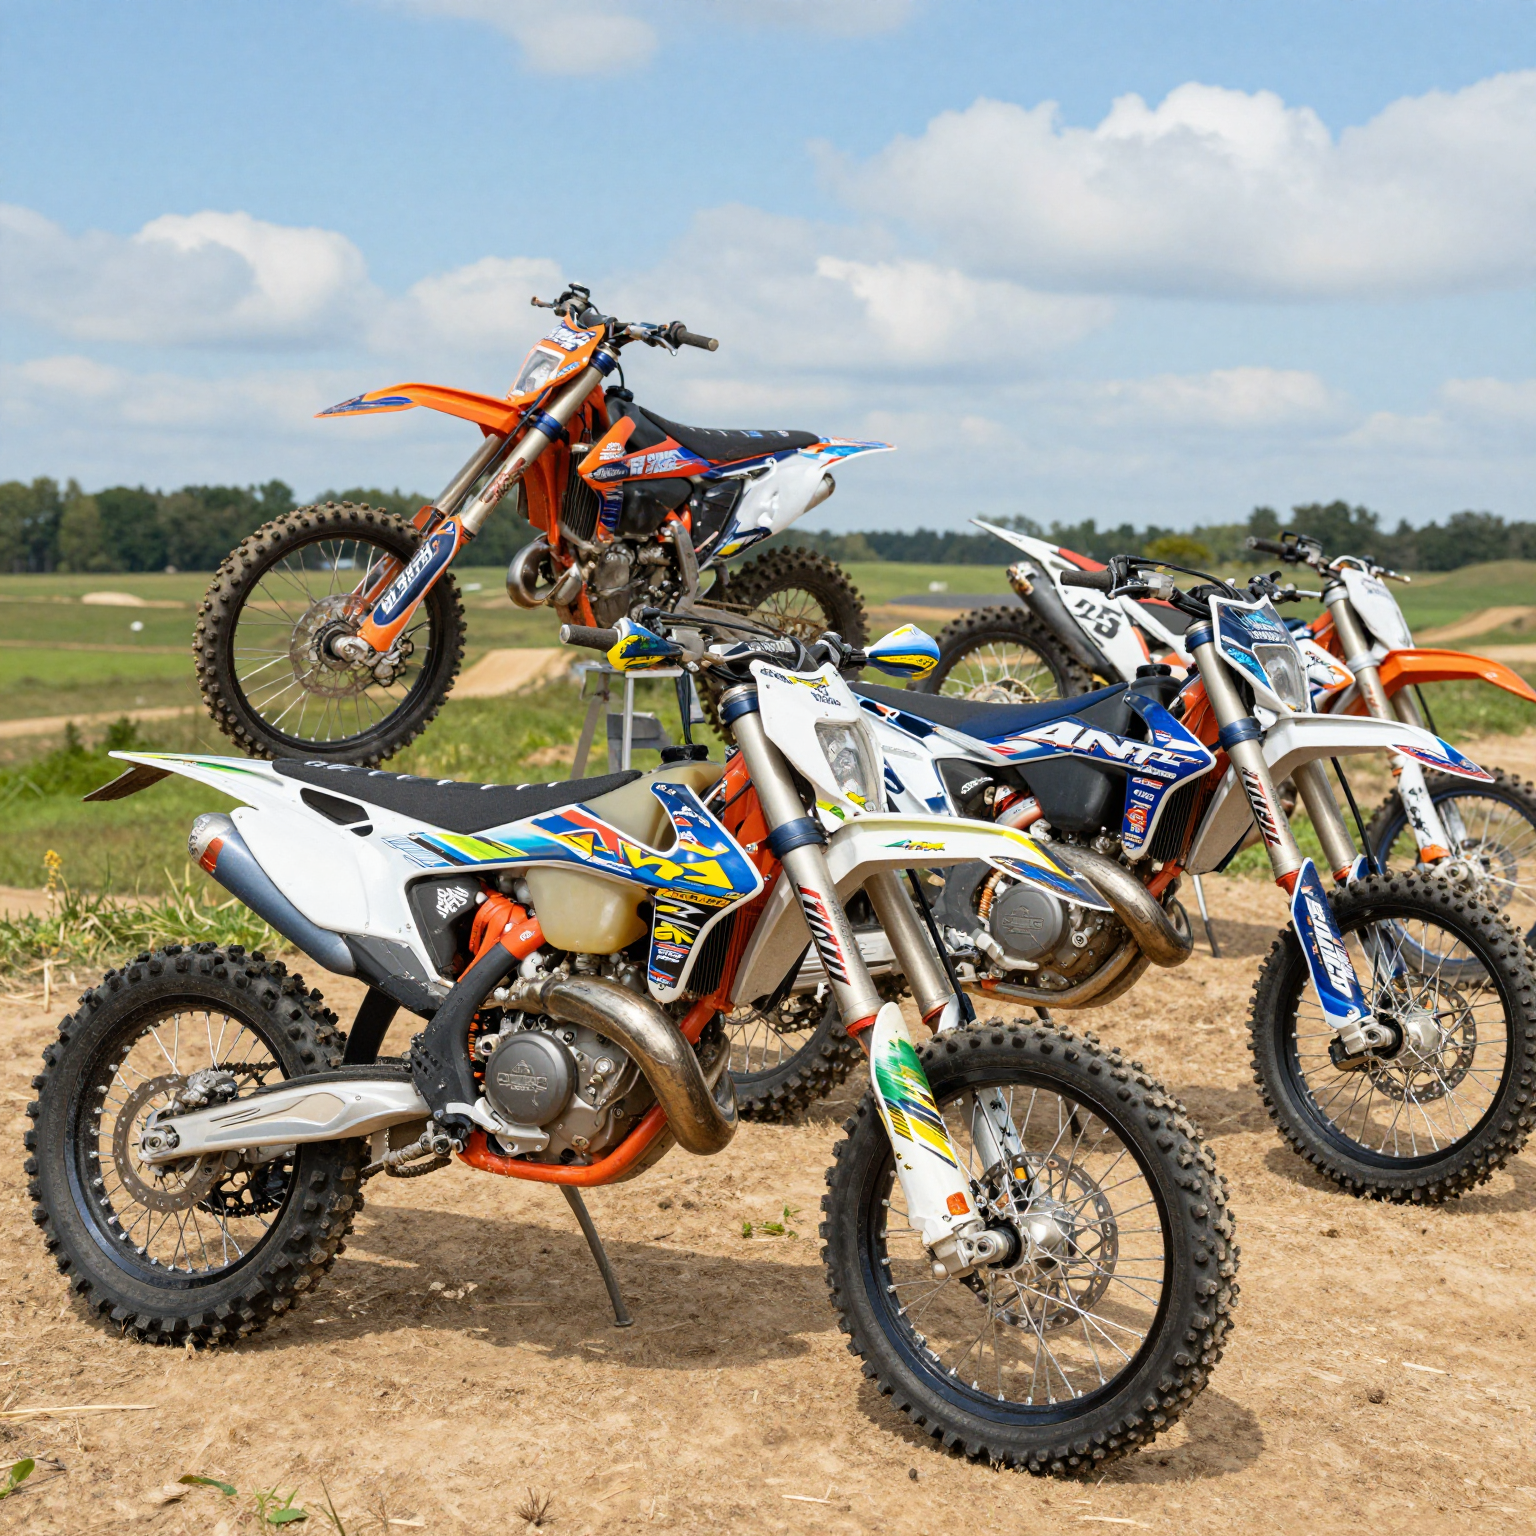
Dirt bike graphics kits are more than just a visual accessory; they play a vital role in enhancing the overall performance and appearance of your motorcycle. For many motorcycle owners, the aesthetic appeal of their bike is just as important as its mechanical efficiency. A well-designed graphics kit not only showcases personal style but also transforms the bike into a head-turning machine on the trails or at the track. However, the significance of these kits goes far beyond their eye-catching designs.
The protective function of graphics kits is crucial as well. These kits shield the underlying plastics from scratches, UV rays, and other environmental factors that may cause long-term damage. By investing in high-quality graphics, owners can prolong the lifespan of their dirt bikes while maintaining their pristine look. This blend of protection and style makes graphics kits an essential consideration for motorcycle enthusiasts, repair shops, and technicians alike.
As we delve deeper into the world of dirt bike graphics kits, this article will explore various aspects, including the top designs available, the benefits of custom graphics, and tips on how to properly apply and maintain them. Furthermore, we’ll guide you on how to choose the right graphics kit that aligns with your riding style and aesthetic preferences. If you’re interested in exploring the top 10 dirt bike wraps or custom dirt bike graphics, you’re in the right place. Strap in as we embark on this exciting journey through the vibrant and protective world of dirt bike graphics!
Types of Dirt Bike Graphics Kits
Dirt bike graphics kits are essential for riders looking to enhance both the aesthetic and protective qualities of their bikes. There are three significant types of graphics kits available in the market: full kits, custom kits, and partial (or half) kits. Each type offers unique benefits, catering to different needs and preferences of motorcycle owners, repair shops, and technicians.
1. Full Graphics Kits
Full graphics kits cover nearly every visible component of the dirt bike, including the fenders, shrouds, airbox, seat, and fork tubes. This comprehensive coverage offers several advantages:
- Complete Protection: Full kits protect the motorcycle from trail debris, UV rays, and minor impacts, which helps in maintaining the bike’s resale value over time.
- Aesthetic Appeal: By providing a coordinated look, full graphics kits create a factory-finished appearance. Riders can choose designs that resonate with their personality and brand image.
- Durability: These kits are made from high-quality materials that withstand the rigors of off-road riding.
Full graphics kits can be particularly advantageous for competitive racers who require optimal performance, or for enthusiasts looking to restore or personalize their bikes. Learn more about dirt bike wraps.
2. Custom Graphics Kits
Custom graphics kits allow riders to design their unique graphics, incorporating specific logos, colors, and patterns to match their style and branding. Some key benefits include:
- Personalization: Custom kits enable a level of personalization that sets individual bikes apart from the rest, making them ideal for show bikes or branding for sponsorships.
- Versatility: Riders can create designs that reflect their interests, race teams, or even personal achievements, crafting a bike that tells their unique story.
- Variety of Applications: Custom graphics kits are suitable for all dirt bike models, and they can accommodate any design aesthetic, from minimalist to eye-catching aggressive looks. These kits are popular among those looking for a standout appearance on the track or trails.
If you’re considering a tailored design, check out our custom dirt bike graphics.
3. Partial (or Half) Graphics Kits
Partial graphics kits focus on specific areas of the bike instead of covering it entirely. They often include decals for the side panels, number plates, and fenders. Benefits of partial kits include:
- Affordability: These kits are generally more affordable than full kits, which is perfect for riders on a budget or for those who want to enhance their bike’s appearance without a complete overhaul.
- Easy Installation: Given their smaller size, partial kits are easier and faster to install, requiring less time and technical expertise. They offer a great way to refresh an existing design without the commitment of a full graphics overhaul.
- Quick Aesthetic Update: Half kits provide a visible enhancement that can significantly alter a bike’s look, making them ideal for personalization or seasonal updates.
Conclusion
Choosing the right type of dirt bike graphics kit depends on your personal style, budget, and functional needs. Full graphics kits offer maximum coverage and protection, custom kits allow for unique personalization, and partial kits provide an easy and affordable way to update your bike. Each option serves a purpose, allowing riders to express themselves while protecting their investment in their dirt bike.
Whether you are a seasoned rider or just beginning your adventure, selecting the right graphics kit can enhance both the look and longevity of your dirt bike.
Benefits of Using a Graphics Kit for Dirt Bikes
Dirt bikes are not just about performance; they reflect the personality and individuality of the rider. A graphics kit for dirt bikes can enhance both the look and feel of your motorcycle, making it stand out on and off the track. Here are some of the main advantages of using a graphics kit:
1. Customization
Customization is one of the most significant benefits of a graphics kit. Riders can express their style through the choice of colors, designs, and logos. Graphics kits allow for personalization that showcases individual flair and can even feature branding for sponsors. This sense of ownership is particularly appealing to competitive riders who wish to make a statement. For instance, custom dirt bike graphics can be tailored to fit various models, giving every bike a distinct character.
2. Protection
Aside from aesthetics, graphics kits provide critical protection for the motorcycle’s plastic bodywork. High-quality graphics are made from durable materials that shield the bike from scratches, dings, and UV damage. A well-applied graphics kit can keep the bike looking new while preserving its resale value. Graphics kits are particularly beneficial for off-road riders who frequently encounter mud, rocks, and other debris that could damage exposed surfaces.
3. Durability
An investment in a graphics kit is also an investment in the longevity of your bike’s appearance. Most modern graphics kits are designed to withstand harsh environments, including extreme weather and rugged terrain. This durability means that the graphics will last through multiple rides, maintaining their vibrant appearance. For instance, many dirt bike riders find that high-quality decals resist fading and tearing, which is critical when riding through challenging trails.
4. Visibility and Recognition
In competitive settings, a distinctive graphics kit can improve visibility, making it easier for fans, sponsors, and officials to identify riders during races. With unique designs, a bike can become instantly recognizable, providing a marketing edge for sponsors. Furthermore, having a visually appealing bike can boost a rider’s confidence and enhance their overall racing experience.
In summary, dirt bike graphics kits are a smart investment for both hobbyists and professional riders. Whether you are looking to customize your bike, protect its surfaces, or ensure long-lasting durability, a graphics kit serves multiple purposes. To explore the top options available, check out our list of top 10 dirt bike wraps.
By utilizing a graphics kit, riders not only enhance their motorcycle but also contribute to a stronger identity and presence in the dirt biking community.
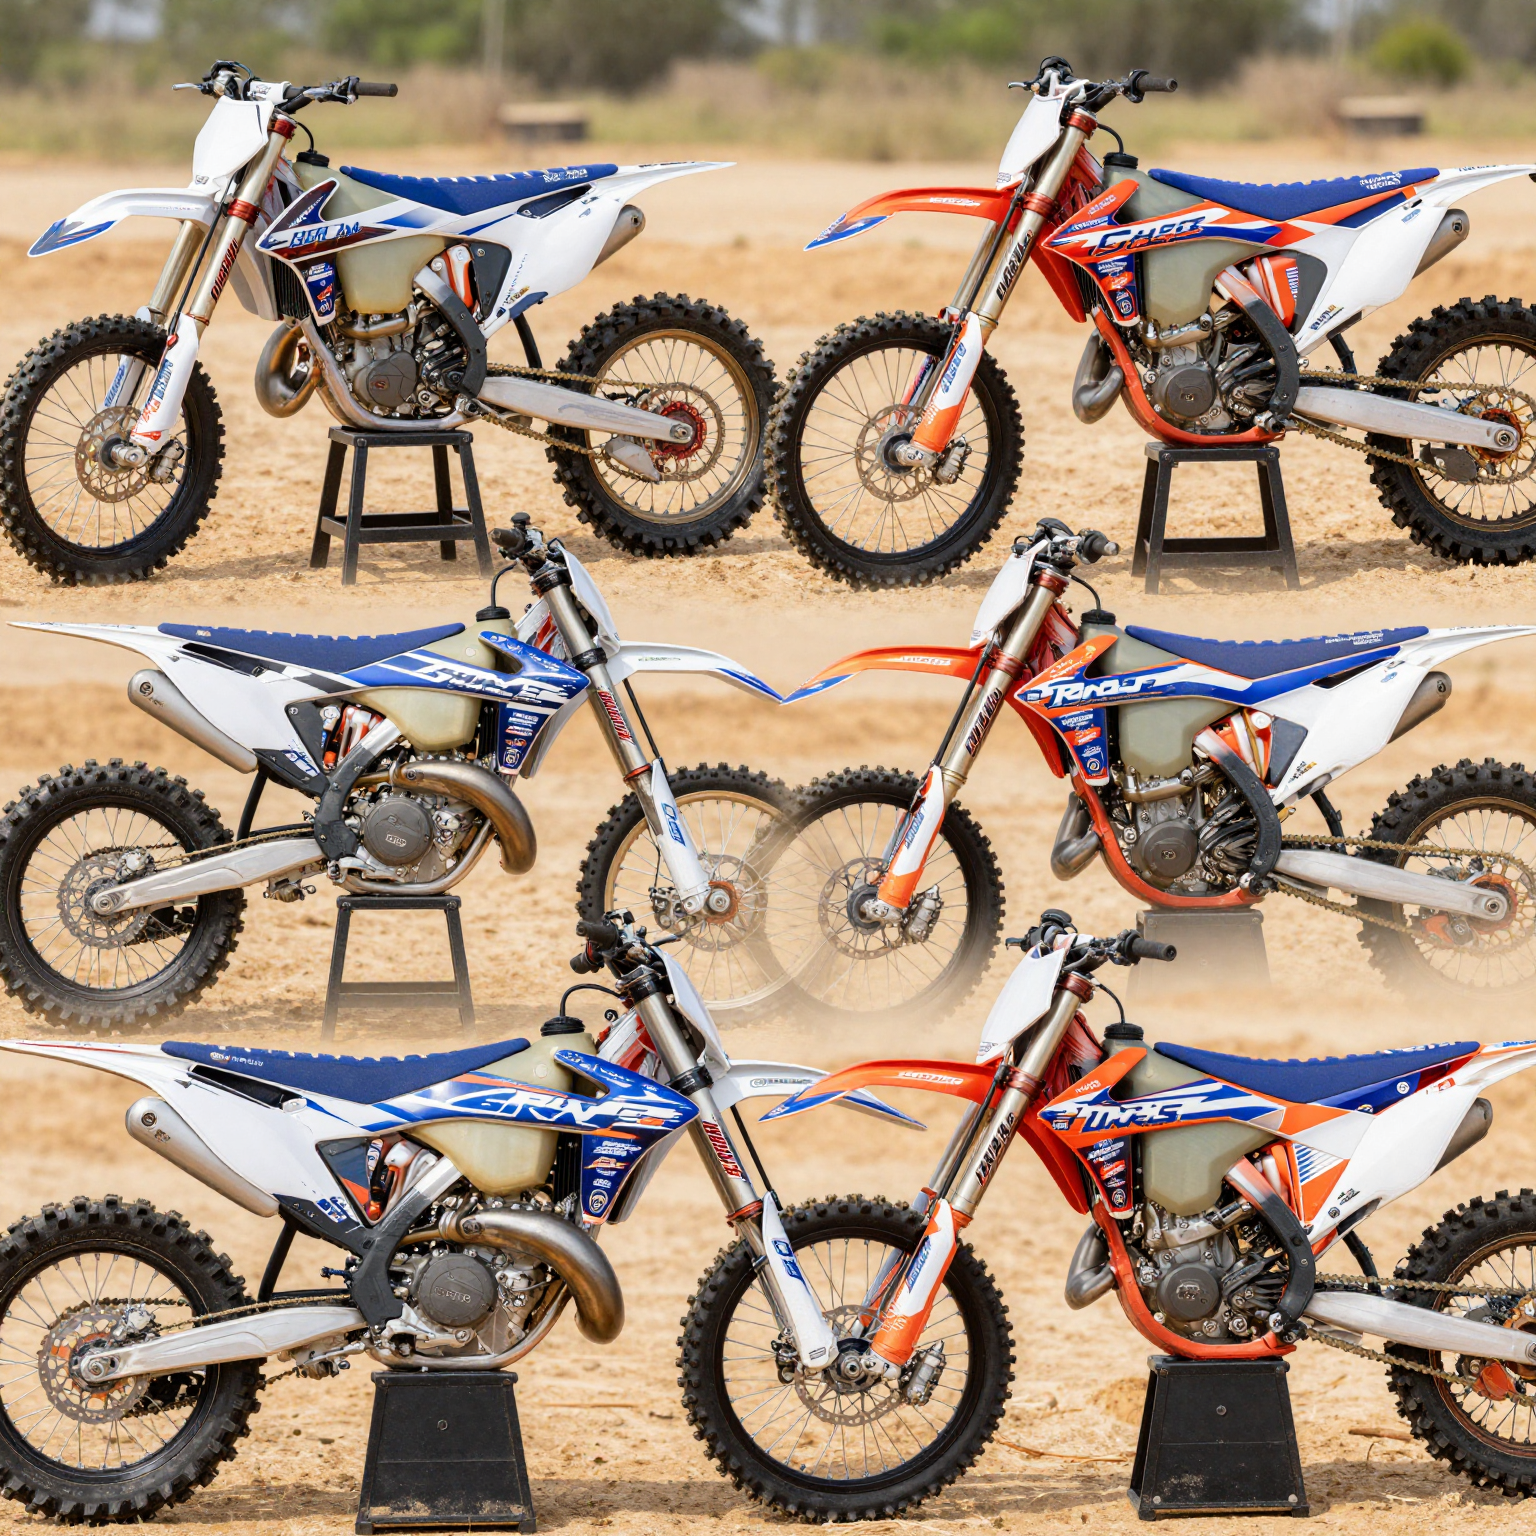
Comparison of Popular Dirt Bike Graphics Kits
When it comes to upgrading your dirt bike’s appearance, choosing the right graphics kit is essential. Below is a comparison of some of the top graphics kits available in 2023, highlighting their key features, prices, and customer ratings.
| Brand/Model | Features | Price | Customer Rating |
|---|---|---|---|
| Yamaha TTR230 Factory Series | Full coverage for fenders, shrouds, airbox | $189 | 4.7/5 |
| Yamaha YZ250F Factory Series | Carbon fiber texture, integrated number plates | $275 | 4.5/5 |
| Kawasaki KLX250S Shroud Kit | Sharp visual upgrade, durable vinyl | $99 | 4.5/5 |
The Yamaha TTR230 kit stands out for its quality and ease of installation, while the Yamaha YZ250F offers a performing aesthetic with great durability. For budget-conscious riders, the Kawasaki KLX250S kit offers excellent value. If you want to learn more about the top dirt bike wraps, feel free to explore additional options.
How to Apply Graphics Kits Effectively to Your Dirt Bike
Applying a graphics kit to your dirt bike can transform its appearance, reflecting your style and personality while also offering some protection to the underlying surfaces. Here’s a step-by-step guide on how to apply graphics kits effectively.
Preparation Steps
Before diving into the application, it’s crucial to prepare both yourself and your bike.
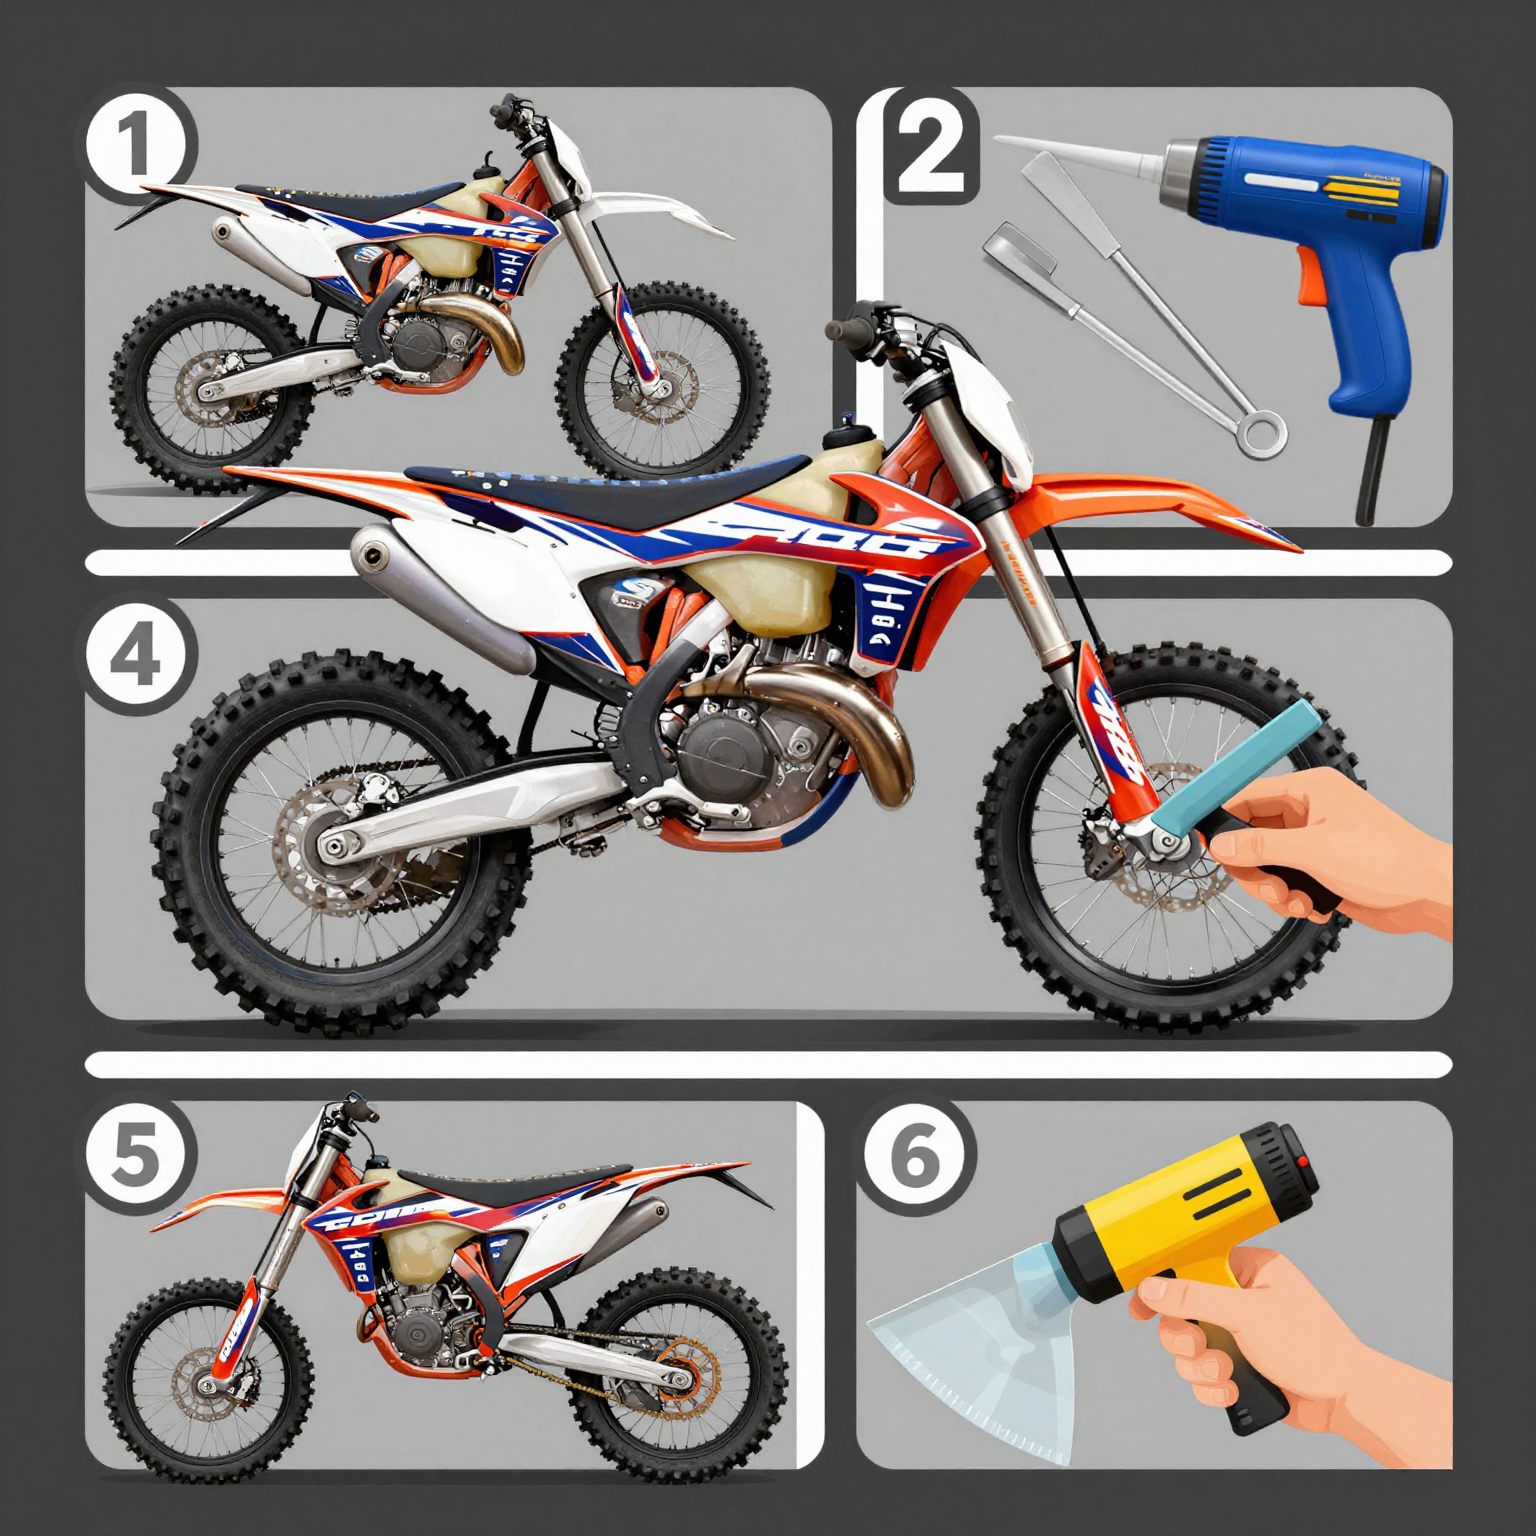
1. Gather Your Tools
You will need the following tools:
- Microfiber Cloth: For cleaning the bike surface.
- Heat Gun or Hair Dryer: To warm the vinyl and help it conform to curves.
- Squeegee: For smoothing out the graphics and removing air bubbles.
- Utility Knife: For trimming any excess vinyl.
- Measuring Tape: To ensure accurate alignment of the graphics.
- Vinyl Application Solution (optional): This can help reduce friction.
2. Clean the Surface
Thoroughly clean the area where you will apply the graphics:
- Use a silicone remover or isopropyl alcohol to eliminate grease, dirt, and old adhesive. Make sure there are no residues left on the surface as these can interfere with the adhesive properties of the graphics kit.
3. Prepare Your Environment
Choose a clean environment with minimal dust.
- Ideally, work indoors or in a sheltered area, avoiding direct sunlight and high humidity. These conditions can affect the vinyl’s adhesion.
Application Process
Now that you are prepared, it’s time to apply the graphics kit.
1. Review the Design
Before removing any backing, lay out the graphics on your bike to see how they fit. This step helps ensure proper placement and alignment before proceeding.
2. Warm the Vinyl
Gently heat the vinyl, particularly on curved surfaces:
- This helps the vinyl become more pliable, allowing for easier application. Be cautious not to overheat, as it may cause the vinyl to wrinkle or damage.
3. Peel and Position
Carefully peel back a corner of the backing paper and begin to lay the graphic:
- Start with one side and gradually work your way across the surface. If you have a complex design, it may help to align the graphic loosely before fully pressing it down.
4. Smoothing the Graphic
Once positioned, use the squeegee to push out any air bubbles:
- Work from the center outwards, applying even pressure. If air bubbles persist, you can puncture them gently with a utility knife and then press the air out.
5. Ensure Proper Adhesion
Allow the adhesive to set:
- It’s generally recommended to let the graphics cure for 24-48 hours before exposing it to dirt or water. This ensures a strong bond between the graphic and the bike’s surface.
Final Tips for a Seamless Finish
- Practice with Scrap Vinyl: If you’re new to applying graphics, practice on scrap pieces first.
- Take Your Time: Rushing can lead to mistakes. Investing time in careful application will yield better results.
- Use a Clear Coat: For added protection against UV rays and other elements, consider applying a clear coat after installation. This can preserve the vibrant colors of your graphics kit.
- Visual Guide: Refer to an illustration for better understanding; see below for an example.
By following these steps and tips, you can successfully transform your dirt bike’s appearance with a graphics kit. For more intricate designs, consider getting custom graphics made to match your specifications. Learn more about the top ten dirt bike wraps, or check out some custom designs at Moto Graphics and Custom Dirt Bike Graphics.
Conclusion
Applying a graphics kit to your dirt bike can be a rewarding project. With the right preparation, tools, and techniques, you can achieve a professional look that not only enhances your bike’s appearance but also adds a layer of protection. Happy riding!
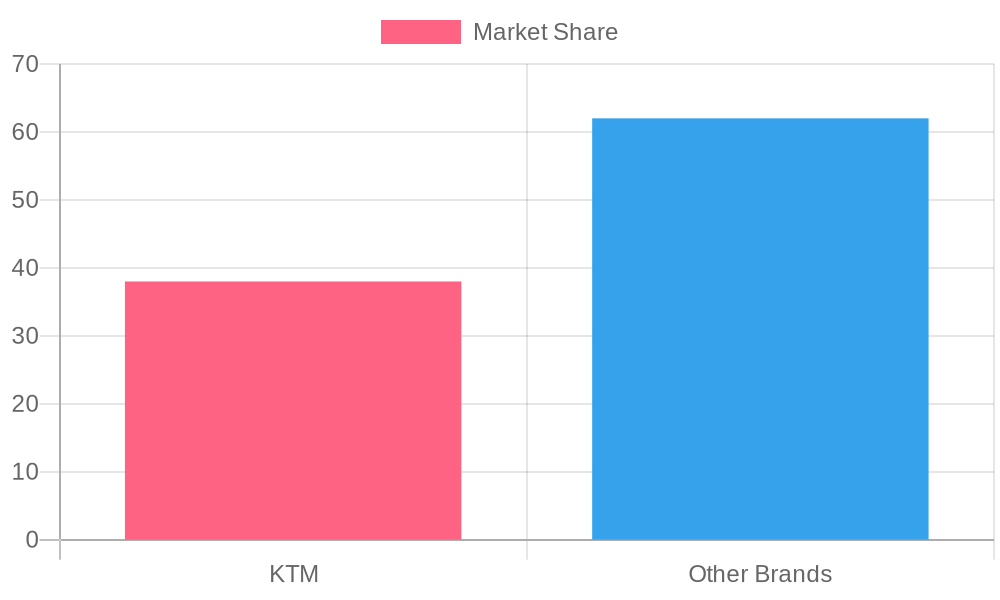
This chart represents the market share of the most popular dirt bike graphics kits in 2023, highlighting KTM’s dominance in the industry. For further insights on the top dirt bike wraps, make sure to check out our top 10 dirt bike wraps!
Expert Tips from Motorcycle Technicians on Choosing and Maintaining Graphics Kits
Selecting the right graphics kit for your dirt bike can dramatically enhance both its appearance and lifespan. Motorcycle technicians and experts provide insights and best practices that are invaluable for ensuring that your graphics not only look great but stand the test of time. Here are essential tips from industry professionals.
Choosing the Right Graphics Kit
- Material Matters: The quality of the vinyl is crucial. Technicians recommend choosing high-quality, UV-resistant vinyl. As stated by experts from the American Motorcyclist Association, “Choosing the right material tailored for your motorcycle model ensures a precise fit and longevity.”
- Adhesive Quality: A durable adhesive layer helps in keeping the graphics intact despite varying weather conditions. Make sure to avoid low-cost options, as they often feature poor backing materials leading to premature peeling or bubbling.
- Consider the Finish: Whether you prefer a matte finish, glossy look, or ceramic coating, each option comes with its own set of durability and aesthetic benefits. Ensure the finish aligns with your bike’s style.
- Fit Specifics: Always select kits designed specifically for your motorcycle model. It ensures the design integrates seamlessly without the risk of lifting or misalignment.
Application Tips
Proper application can significantly affect the performance and longevity of your graphics kit. Here are some expert-recommended processes:
- Preparation is Key: Ensure the surface is clean and dry. Technicians recommend using isopropyl alcohol for a thorough clean to remove any grease or wax. This preparation is emphasized by the Cycle Tech Pro Network, stating, “Preparation significantly prolongs the lifespan of your graphics kit.”
- Application Tools: Utilize a squeegee (preferably Teflon-covered) while applying the graphics to avoid scratches. Additionally, using a heat gun can help mold the graphic smoothly onto the bike.
- Environment: Aim to apply the graphics in a clean, dust-free area. Avoid applying the graphics during extremely humid or cold weather, which can hinder adherence.
Maintenance for Longevity
Once your graphics are in place, maintaining them is essential for keeping them in pristine condition. Here are some maintenance tips directly from industry experts:
- Regular Cleaning: Use mild soap and water for cleaning and avoid abrasive cleaners or power washers that can damage the graphics. Technicians suggest cleaning after rides, especially in dirt or salt environments, to prolong the graphics’ lifespan.
- Inspection: Regularly check for any lifting edges or cracks, especially after exposure to harsh weather conditions. Perform these inspections every few weeks and reapply adhesive if necessary.
- UV Protection: Apply a UV-protective wax or sealant to sustain the vibrancy of the colors and protect against sun damage. This is highlighted as critical advice from Harley-Davidson’s expert section on maintenance.
Quotes from Experts
In the words of a motorcycle technician from Motorcycle Mechanics Magazine, “Using high-quality materials and taking the time to install them correctly will often extend the graphics’ life by double.” This statement underscores the importance of both the choice and application of graphics kits.
Another technician advises, “Educating owners about care routines can help maintain the look and feel of their graphics. Simple steps can go a long way.”
Conclusion
Choosing and maintaining the right graphics kit can make your dirt bike stand out and endure the elements. By applying these expert tips, you can ensure not only a striking appearance but also the longevity of your investment. For more insights on quality wraps, be sure to check out our list of the top 10 dirt bike wraps. If you’re considering a custom design, explore the possibilities with our custom dirt bike graphics services.
Expert advice and practices can help you maximize your motorcycle’s appearance-so ride smart and keep your bike looking its best!
Conclusion on Customizing Dirt Bikes
In the world of dirt biking, personalization plays a significant role not just in aesthetics but in the overall riding experience. Throughout this article, we’ve explored the profound value of customizing dirt bikes using graphics kits.
Custom graphics kits offer motorcycle owners the unique opportunity to express their individuality and stand out on the trails. These kits allow for complete creative control, enabling riders to incorporate personal designs, logos, names, and sponsor branding. Not only do these elements enhance the bike’s appearance, but they also foster a sense of identity and pride among riders. For more insights into specific designs, check out our top 10 dirt bike wraps.
For motorcycle repair shops, there exists a vast avenue of opportunity in offering customization services. Personalized graphics serve as a value-added service that can increase customer loyalty and boost revenue. Repair shops can provide tailored design consultations, showcasing their commitment to customer satisfaction and helping clients achieve the desired look for their bikes. Furthermore, the effectiveness of graphics kits as a marketable service cannot be overstated; they help create repeat customers, especially during seasonal or event-oriented promotions.
Additionally, personalized graphics serve logistical functions for technicians, such as improving vehicle identification and preventing mix-ups in busy workshops. Custom decals can also enhance a technician’s professional image, utilized as mobile marketing tools that project quality workmanship.
Ultimately, the integration of customized dirt bike graphics is a crucial factor that enriches the biker’s experience while simultaneously offering substantial benefits to motorcycle repair shops. As customization continues to enhance both functionality and self-expression, it’s clear that investing in high-quality graphics kits is essential for anyone looking to ride in style.
Ready to Accelerate Your Bike’s Style?
Transform your dirt bike into a head-turning machine with high-quality graphics kits from MotoGraphics. Whether you’re an avid enthusiast looking to enhance your ride’s aesthetics or a repair shop aiming to offer premium customization options, our graphics kits provide the perfect balance of durability and design. Our selection is tailored to meet the needs of motorcycle owners and technicians alike, ensuring that every bike not only looks great but also stands out on the trails.
We understand that personalizing your ride is a reflection of your personality. Browse through our wide array of custom dirt bike graphics that match your unique style or explore the top 10 dirt bike wraps for inspiration.
Don’t settle for an ordinary bike-upgrade to a stunning look that will make you the envy of your peers. Check out our graphics kit offerings today! Visit MotoGraphics now and elevate your dirt bike’s appearance!
Let us help you ride in style!