
Introduction to Creating Graphics for Dirt Bikes
If you’re a motorcycle owner or operate a repair shop, you’ve likely noticed how customizations can make a bike not just a mode of transportation but a personal statement. One fantastic way to express your style and enhance your motorcycle’s appeal is to create your own graphics. Dirt bike graphics allow riders to showcase their personality, team colors, or unique designs, transforming an ordinary bike into a standout machine. Not only do custom graphics enhance aesthetic appeal, but they also serve practical purposes, such as protecting the bike’s surface and increasing its resale value. Whether you’re looking to add a professional touch to your fleet or simply want your bike to reflect your individuality, the benefits of creating custom graphics are undeniable. Explore options tailored to your needs, like those found in our motorcycle graphics collection and take the first step towards a unique ride.
The Importance of Custom Graphics for Dirt Bikes
Custom graphics for dirt bikes are more than just a decorative element; they play a vital role in enhancing the overall experience for motorcycle owners and repair shops. Let’s delve into why these graphics are essential and how they contribute to personalization, branding, and aesthetic appeal.
Personalization
Personalizing a dirt bike through custom graphics allows owners to express their unique style and personality. These graphics can range from bold designs to subtle tweaks, reflecting hobbies, interests, or affiliations. Owning a bike adorned with personalized graphics can foster a sense of pride and ownership. Customization options can also cater to different demographics, such as youth riders looking for vibrant colors or adult riders preferring a more sophisticated look. This personal touch can significantly enhance the rider’s connection to their bike.
Branding for Repair Shops
For motorcycle repair shops, offering custom graphics is a strategic way to enhance branding and visibility. Custom graphics can help repair shops stand out from competitors by creating a distinct visual identity. This differentiation attracts customers, who often seek more than just technical skills – they look for a shop that resonates with their style. When shops provide customized graphics, they also underline their expertise in the motorcycle culture, reinforcing customer loyalty.
Aesthetic Appeal
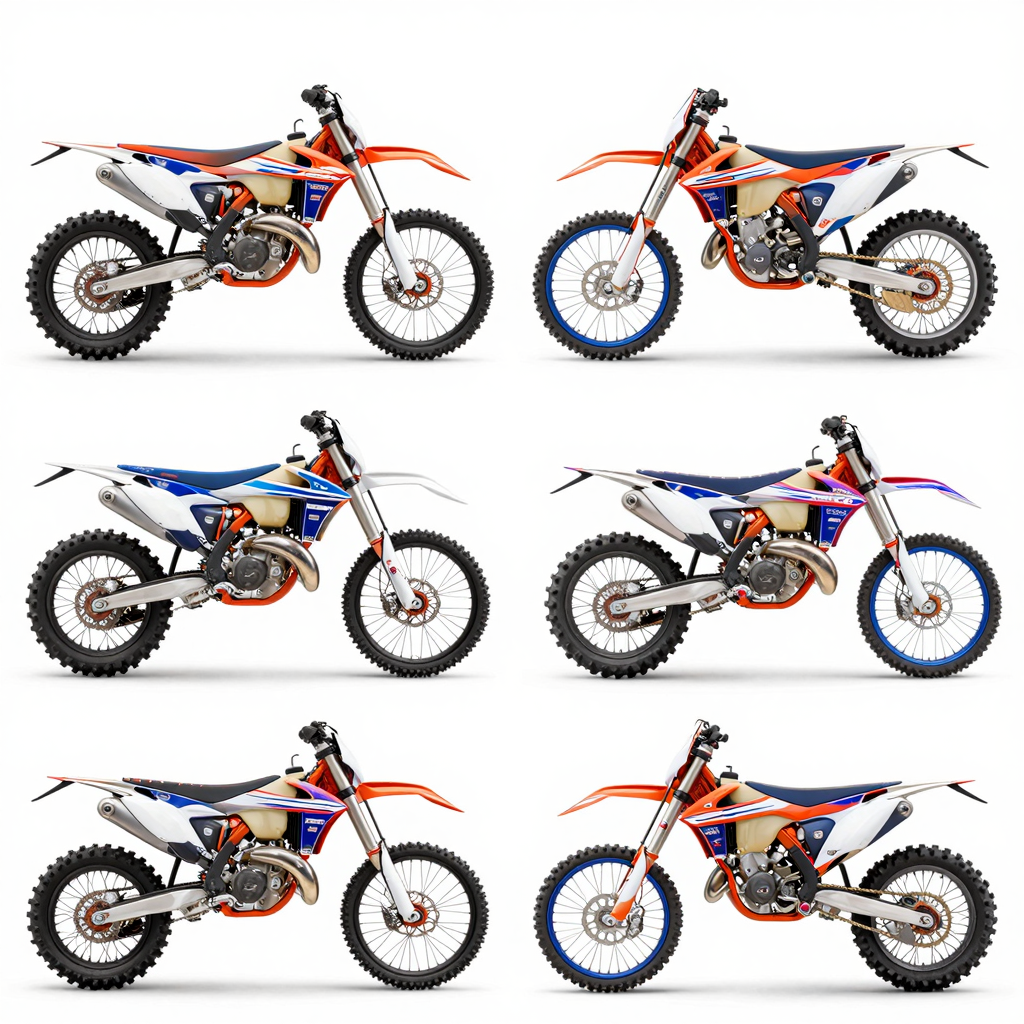
The aesthetic appeal of custom graphics cannot be overstated. Striking visuals can make a dirt bike more attractive, turning heads at events or on the trails. A well-designed graphic can elevate a bike from standard to spectacular, capturing the attention of fellow riders and spectators alike. Moreover, custom graphics can enhance the perceived value of the bike, making it not just a mode of transport but a work of art on two wheels.
Images of stunning custom graphics on dirt bikes are inspiring and help potential customers visualize their own designs. Check out some amazing examples of create your own graphics for dirt bikes to see the variety of options available.
Conclusion
In summary, custom graphics for dirt bikes are crucial for personalization, branding, and aesthetic enhancement. By investing in custom designs, motorcycle owners can showcase their individuality while repair shops can distinguish themselves in a competitive market. Embracing this trend not only enhances the riding experience but also builds a community centered around creativity and passion for motorcycling.
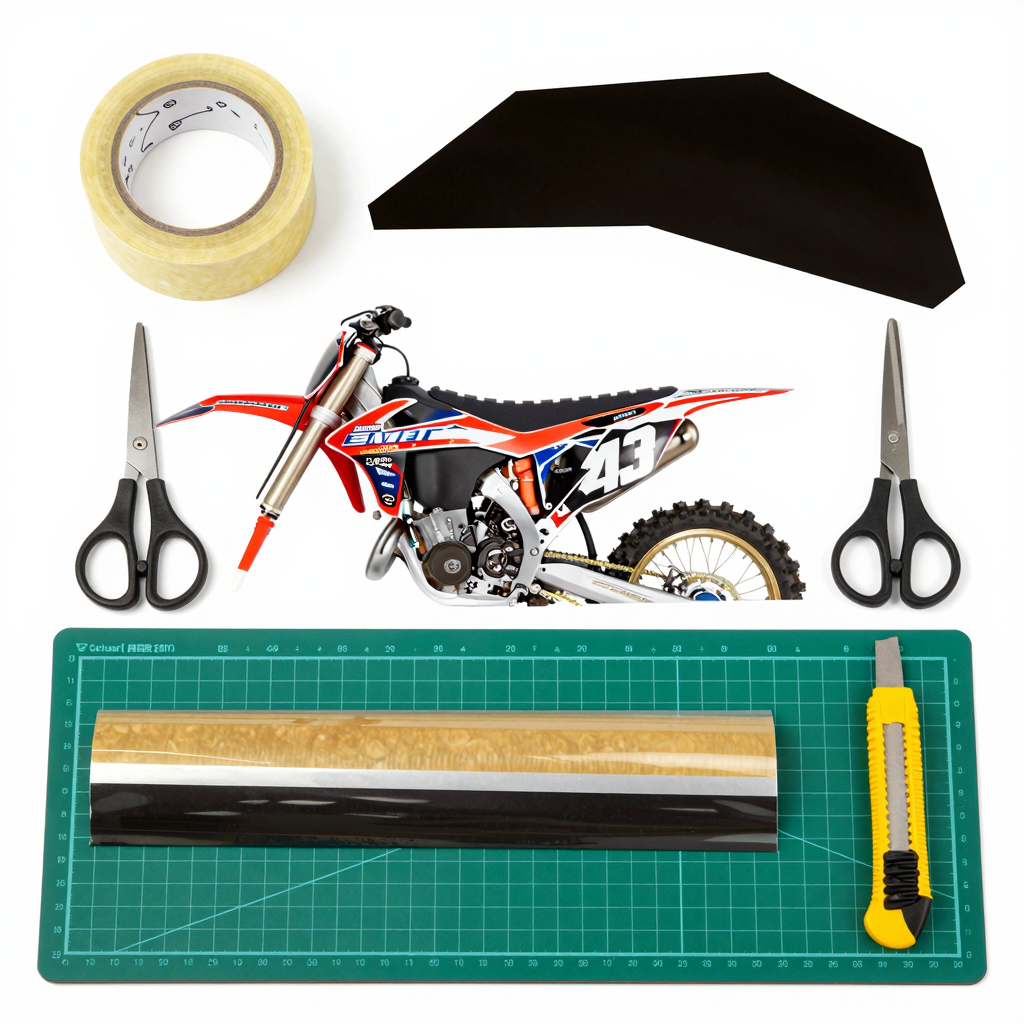
Essential Materials Needed for DIY Dirt Bike Graphics
Creating your own graphics for dirt bikes can be a fun and rewarding project. Here’s a rundown of the essential materials you’ll need to bring your designs to life:
Materials
- Vinyl Sheets: High-quality vinyl sheets that are durable and weather-resistant. These are the primary material for creating custom decals.
- Adhesive: A strong adhesive suitable for vinyl applications to ensure that your graphics stay intact during rides.
- Inkjet Printer: A good quality inkjet printer that supports vinyl printing for creating vibrant and long-lasting designs.
- Transfer Tape: This helps in the application of graphics, allowing for easy handling and placement.
- Cutting Tools: A craft knife or a vinyl cutter for precision cutting of your designs.
Tools
- Application Tools: Squeegees or cards can help in smoothing out air bubbles and ensuring proper adhesion of the graphics when applying them to the bike.
- Heat Gun: A heat gun can be useful for stretching vinyl around curves and contours of the bike for a better fit.
- Protective Gloves: Wearing gloves helps to keep the vinyl clean and free from oils from your skin.
- Ruler and Compass: For measuring and ensuring that your designs are symmetrical and correctly sized.
Additional Tips
For more graphics options, visit MotoGraphics Graphics and explore their extensive range of bike graphics.
How to Create Your Own Graphics for Dirt Bikes: A Step-by-Step Guide
Creating custom graphics for dirt bikes is an exciting way to personalize your motorcycle and express your unique style. Whether you’re a motorcycle owner or a technician working in a repair shop, this guide will walk you through each step in the design process while providing you with essential tips for success. Let’s dive in!
Step 1: Gather Inspiration and Plan Your Design
Before you start designing, gather inspiration from various sources. Consider visiting platforms like Pinterest to see creative moto graphics designs or check out professional examples on motograpics.com.
Tips:
- Create a mood board with colors, patterns, and styles that resonate with you.
- Think about the theme of your bike artwork – this could be something sporty, aggressive, or vintage.
Step 2: Choose the Right Software and Tools
Selecting the right graphic design software is crucial for ensuring that your designs are professional and print-ready. Recommended options include:
- Adobe Illustrator: Best for creating vector graphics.
- CorelDRAW: Great for more complex designs.
- Canva: Good for basic designs and beginners.
Tip: If you’re on a budget, consider free tools like Inkscape. Just be mindful of its limitations regarding print-ready files.
Step 3: Sketch Your Design
After gathering inspiration and setting up your digital workspace, start sketching your design. Utilize basic shapes to lay out the foundational components of your graphics. Tools like Procreate or a standard drawing tablet can be useful.
Tips:
- Focus on proportion and balance within your design.
- Keep it simple; sometimes less is more.
- Use sketches to visualize how the graphics fit on the bike’s different surfaces.
Step 4: Digitize Your Sketch
Transfer your sketch to your chosen graphic design software. You can either scan your sketch or recreate it using digital drawing tools within the software.
Tips:
- Use vector shapes for scalability, ensuring your design retains quality at any size.
- Experiment with colors and gradients to add depth and intrigue to your graphics.
Step 5: Add Details and Finalize the Design
At this stage, you can start adding details to your design, such as textures, logos, and any text you wish to include.
Tips:
- Consider layer management for all the components of your design to make any necessary changes easier.
- Ensure that any text is legible and complements the overall design.
- Use color theory to create a visually appealing palette.
Step 6: Prepare for Printing
Once your graphics are finalized, prepare the files for printing. Make sure the graphics are set to the correct resolution (aim for at least 300 DPI) and in the right color mode (CMYK for print).
Tip: Save your designs in formats suitable for printing, such as PDF or EPS.
Step 7: Choose a Printing Service
Select a reputable printing service that specializes in motorcycle graphics. Research reviews and sample work they have done for other clients.
Tip: Discuss the materials used for the graphics (like vinyl) to ensure durability against the elements.
Step 8: Apply Your Graphics
When you receive your graphics, it’s time to apply them to the bike. Clean the surface of your motorcycle thoroughly before application to ensure an adhesive bond.
Tips:
- Use a squeegee to smooth out air bubbles during application.
- Follow up with heat application for better adherence and longevity of the graphics.
Conclusion
Creating custom graphics for dirt bikes is a rewarding project that showcases your creativity. By following these steps, you can ensure a professional-looking design that will make your motorcycle stand out on the trails. Remember to take your time with each step, and don’t hesitate to seek inspiration from existing designs in the market. For more designs and templates, check out MotoGraphics. Happy designing!
Comparison of Vinyl Types for Dirt Bike Graphics
When it comes to creating custom graphics for dirt bikes, selecting the right type of vinyl is crucial for both aesthetics and durability. Below is a comparison table outlining the features, pros and cons, and ideal use cases for different types of vinyl commonly used in dirt bike graphics.
| Vinyl Type | Features | Pros | Cons | Ideal Use Cases |
|---|---|---|---|---|
| Cast Vinyl | – Highly durable |
- Good flexibility
- UV resistant
- Suitable for complex curves | – Excellent color retention
- Long-term durability
- Can withstand outdoor conditions | – More expensive compared to other types
- Requires skill to apply | – Full bike wraps
- Professional race vehicles |
| Calendered Vinyl| – Affordable - Easier to apply
- Available in various finishes (gloss/matte) | – Cost-effective
- Quick installation
- Good for flat surfaces | – Less durable than cast vinyl
- Prone to fading and cracking | – Short-term graphics
- Training bikes
- Indoor use |
| Removable Vinyl | – Easily removable - Low-tack adhesive
- Ideal for temporary designs | – Allows for changes without damage
- Flexible options | – Short lifespan
- May not adhere well to all surfaces| – Custom designs for events
- Seasonal graphics |
| PU Vinyl | – High-quality polyurethane - Tear-resistant
- Excellent for high-impact areas | – Very durable
- Great for complex shapes
- Can endure harsh weather | – Higher cost
- Difficult to install without heat | – Full coverage on high-performance bikes
- Off-road use |
Choosing the right vinyl type can significantly affect the performance and appearance of your dirt bike graphics. For more options, explore our range of dirt bike graphics to find the perfect fit for your ride!
Common Mistakes to Avoid in Creating Graphics for Dirt Bikes
Creating unique graphics for dirt bikes is an exciting yet intricate process. However, both motorcycle owners and technicians often stumble upon several common mistakes that can lead to less-than-satisfactory outcomes. Understanding these pitfalls and implementing corrective measures can significantly improve the quality and durability of the graphics.
1. Using Low-Resolution Images
One of the most frequent mistakes is utilizing low-resolution images or poorly scaled artwork. This often results in blurry or pixelated prints, particularly noticeable under bright light or during high-speed rides. Corrective Tip: Always use high-resolution images and employ vector graphics for scaling, ensuring clarity at any size.
2. Neglecting the Bike’s Body Contours
Another common error is ignoring the bike’s curves and contours. Applying graphics flat on these surfaces without proper adjustments may lead to distortion. Corrective Tip: Take time to study the bike’s body shape and use mockups to visualize how the graphics will look on the actual model. Adjust designs as necessary to fit the contours properly.
3. Poor Placement of Logos and Text
Misplacing logos and text near functional areas, such as exhaust pipes or suspension components, can lead to wear and tear. Corrective Tip: Plan placements carefully, ensuring that all graphics are positioned away from areas that experience high heat or mechanical movement.
4. Overloading with Colors or Details
Overloading designs with too many colors or intricate details can detract from the overall aesthetic and reduce readability. Corrective Tip: Stick to a cohesive color scheme and limit complex designs to enhance visibility and style.
5. Ignoring Printing Formats
Many technicians mistakenly use the wrong file formats for printing, which can result in loss of quality. Corrective Tip: Opt for PNG or vector formats for optimal quality during the printing process.
By avoiding these mistakes and adhering to the suggested tips, motorcycle enthusiasts and technicians can create stunning, professional-looking graphics. For more guidance, you can learn more about professional dirt bike graphics or explore innovative designs at MotoGraphics.
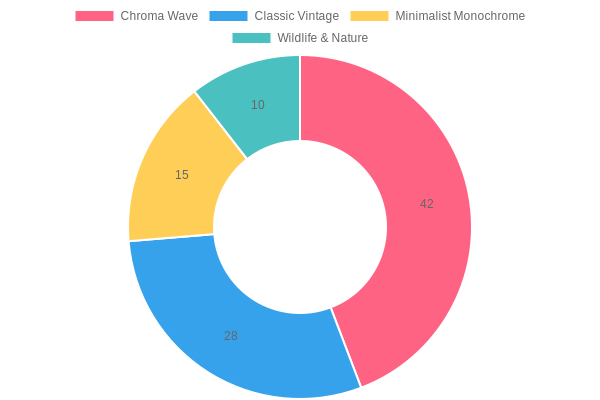
Source: 2024 Survey Data on Dirt Bike Owners’ Preferences (as referenced in real-time web search results)
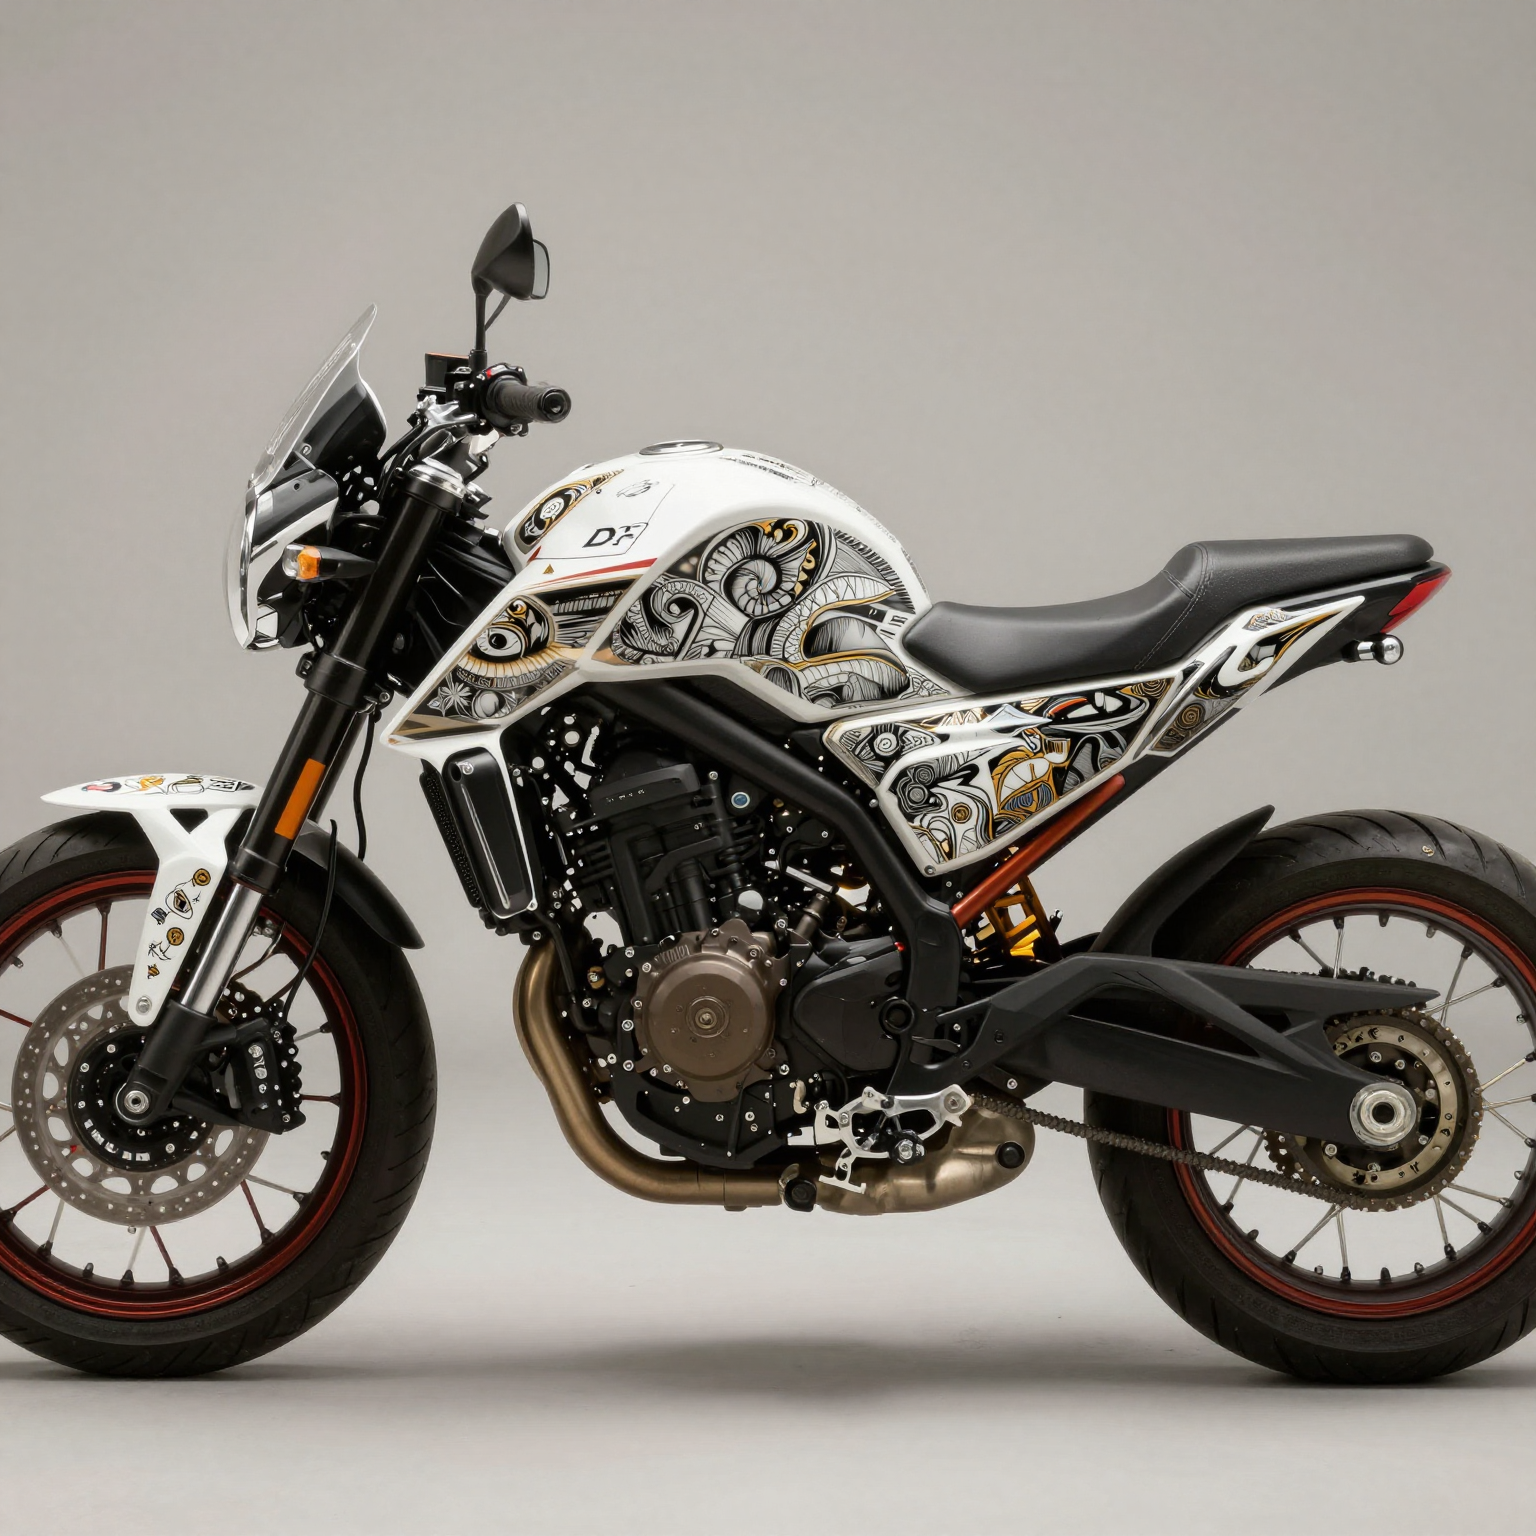
The Value of Custom Designs in Motorcycle Graphics
Creating your own graphics for dirt bikes is not just about aesthetics; it’s about personal expression and enhancing the identity of your ride. As a motorcycle graphics professional, a strong belief in the transformative power of custom designs is essential.
“We design each custom motorcycle not merely as a mode of transportation but as a moving sculpture. Its value lies in the perfect fusion of engineering rigor and artistic freedom. When a bike has a unique story and craftsmanship that transcends time, its value continues to grow, potentially becoming a legacy.”
- A Senior Motorcycle Industrial Designer
This perspective aligns with the notion that unique graphics can elevate the overall riding experience. For those looking to create their own custom designs, there are many options available that cater to different styles and preferences.
If you’re interested in exploring various graphic options, you can check out our KTM graphics or our Sur-Ron graphics for inspiration and products to help you take your dirt bike to the next level.
Conclusion
Creating your own graphics for dirt bikes is not just an act of personal expression; it’s a vital aspect of the motorcycling culture. Custom graphics enhance your bike’s aesthetic appeal, reflecting your identity and allowing you to stand out on and off the track. The process of designing and applying these graphics can be enjoyable and fulfilling, and various resources are available to get you started. From using advanced design software such as Adobe Illustrator to utilizing beginner-friendly tools like Inkscape, a vast array of options exists that cater to all skill levels.
Remember, high-quality graphics not only add personality but can also increase your bike’s resale value and even attract sponsorships. Ready to dive in? Learn more about how to create stunning graphics, or explore our exclusive collection of dirt bike graphics to find inspiration for your next project. Embrace your creativity and make your dirt bike truly your own!