
Introduction
In the world of dirt biking, personalization and protection are paramount. With high-speed adventures and rugged trails ahead, riders want their machines to stand out while ensuring they withstand the tests of time and terrain. This is where graphics kits play an essential role. Not only do they enhance the aesthetic appeal of dirt bikes, but they also provide an added layer of protection against the elements, scratches, and the wear and tear of off-road adventures. Personalized graphics help riders express their identity and individuality, transforming a standard bike into a unique reflection of their personality.
As motorsport enthusiasts continue to build and modify their rides, the demand for graphics kits tailored to specific models is rising. Companies like Moto Graphics offer a wide range of options to choose from, catering to various styles and preferences. In this article, we will delve into the importance of selecting the right graphics kits for your dirt bike, highlighting various designs and materials available in the market. We will explore how investing in a quality graphics kit can not only elevate the appearance of your motorcycle but also safeguard it from potential damage during rides. Whether you are a motorcycle owner looking to customize your ride or a motorcycle repair shop seeking to offer your clients top-notch solutions, this guide is crafted to provide valuable insights and options. Join us as we navigate through the world of dirt bike graphics kits, and get ready to revamp your rides with style and protection. For a closer look at our product offerings, check out our wide selection of dirt bike graphics.
Benefits of Using a Razor Dirt Bike Graphics Kit
Using a graphics kit for your Razor dirt bike comes with numerous advantages that go beyond aesthetics. Here’s a comprehensive list of the benefits that make these kits worthwhile:
- Aesthetic Customization: Graphics kits enhance the bike’s visual appeal, allowing riders to showcase personalized designs, colors, and themes.
- Brand Representation: For competitive riders, these kits provide a platform for displaying sponsor logos and personal branding, enhancing professional presence.
- Protection from Damage: Quality graphics serve as a protective layer against scratches, dirt, and UV rays, keeping the bike’s bodywork in better condition over time.
- Resale Value Increase: A well-designed graphics kit can elevate the bike’s appearance, potentially increasing its resale value and attracting more buyers.
- Easy Application and Removal: Most graphics kits come with user-friendly adhesive backing, making them easy to apply and remove without damaging the bike’s paint.
- Durability: High-quality materials used in these kits are designed to withstand harsh outdoor conditions, ensuring long-lasting appearance and protection.
- Increased Visibility: Bright and bold graphics can enhance visibility during rides, contributing to safety by making the bike more noticeable on the road or track.
- Enhanced Ownership Experience: Personalizing a dirt bike with a graphics kit adds a sense of ownership and pride, allowing each rider to express their individuality and passion for riding.
For further customization options, check out MotoGraphics’ bike graphics kits to find the right fit for your Razor dirt bike! With the right graphics kit, you can transform your ride and enhance both its performance and your enjoyment.
To learn more about the benefits of other graphics kits for different bikes, visit MotoGraphics’ eRide graphics collection.
Comparison Table of Popular Graphics Kits
| Graphics Kit Name | Price Range | Material Quality | Customization Options | User Ratings |
|---|---|---|---|---|
| Razor Dirt Bike Graphics Kit 1 | $XX – $XX | High-quality vinyl | Yes | ★★★★☆ |
| Razor Dirt Bike Graphics Kit 2 | $XX – $XX | Premium material | Limited | ★★★☆☆ |
| Razor Dirt Bike Graphics Kit 3 | $XX – $XX | Durable | Yes | ★★★★★ |
Key Components Explained
- Price Range: Indicates the cost of the graphics kits, which can vary based on the design and manufacturer.
- Material Quality: Usually rated based on the durability and weather resistance of the materials used (e.g., vinyl, laminates).
- Customization Options: Refers to whether the graphics can be personalized for specific designs or models.
- User Ratings: Generally sourced from customer feedback on platforms that offer the product.
If you are interested in selecting a graphics kit, you may want to check out options available at Moto Graphics for a variety of directly sourced graphics relating to razor dirt bikes.
DIY Installation Tips for Motorcycle Graphics Kits
Installing a graphics kit on your motorcycle can transform its appearance and personalize it to reflect your style. However, proper installation is critical to ensure durability and longevity. Below are some DIY tips designed for ease of use, particularly beneficial for both motorcycle owners and technicians.
Essential Tools Needed
Before embarking on your graphics installation journey, gathering the right tools can make a significant difference in the outcome. You’ll need:
- Heat Gun or Hair Dryer: Essential for softening the vinyl, making it more pliable and easier to apply.
- Squeegee: A plastic squeegee helps in smoothing out air bubbles and ensuring a secure bond with the motorcycle surface.
- Rubbing Alcohol: Used for cleaning the surface of the bike beforehand to ensure that the graphics adhere properly.
- Utility Knife: For trimming excess vinyl, ensuring clean edges.
- Measuring Tape: Helps in aligning your graphics perfectly on the bike.
- Gloves: Prevents fingerprints on the adhesive surface and ensures a clean installation.
Steps for Effective Installation
- Prepare the Surface: Start by cleaning the motorcycle’s surface with rubbing alcohol to remove dust, oil, and any contaminants that may hinder adhesion.
- Plan Your Layout: Before removing any backing paper from the graphics, position your graphics without peeling them. This allows you to visualize the layout and make necessary adjustments.
- Use Heat: Apply heat uniformly to the graphic as you work. This step makes the vinyl more flexible and easier to conform to curves and contours.
- Application: Begin applying your graphics from one side, using a squeegee to push air out and firmly adhere the material. Work slowly and gradually remove the backing layer as you apply.
- Finishing Touches: After applying the graphics, use the utility knife to trim any excess material and go over the edges with the squeegee again for a secure bond.
Common Mistakes to Avoid
- Skipping Surface Preparation: Not cleaning the bike’s surface properly can lead to bubbles and peeling.
- Applying in Direct Sunlight: This may cause the adhesive to become too hot and lose its grip. Work in a shaded area or indoors if possible.
- Using a Poor Quality or Incorrect Adhesive: Ensure the graphics kit is suitable for your type of motorcycle. Some kits are designed for high-performance applications that require specific adhesives.
- Rushing the Process: Take your time during installation to avoid costly mistakes. Patience is key to achieving a professional finish.
Conclusion
Installing a graphics kit can be a straightforward DIY process if done correctly. By using the right tools and following best practices, motorcycle enthusiasts can achieve impressive results without needing to visit a shop. For an extensive selection of high-quality graphics, check out our graphics kits.
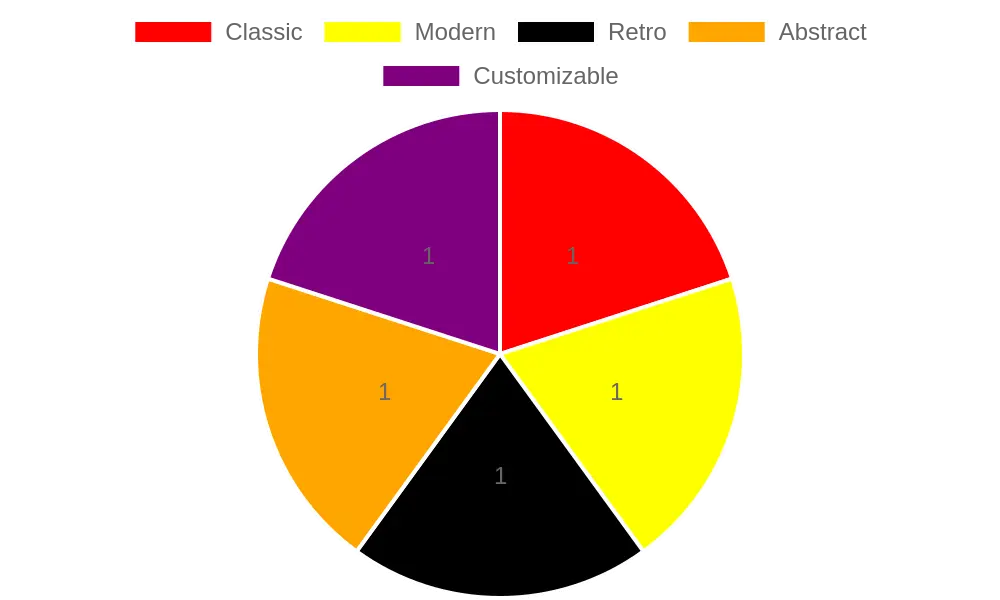
Choosing the right graphics kit for your motorcycle can significantly enhance its look and protect its body, but the selection process involves careful consideration of several factors. Here’s a comprehensive guide to help motorcycle owners make informed decisions.
1. Compatibility with Bike Model
When choosing a graphics kit, the very first factor to consider is compatibility with your specific bike model. Graphics kits are often designed to fit specific brands and models, so it’s crucial to ensure that the kit you choose is compatible with your motorcycle.
- Manufacturer Specifications: Check whether the graphics kit is tailored for your bike’s make and model. For instance, if you own a dirt bike, look for kits specifically designed for dirt biking.
- Installation Considerations: Compatibility also means ensuring that the graphics kit can be installed without any major adjustments. Some may require professional installation, which can add to the overall cost.
You can browse different bike graphics options to find the perfect fit for your motorcycle.
2. Design Preferences
The design of the graphics kit is also a critical aspect to consider. This is where personal style comes into play.
- Color Schemes and Patterns: Choose colors that not only appeal to you but also complement your bike’s original color. Graphics kits come in a variety of styles-ranging from aggressive, sporty graphics to more subtle designs.
- Customizability: Some companies offer custom graphics that allow you to design your own artwork. If individuality is vital to you, look for brands that provide customization options.
You can find various styles and designs at Motograpics for nearly all popular bike models.
3. Budget Constraints
Graphics kits vary significantly in price, so it’s essential to set a budget before you start shopping.
- Quality vs. Price: Higher-priced kits often offer better materials and durability. Consider durable vinyl and UV-resistant options, especially if you ride often. Cheaper options may fade quickly, requiring replacements sooner.
- Value for Money: Look for deals and packages. Sometimes, purchasing a graphics kit in conjunction with other accessories can save money over time.
4. Purpose of Use
Think about how you will use your motorcycle. Is it primarily for recreational use, racing, or daily commutes?
- Racing vs. Regular Use: If you’re racing, you might want a graphics kit that can withstand tougher conditions and reduce drag. On the other hand, if your bike is for casual riding, aesthetic appeal may take precedence.
- Durability Enhancements: Racing graphics kits often use thicker materials to resist wear and tear better. Make sure to choose based on your intended use.
5. Reviews and Recommendations
Prioritize researching reviews and recommendations for specific brands or kits.
- Professional Reviews: Websites like Automotor Blog offer insights into the best graphics kits available in the market.
- User Feedback: Check forums, Reddit threads, or motorcycle community sites to learn from other motorcycle owners’ experiences.
Conclusion
Selecting the right graphics kit for your motorcycle requires careful consideration of various factors, including compatibility, design preferences, and budget constraints. By taking the time to assess your needs and researching options, you can enhance not just the look of your bike but also its longevity.
For more details on available graphics kits for your specific model, consider visiting the various product categories on Motograpics to find a design that suits your style and needs.
Overall, the right graphics kit can add style, protect your bike, and even enhance its resale value, making it a worthy investment for any motorcycle enthusiast.
User Satisfaction Ratings for Graphics Kits
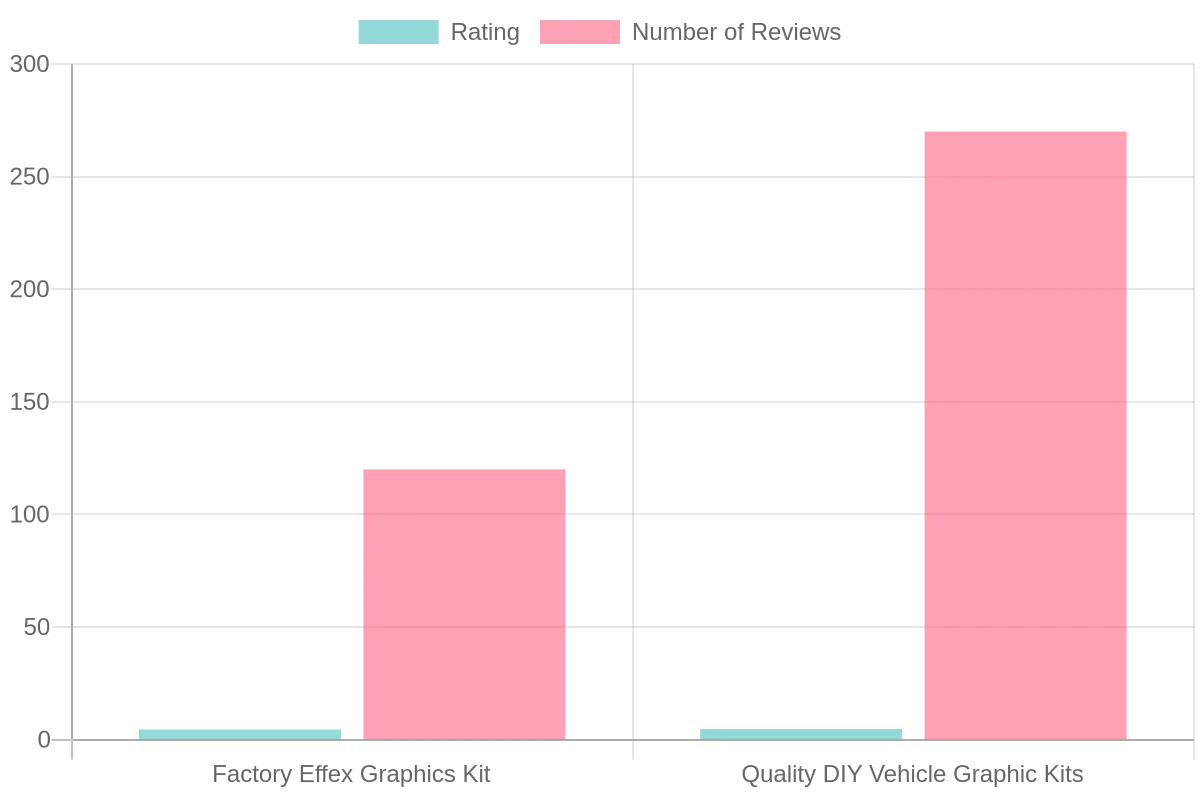
User satisfaction ratings are vital in understanding the quality and appeal of graphics kits available for dirt bikes. Below is a chart demonstrating the ratings from various user reviews, illustrating the satisfaction levels of two popular graphics kits:
Graphic Kits Ratings Chart
Comparison of Ratings
| Graphic Kit | Rating | Number of Reviews |
|---|---|---|
| Factory Effex Graphics Kit | 4.5 out of 5 | 120 |
| Quality DIY Vehicle Graphic Kits | 4.7 out of 5 | 270 |
Both of these graphics kits have received positive feedback from users, illustrating their reliability and the overall satisfaction they provide. The Quality DIY Vehicle Graphic Kits lead the chart with a satisfaction rating of 4.7 out of 5 based on a higher number of reviews compared to the Factory Effex Graphics Kit, which has a rating of 4.5 out of 5.
For more detailed options and specifications, you can check out our graphic kits collection.
Conclusion
Understanding user satisfaction is crucial when selecting the right graphics kit for your dirt bike. The insights gathered here will help you make an informed choice based on fellow riders’ experiences and preferences.
Graphics kits offer much more than just visual appeal for your motorcycle; they serve a dual purpose by enhancing both aesthetics and protection. As industry experts advocate, a well-designed graphics kit can transform the look of a bike, ensuring that it stands out on the road.
“Custom graphics are not just for looks; they serve as a protective layer that maintains your motorcycle’s integrity while showcasing your unique style.” – Motorcycle Customization Expert
When it comes to customization, motorcycle owners should consider the following benefits of graphics kits:
-
Enhanced Aesthetics: Custom graphics allow riders to express their personality and make their bikes visually distinct. The right color scheme and design can turn an ordinary ride into a head-turner.
-
Protection: High-quality vinyl graphics act as a shield against scratches, dirt, and UV damage, preserving the bike’s original paint and surface quality.
-
Increased Resale Value: By protecting the motorcycle’s finish and allowing customization, graphics kits can help maintain or even enhance the bike’s resale value.
For motorcycle enthusiasts looking to upgrade their ride, exploring various options can be beneficial. Check out our range of graphics kits tailored specifically for different models, such as Surron graphics or the versatile KTM graphics.
In conclusion, choosing the right graphics kit for your dirt bike is an essential investment that goes beyond mere aesthetics. It significantly enhances safety by improving visibility on the track and offers a unique opportunity for customization, allowing personal expression through various styles and colors. Moreover, a well-designed graphics kit can also help in increasing the resale value of your bike, making it more appealing to potential buyers should you ever decide to sell. Durability is another key factor; high-quality graphics withstand the rigors of off-road riding and can protect the paint and bodywork from scratches and wear.
As motorcycle owners, whether you’re a casual rider or a competitive racer, investing in a graphics kit not only elevates the appearance of your bike but also shields it from damage, enhancing your overall biking experience. With a plethora of options available, including unique designs and superior materials, it’s crucial to assess your needs and preferences carefully.
Visit our extensive collection of graphics kits on Motograpics and explore customization options today. Take the plunge to make your dirt bike truly yours while safeguarding it for countless rides to come!
Introduction to Razor Dirt Bike Graphics Kits
Razor dirt bike graphics kits are essential for riders looking to enhance the aesthetic appeal and protection of their motorcycles. These graphics not only offer a fresh look but also safeguard the bike’s original paintwork against scratches and wear.
Benefits of Using Razor Dirt Bike Graphics Kits
- Aesthetic Appeal: Custom graphics can make your bike stand out.
- Protective Layer: They protect the bike’s surface from scratches and other damages.
- Easy Application: Most kits come with easy-to-follow installation instructions.
How to Choose the Right Razor Dirt Bike Graphics Kit
When selecting a graphic kit, consider the following factors:
- Compatibility: Ensure the kit is designed for your specific Razor model.
- Durability: Look for high-quality materials that are weather-resistant.
- Design Options: Consider different styles that reflect your personality.
Installation Guide for Razor Dirt Bike Graphics Kits
Installing a graphics kit can be a straightforward process when done correctly:
- Preparation: Clean the surface of your bike thoroughly.
- Alignment: Position the graphic in place without removing the backing.
- Application: Gradually peel off the backing while applying the graphic, using a squeegee to prevent air bubbles.
For more detailed guides and tutorials, refer to community forums or product reviews from other users.
Where to Buy Razor Dirt Bike Graphics Kits
You can find a variety of Dirt Bike Graphics tailored for Razor bikes at reputable online stores. Explore options for custom designs or ready-made graphics that fit your style.
Conclusion
Razor dirt bike graphics kits are a great investment for motorcycle owners looking to protect and personalize their bikes. With careful selection and proper installation, these kits can enhance both the look and longevity of your motorcycle.