
Wet Versus Dry Install on Textured Shrouds: The Basics
A dirt bike custom graphics kit is a set of pre-cut vinyl decals printed with your artwork and laminated for protection, trimmed to fit specific plastics such as shrouds, fenders, and number plates. Whether it stays on comes down to how the vinyl meets the plastic underneath.
A wet install uses application fluid. The fluid sits between the film and the panel, so the vinyl slides and can be repositioned before the adhesive sets. A dry install skips the fluid: the film goes straight onto the panel and squeegee pressure alone bonds it.
Textured shrouds change the outcome. Their grained, matte surface traps air and keeps the adhesive from touching the plastic evenly, which changes how fluid behaves, how air escapes, and how well edges stay down. This guide compares both methods on grained shrouds — adhesion, air evacuation, and the trade-offs — and points to model-specific graphics kits for the plastics your shop handles most.
Why Textured Shrouds Change the Rules
Textured shrouds are not simply rough plastic. Their micro-texture and molded grain form a dense field of peaks and valleys instead of a flat plane. A pressure-sensitive adhesive bonds only where it touches the substrate, so every valley is dead space.
That geometry makes trapped air the dominant failure mode. Press a decal onto a grained surface and air is sealed into the valleys before the adhesive can flow into them. Those pockets act as small lift points, and they grow under vibration, washing, and heat cycling.
The Four Variables That Decide the Bond
Lower effective contact area. Adhesion scales with the area the adhesive actually wets, not the area the decal covers. On smooth plastic the contact patch approaches the full footprint; on a coarse molded grain it falls well below it, and peel and shear strength drop even when the decal looks perfectly applied.
Surface energy and contamination. Mold release agents, silicone overspray, and handling oils collect in those same valleys and lower the surface energy of the plastic. Adhesive bonds best to a clean, high-energy surface, so residual release chemistry creates a weak boundary layer exactly where the bond needs to be strongest. Two shrouds from different molds can behave very differently for this reason alone.
Conformability limits. Calendered vinyl is stiffer and resists stretching into deep grain, so it bridges the peaks and leaves the valleys empty. Cast vinyl is thinner and more compliant and sinks into the texture with far less force. Model-specific graphic kits cut for a particular shroud are the practical way to see how different films behave on real molds.
Temperature during application. Warm plastic and warm vinyl flow more readily. In the cold, the adhesive is stiff and tack is low, so the film will not deform into the grain and air entrapment is close to certain. Warm both and the film softens enough to be pressed into the texture instead of laid over it.
| Surface condition | Effective contact | Air entrapment risk | Practical implication |
|---|---|---|---|
| Smooth, clean plastic | High | Low | Light squeegee pressure is usually enough |
| Fine molded grain | Moderate | Moderate | Firm pressure plus post-heating |
| Coarse grain with release residue | Low | High | Degrease first, then heat and work the film in |
| Cold panel, cold film | Low | Very high | Warm both before touching the decal down |
What This Means for Method Choice
Grain depth, not preference, should drive the decision. Where grain is fine and contact area stays high, a dry install with heat and pressure works well because there is little void volume to displace. Where grain is coarse and the voids are deep, air has to be pushed out of the valleys before the adhesive grabs, which is a different mechanical problem.
It also changes what “done” looks like. On textured shrouds, a finished install shows grain telegraphing through the film and edges that stay sealed after a heat cycle. A decal that sits flat and looks clean on the bench proves nothing.
Tools and Materials Checklist for Both Install Methods
Stock the bay with this kit before your techs touch a shroud, so neither method stalls halfway through. Keep it as a line item in your shop SOPs.
- Application fluid and a clean spray bottle (wet install only — two or three drops of mild soap in 500 ml of water is enough; never neat dish detergent)
- Lint-free microfiber cloths, at least four per bike, washed separately from shop rags
- Isopropyl alcohol or a dedicated surface prep cleaner for a final degrease pass, on both methods
- Felt-edge or hard plastic squeegee — felt edges protect gloss laminates, hard plastic bites better on textured shrouds
- Heat gun or hairdryer on a low setting to relax vinyl over curves and recessed bolt holes
- Adhesion promoter or edge primer for bare and low-surface-energy plastic — wiped on the cleaned panel before the film goes down, not after
- Sharp trimming blade with a fresh tip for clean relief cuts around vent cutouts
- Masking tape for hinge-style positioning and for tacking over bolt holes during alignment
- Temperature gauge — surface and ambient readings both matter; most films behave best between 20 and 30 C (68 to 86 F)
If you are restocking graphics alongside consumables, our KTM graphics kits cover film thickness and laminate finishes to match the shrouds you handle most. Post this list at the bench and check it off before every job; it is the cheapest way to avoid a reprint.
Side by side, the decision holds whether you are wrapping a set of Surron Light Bee graphics or a full race kit on molded plastic.
Wet Install vs Dry Install on Textured Shrouds
| Factor | Wet Install | Dry Install |
|---|---|---|
| Adhesion on textured plastic | Strong, squeegee-driven bond | Relies on pressure, can miss pockets |
| Air bubble and air entrapment | Bubbles float out, easy escape | Trapped air, hard to chase out |
| Repositionability during application | Slides freely until you squeegee | One-shot placement, almost no second tries |
| Working time before adhesive grabs | Long, 10-20 minutes of play | Seconds, grabs on contact |
| Cure time before washing or riding | 24 hours before riding, 48 before washing | 24 hours before riding, 48 before washing |
| Heat and stretching requirements | Moderate heat, light stretching | More heat, aggressive stretch around edges |
| Skill level needed | Beginner-friendly, forgiving to mistakes | Experienced hands only |
| Edge-lifting risk | Low once cured properly | Higher on tight compound curves |
| Recommended use case (flat vs textured panels) | Textured shrouds, complex multi-piece kits | Flat panels and simple shapes |
| Cleanup | Soapy water spray, towel wipe-down | Minimal, just tools and liner |
Wet Install Walkthrough: A Repeatable Procedure for Textured Shrouds
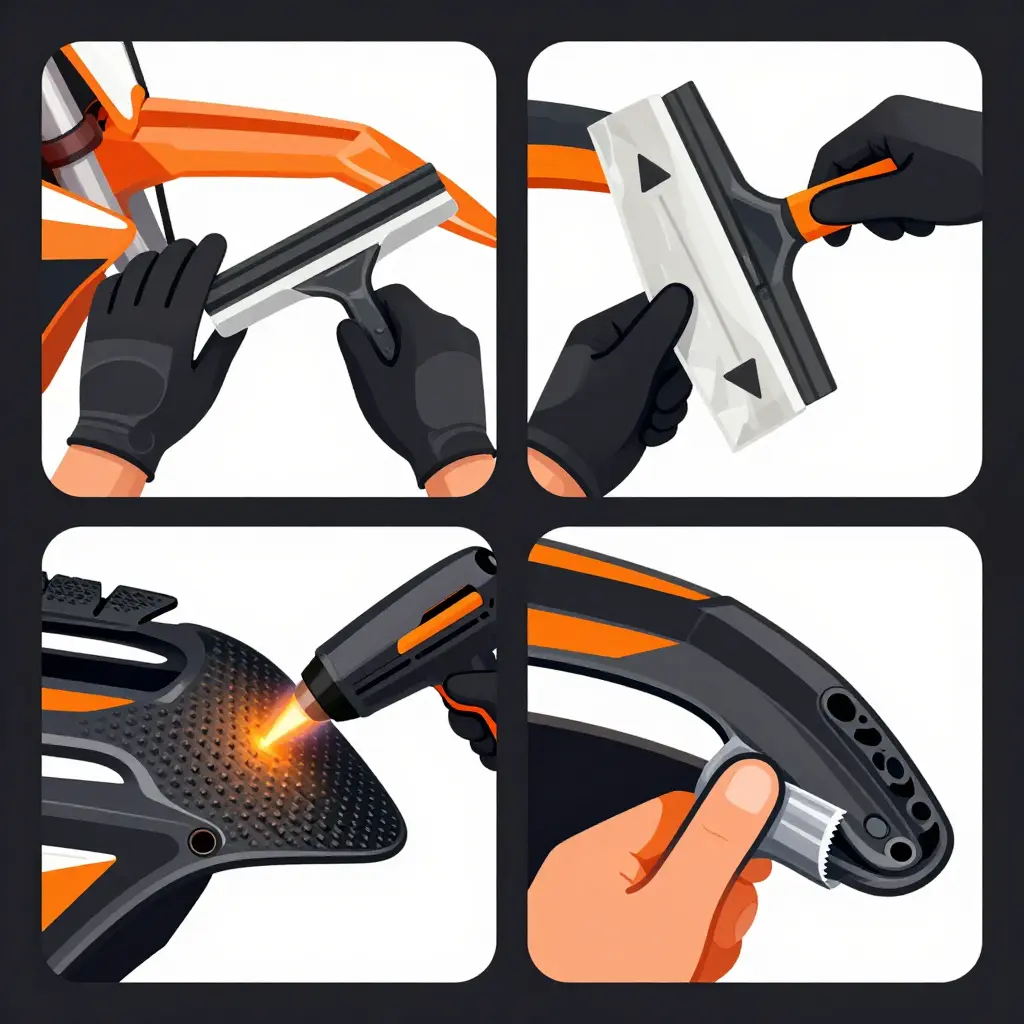
Wet install is the right call when the kit has to conform to deep grain, molded ribs, or compound curves that would otherwise trap air under the adhesive. If the liner is fighting the surface, or you need repositioning slack on a freshly molded shroud, work through the sequence below in order.
-
Clean and degrease the panel. Wash the shroud with mild soap, rinse it, then wipe it down with isopropyl alcohol and let it flash off completely. Wax, silicone, or chain lube left behind shows up later as a bubble or a lifting edge.
-
Mix and spray the application fluid. Two or three drops of mild soap in 500 ml of water, misted evenly over the panel. A light, consistent coat gives the film slip without flooding the adhesive — which matters more on grain, where fluid has nowhere to drain.
-
Lay the kit and align it against reference points. Peel the liner from one end, set the piece on the wet panel, and line it up on bolt holes, shroud edges, and vent cutouts before pressing anything down. Pre-cut kits from our KTM graphics range speed this up, since every edge is already trimmed to the shroud shape.
-
Squeegee from the center outward. With a felt-edged squeegee, push in overlapping strokes from the middle of the panel toward the perimeter while your free hand holds the film steady. Overlap each stroke by about a third so no fluid gets pushed back under the graphic.
-
Evacuate fluid and air toward the panel edges. Work remaining fluid and any trapped air to the nearest edge, then lift that edge slightly so it can escape. Never force fluid into a corner or a tight radius.
-
Check the texture valleys for trapped fluid. Sight across the panel at a low angle under good light and squeegee any fluid pooling in the grain valleys toward an edge. Repeat until no dark, glossy pockets remain.
-
Heat-set over the grain. With a heat gun on low, 60 to 70 C (140 to 160 F), warm the film evenly and press it into the valleys with a squeegee or a gloved fingertip. Keep the gun moving and stop before the vinyl turns glossy or starts to stretch.
-
Respect the post-install dwell period. Leave the kit undisturbed for 24 hours before the bike is ridden, 48 hours before washing, and 72 before pressure-washing, so the adhesive can fully bond and residual fluid can escape. Skipping the dwell is the most common reason a good wet install fails a week later.
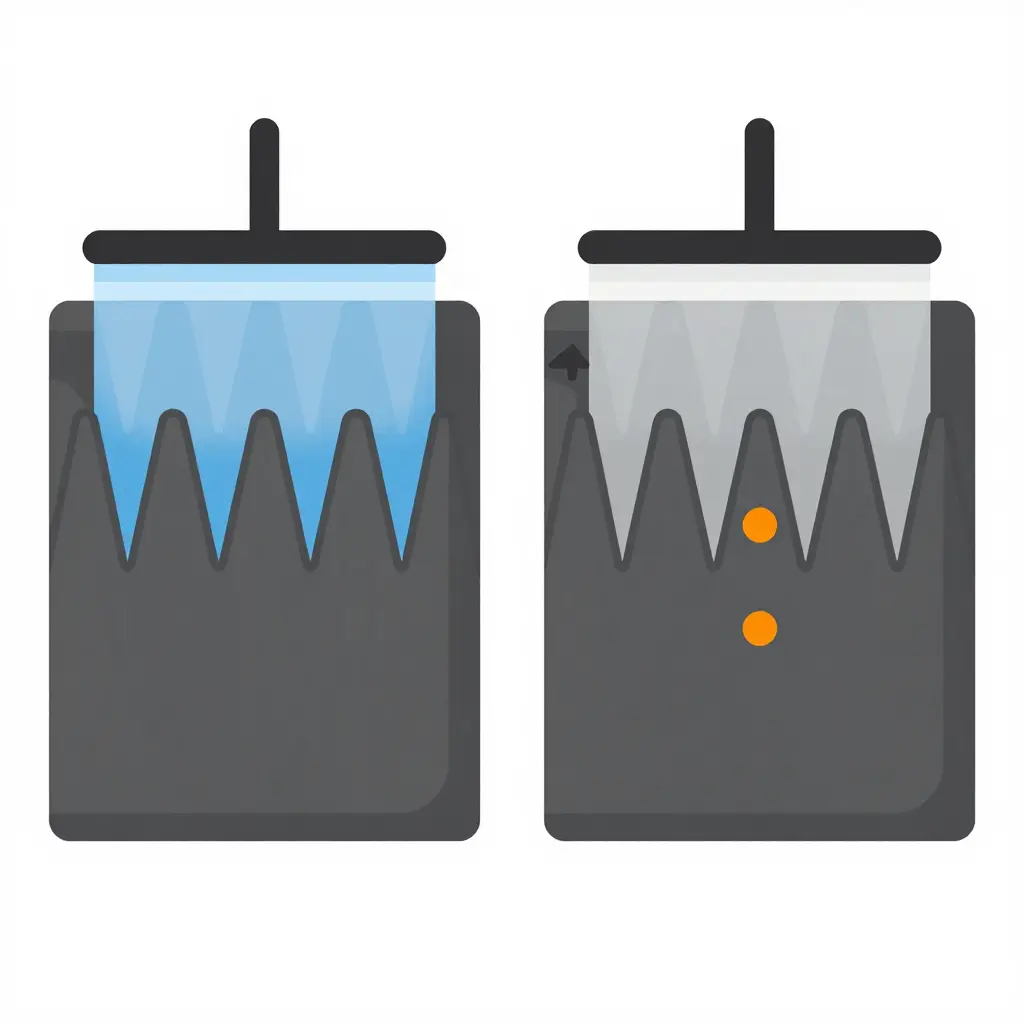
Side by side: fluid fills the grain valleys on a wet install, while trapped air pockets survive on a dry one.
Dry Install Walkthrough: The Step-by-Step Counterpart
A dry install behaves very differently on textured shrouds. The adhesive grabs the moment it touches, so there is no slip time to straighten a crooked panel. The work is faster and needs fewer supplies, but every premature contact traps air against the grain, and only controlled peel-backs and heat gun work will flush it out again.
The Sequence
- Prepare and fully dry the surface. Wash the shrouds with mild soap, then wipe down with isopropyl alcohol to strip oils and release agents. Wait at least 30 minutes, and ideally overnight on brand-new plastics, until the surface is dry before any vinyl decals go near it.
- Dry-fit the whole kit first. Lay every piece on the bike with the backing still on to confirm orientation and coverage, then tape a straight hinge line along one edge as your alignment reference.
- Anchor one edge and peel in sections. Stick only the taped hinge edge down, then peel the backing back a few inches at a time and lay the film forward instead of pulling the whole sheet at once.
- Squeegee at a consistent 30 to 45 degrees. Push air outward from the center with firm, overlapping strokes, keeping the blade in that range so you do not stretch the vinyl or leave ridges of trapped air.
- Apply localized heat into the grain valleys. Warm the decal briefly with a heat gun on low, 60 to 70 C (140 to 160 F), then press with a squeegee or a gloved thumb so the adhesive flows down into the textured surface rather than bridging over it.
- Lift and re-squeegee anything that lifted. If a corner or channel refuses to sit, peel back just that section, reheat it gently, and re-apply with fresh squeegee pressure from the center out.
- Heat-seal edges and wrap areas. Run the heat gun along the perimeter and any wrapped edges at a low setting, then press them down hard while still warm to lock the film into place.
- Inspect and respect the dwell period. Check every edge and high-flex area for lifting or bubbles, then apply the same schedule as a wet install: 24 hours before riding, 48 before washing, 72 before pressure-washing.
Compared with the wet method, the trade-off is fewer supplies in exchange for less room to recover: no water to chase out, but no margin for a misaligned first contact on textured shrouds. These KTM graphics kits are pre-cut to the shroud, so the dry sequence at least starts from edges that already match.
What Published Guidance and Installers Actually Say About Textured Plastic
Adhesion and surface prep. Application bulletins for cast vinyl, the type published by 3M, Avery Dennison, and ORAFOL, treat grained, textured, and low-surface-energy plastics as a test-first substrate. Grain cuts the contact area between adhesive and panel, so the guidance calls for extra squeegee pressure and heat, rather than more slip solution, to flow adhesive down into the valleys. Installer write-ups on MX forums and install videos say the same in plainer language: lift a corner after a day and you will know whether the grain won.
Air entrapment. This is where the sources split, and the split tracks grain depth. Installers working on shallow pebbled grain often prefer dry application, because a firm squeegee can chase air along the grain to an edge, and slip solution pools in the dimples. On coarse, deep grain the reports reverse: dry pressure bridges the valleys and seals air in. The hazy, milky patches installers blame on wet installs show up where solution was left in deep dimples and dried unevenly.
Repositioning. Here the sources agree that wet wins. A slip solution buys minutes of movement on a large one-piece shroud graphic, while a dry install with transfer tape is essentially one-shot. Installers describe lifting and re-laying as a bond-killer on grained plastic, because the adhesive picks up grit and dust on the second pass.
Cure and post-heating. Manufacturer notes emphasise post-heating edges and a dwell period before washing. Installer commentary on wet installs often runs longer, quoting several days up to a week for residual moisture to disappear. Treat that range as field experience rather than a specification: manufacturers publish dwell times, not measured cure curves for textured shrouds.
Where they diverge: the split falls along grain depth. Plenty of installers wet-install on smooth OEM plastics without trouble and reserve dry methods for pebbled or matte-grain panels, so the two camps are describing different substrates as much as different techniques. For a shop, pre-cut coverage removes most of the repositioning problem in the first place — see our range of KTM graphics for kits cut to grained shroud panels.
Adhesive Bond Development Over 72 Hours
After a fresh install, the useful question is not which method is better but when the bike can be washed or pressure-washed. The chart below tracks how much of its final grip each method has reached at each checkpoint. Dry install on textured shrouds starts ahead because there is no slip solution under the film, so the pressure-sensitive adhesive grabs the grain almost immediately. Wet install catches up as the water works out of the film and past the edges, which keeps it in the handle-with-care window longer.
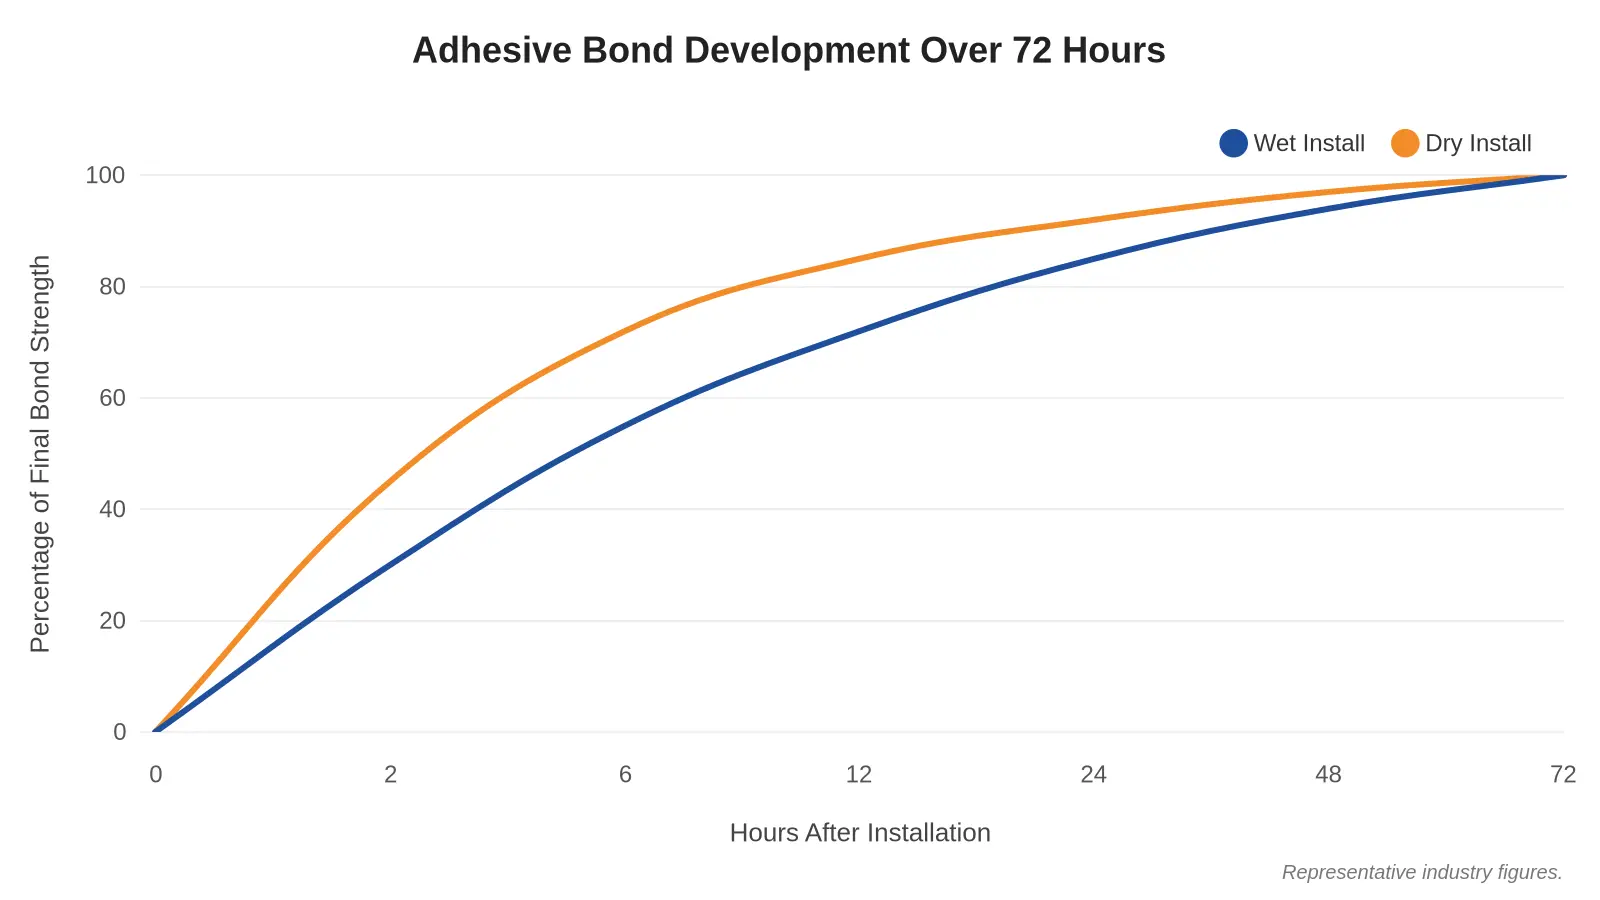
Wet install bond strength climbs slowly through the first half-day while dry install front-loads its grip, and both reach full strength by 72 hours. (Illustrative figures, not measured data.)
Reading the curves in the shop
| Checkpoint | Wet install | Dry install |
|---|---|---|
| 2 hours | 30% | 45% |
| 6 hours | 55% | 72% |
| 12 hours | 72% | 85% |
| 24 hours | 85% | 92% |
| 48 hours | 94% | 97% |
| 72 hours | 100% | 100% |
What that means in practice: no riding for 24 hours, no washing for 48, no pressure-washing for 72 after either method. Before that, edges and tight compound curves are still soft enough to lift under a sponge or a muddy boot. If you are kitting out a customer’s bike with one of our custom dirt bike graphics kits, put the cure window in your handover notes. It protects your work and saves the call about a peeling shroud a week later.
Technique Adjustments for Grain and Curvature
The two walkthroughs look different on the bench and finish in the same place. Textured shrouds punish speed and reward discipline, and the wet-versus-dry choice matters less than the handful of habits below. Whether your team installs wet or dry, these adjustments separate a graphics kit that survives a season from one that lifts at the first wash.
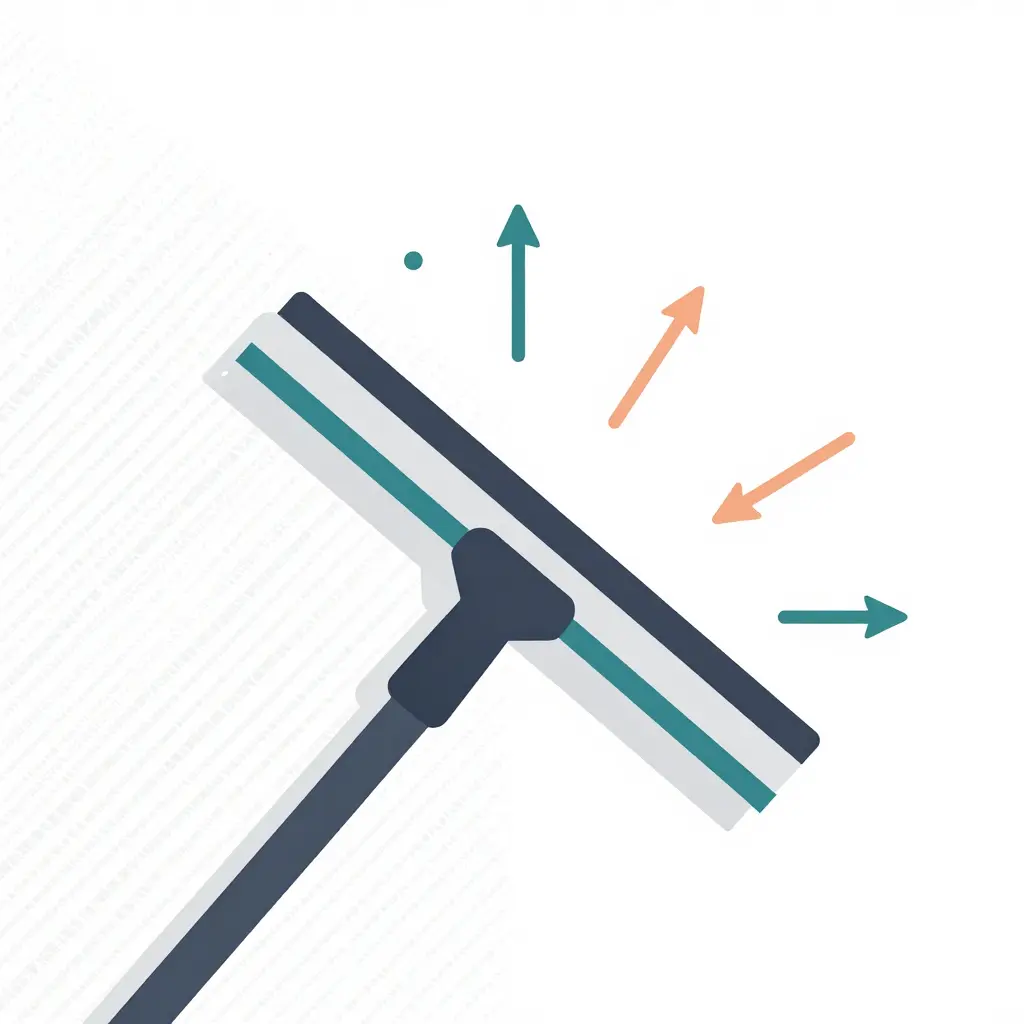
Squeegee angle and stroke overlap. Hold the squeegee at 30 to 45 degrees to the panel and push with the leading edge, never drag it flat. Overlap every stroke by 30 to 50 percent so no ridge of fluid or air is left behind. On curved sections, switch to short strokes and work from the center of the shroud outward, letting the vinyl relax into the shape instead of forcing it around.
Heat is a tool, not a shortcut. Keep the gun on low, 40 to 60 C (104 to 140 F), moving constantly at 15 to 20 cm from the surface. Those numbers relax the film so it follows a curve; go no higher than 60 to 70 C, and only when pressing film into deep grain or sealing a wrapped edge. Warm the film only until it relaxes. Over-stretching is the expensive mistake in this job: it thins the adhesive, distorts the printed image, and the material remembers the stretch, pulling back from edges within weeks. If a shroud needs more than gentle persuasion, the cut is wrong, not the heat setting.
Press into the valleys, not over them. Deep grain creates hundreds of tiny bridges. Work the film down into each valley with your thumb through a microfiber towel, then lock it with a squeegee pass across the grain. Film that spans the peaks instead of sitting in the valleys will lift, trap dust, and look cloudy under light.
Edge sealing on wrap-around areas. Wherever the film turns a radius, post-heat to 60 to 70 C (140 to 160 F) and roll the edge over with a firm thumb or edge roller, aiming for a 5 to 10 mm wrap on the back side. A sealed edge is what keeps pressure-washer water from creeping under the film, and it takes two minutes per shroud.
Keep excess fluid out of deep texture. On heavy grain, application fluid has nowhere to escape. Use a light mist rather than a flood, and on very coarse shrouds lean toward a dry or barely damp install so nothing stays trapped in the valleys.
Respect dwell time. No riding for 24 hours, no washing for 48, no pressure-washing for 72, and about a week before hard riding or a full detail. Adhesive needs time to wet out and bond.
Rules Your Shop Can Train On
- Push at 30 to 45 degrees and overlap by half — no flat-dragging, ever.
- Heat until the film relaxes, then stop; if it stretches easily, you are already too hot.
- Seal every wrapped edge with post-heat, and give the adhesive 24 hours before the bike is ridden and 48 before it is washed.
| Parameter | Target | Why it matters |
|---|---|---|
| Squeegee angle | 30 to 45 degrees | Prevents stretching and trapped fluid |
| Stroke overlap | 30 to 50 percent | Eliminates air and fluid ridges |
| Heat range | 40 to 60 C | Relaxes film without thinning adhesive |
| Edge post-heat | 60 to 70 C | Locks the wrap against water ingress |
| Ride dwell | 24 hours | Allows the adhesive to wet out |
| Wash dwell | 48 hours | Keeps water out from under sealed edges |
| Pressure-wash dwell | 72 hours | Protects sealed edges |
Print the list, tape it to the install bay, and audit it on the next three jobs. That audit will show you where the routine slips, which is more useful than any general advice about craftsmanship.
FAQ: The Wet vs. Dry Install Questions Your Team Asks Most
Can a wet install be used on textured shrouds?
Yes, and it is usually the safer starting point for molded plastics with a visible grain. The application fluid lets the film float just enough to reposition a large kit and chase out trapped air before the adhesive bites into the peaks of the texture.
Does application fluid weaken the adhesive?
No, not once the kit has fully cured, provided your installers squeegee the fluid out instead of leaving pockets under the film. The water works out through the film and past the edges over roughly 24 to 72 hours, and the bond returns to full strength.
How long should a graphics kit cure before washing or riding?
Twenty-four hours before riding, 48 before washing, and 72 before pressure-washing a fresh dirt bike custom graphics kit. Warm workshop temperatures speed curing and cold shops slow it down, so seal the edges and keep to the full window whenever the bike is heading straight into mud.
Will edges lift on textured plastic, and how is it prevented?
Edges can lift when the panel was not degreased or the vinyl was stretched too aggressively into a recess. Prevent it by wiping down with isopropyl alcohol, choosing a dry install or a light wet install with sealed edges, and post-heating to around 60 to 70 C (140 to 160 F) so the adhesive flows into the grain.
Which method is easier for a shop training new installers?
The wet install, because it is forgiving: a misaligned panel can be slid back into position before the adhesive sets. Start new hires on flat side plates, then move them to curved shrouds once they can squeegee consistently without trapping fluid.
| Question | Short Answer |
|---|---|
| Wet install on texture? | Yes, and it is the forgiving choice |
| Fluid and adhesive? | No loss of bond after full cure |
| Cure time? | 24 hours to ride, 48 to wash, 72 before pressure-washing |
| Edge lift? | Preventable with degreasing and heat |
| Best for trainees? | Wet install, then move to dry |
Choosing a Method for Your Shroud Type
If your shroud has a pronounced grain or deep mold texture, go wet. If the plastic is smooth or only lightly dimpled and you are confident in your placement, go dry.
Where wet install wins:
- Slip solution gives you working time to slide the decal into alignment on curved, heavily grained panels.
- Fluid and squeegee pressure push trapped air out of the texture valleys instead of sealing it in.
- You pay for it in patience: longer cure, more edge work, and a bike that stays parked longer than you would like.
Where dry install wins:
- Faster, fewer tools, and strong initial tack on flat surfaces.
- Less chance of over-soaking the adhesive on simpler plastics.
- You pay for it in commitment: on coarse texture, a misaligned panel or a trapped bubble is much harder to fix once the vinyl grabs. Riders fitting KTM graphics on angular shrouds often find wet install more forgiving, while Surron Light Bee graphics on smaller, flatter panels go on quickly dry.
Either way, the method is not the variable that decides the outcome. A surface stripped of silicone, polish residue, and dust, then a full cure before the first ride, is what keeps the kit in place. Skip the prep and neither approach saves you, whether you are fitting Talaria MX3 and MX4 graphics, a Stark Varg kit with tight compound curves, or 79Bike graphics on a lightweight frame.
Motograpics supplies fade-resistant vinyl decals and custom artwork built to survive that prep and cure routine on every one of these platforms.