
Custom dirt bike graphic kits are pre-cut, fade-resistant vinyl decal sets that cover a bike’s plastics and bodywork. Two numbers tell you what a kit actually contains: how many decals ship in the box, and how much plastic they cover.
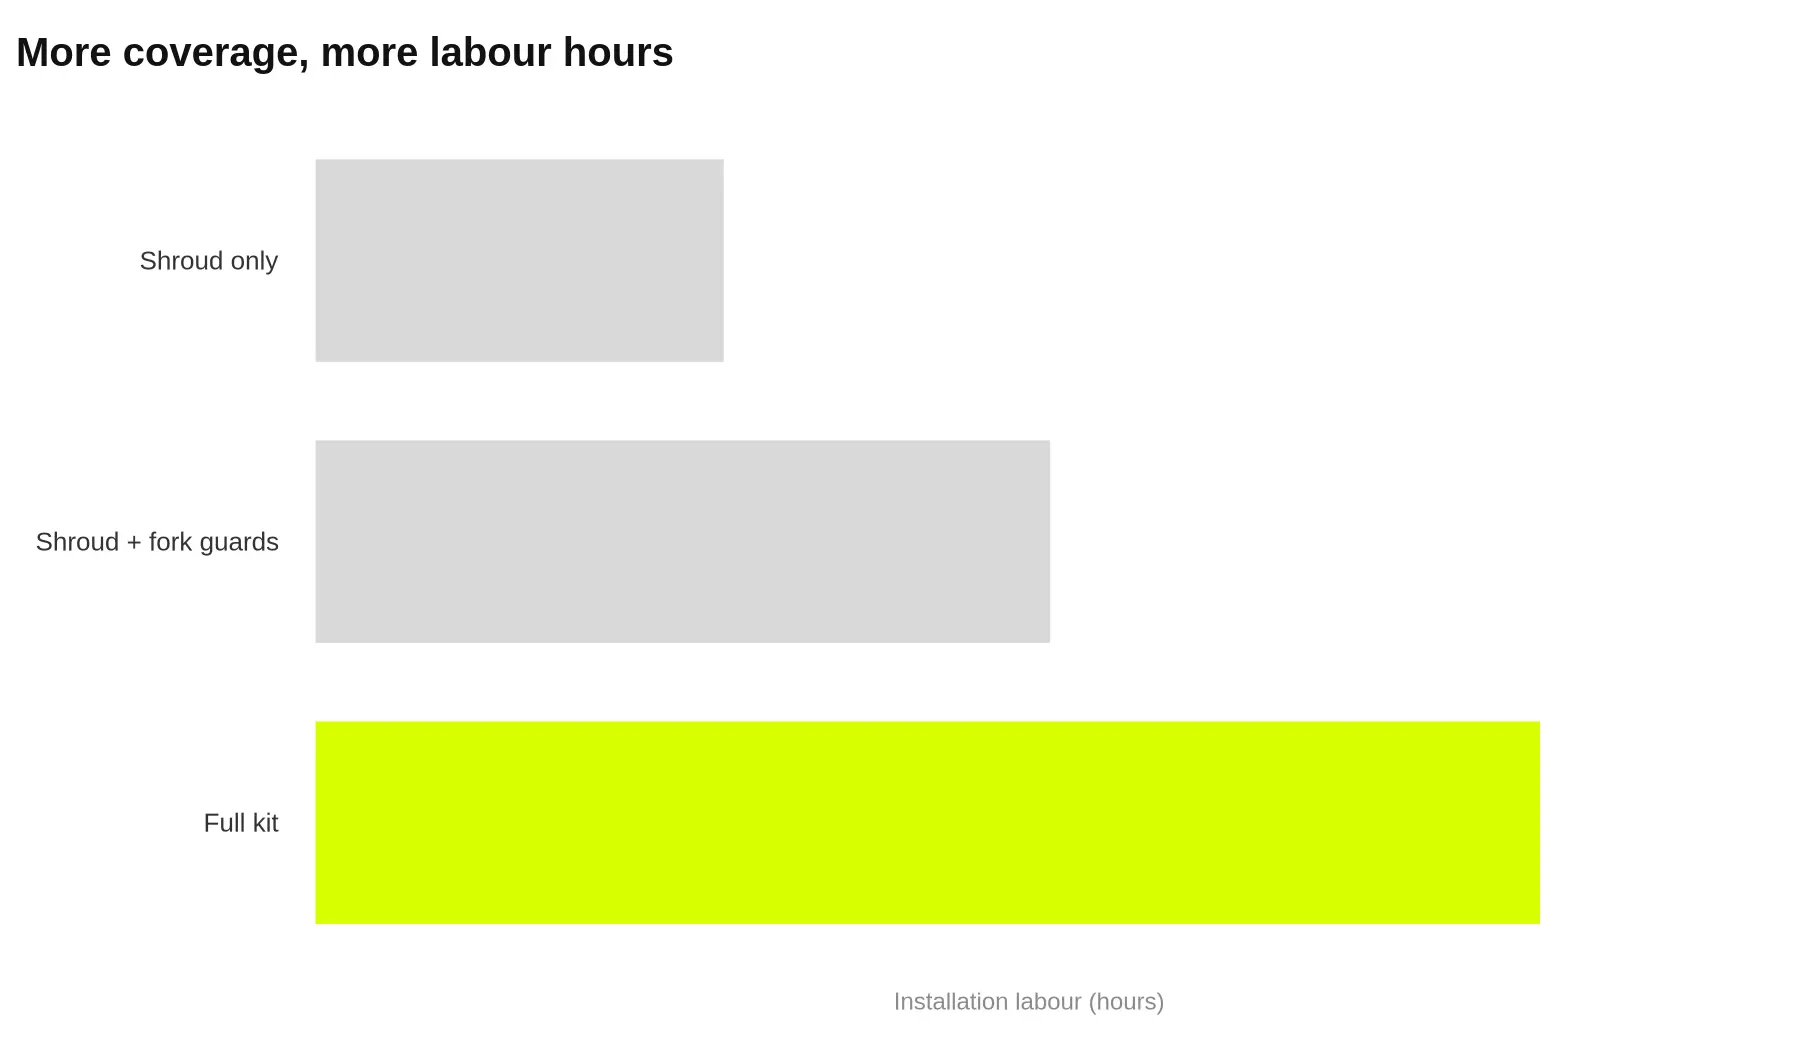
Coverage runs from a shroud-and-fender set up to a full-body kit with tank, airbox and swingarm panels. Install time follows coverage, but not in a straight line. An entry kit takes an hour to an hour and a half. A standard full-plastic kit takes two to three hours. Add rim and fork decals and you are at three and a half to five hours; the Complete kit with number plates and swingarm pieces runs five to seven.
This article sets out four coverage tiers with piece counts and the share of visible plastics each covers, gives install windows you can quote against, lists the preparation steps that keep vinyl stuck, and shows how to match a tier to a weekend trail riding schedule. Coverage and install hours are both measurable, so both can be priced against shop labour and downtime.
Graphic Kit Coverage Tiers and Install Time Benchmarks
| Coverage Tier | Decals Included | Approximate Surface Covered | Estimated Install Time (single installer) | Skill Level Needed | Typical Use |
|---|---|---|---|---|---|
| Essentials / partial kit | Radiator shroud graphics plus one or two accent decals (tank or front number plate) | Roughly 30 to 40% of visible plastics | 1 to 1.5 hours | Beginner – flat panels, peel-and-stick | Quick cosmetic refresh, budget-friendly weekend trail bike, adding personality without stripping the bike |
| Standard full-plastic kit | Shrouds, front and rear fenders, side panels, airbox covers | Roughly 60 to 70% of visible plastics | 2 to 3 hours | Beginner to intermediate – a few curved surfaces | Full plastics refresh for a new trail season or a bike being sold |
| Full body kit with rim and fork decals | All plastics in the standard kit plus rim stripes and fork guard decals | Roughly 85 to 90% of visible surfaces | 3.5 to 5 hours | Intermediate – comfortable with curved and cylindrical surfaces | Riders who want a coordinated look from fender to wheel and don’t mind a half-day in the garage |
| Complete display and number-plate kit | Everything above plus number plates, display or headlight surround, swingarm decals, and detail pieces | Roughly 95 to 100% of visible surfaces | 5 to 7 hours | Intermediate to advanced – patience for tight tolerances and layered pieces | Showroom-level builds, custom race-number setups, and full bike transformations |
As coverage climbs from a partial Essentials kit to the Complete kit, the surface that has to be cleaned, positioned and squeegeed climbs with it. Install time goes from about an hour to a full working day, and the last tier costs more time than its extra ten points of coverage suggests.
Inside a Graphic Kit
A custom kit is pre-cut pieces sized to your bike’s panels. Piece count tells you how many separate placements the job involves; surface area tells you what you are paying for. Check the contents before you price pre-cut vinyl decals per square foot.
- Shroud and tank decals – largest single surface, and the kit’s visual anchor.
- Front and rear fender decals – mid-size panels, moderate coverage.
- Swingarm and fork guard graphics – highest wear zone.
- Number plates – smallest pieces, most visible corners.
- Airbox and frame decals – low square footage, lowest wear zone.
- Optional rim and hub decal sets – accent coverage only.
Judge a tier by the surface it covers, not by how many decals are in the bag. The shrouds are the largest single surface and carry the kit’s look; swingarm and fork guards take the most wear, so laminate thickness matters most there; frame and airbox decals sit in the lowest-wear zone. Use that breakdown to price each tier and to confirm which pieces actually ship in the box.
Estimated Install Time by Coverage Tier
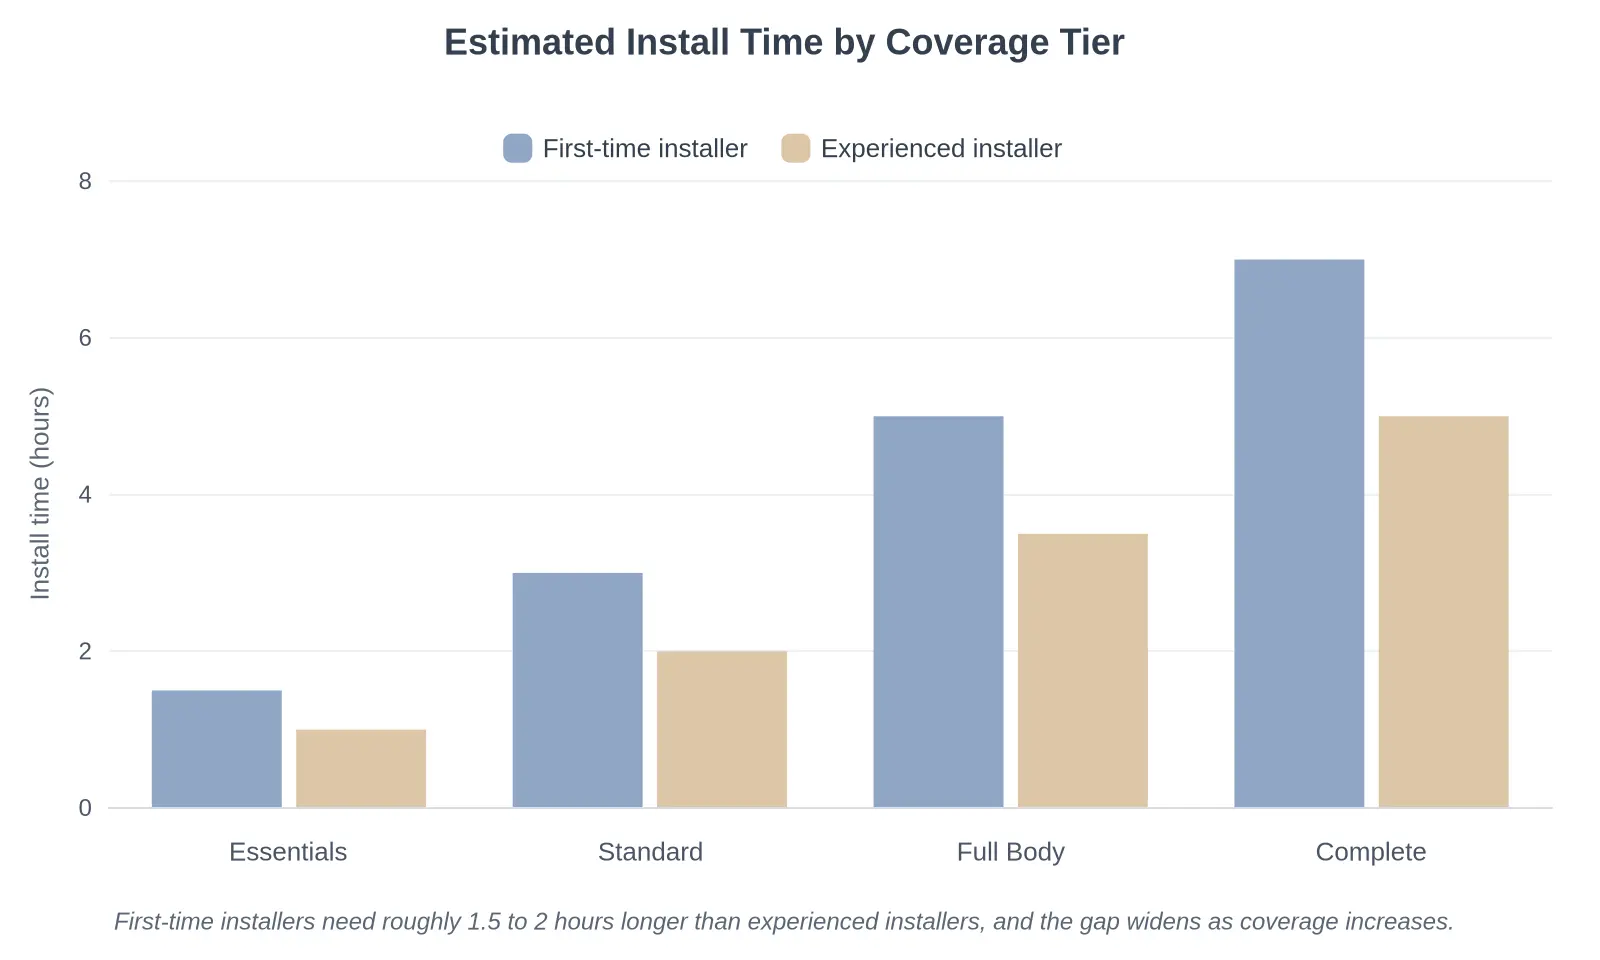
Chart caption: The gap between a first-time and an experienced installer starts at about half an hour on an Essentials kit and widens to two hours on a Complete kit.
What the Numbers Tell You
The pattern holds as coverage grows: more panels, more compound curves, more time on your knees with a squeegee. On an Essentials kit a first-timer needs about 1.5 hours against 1 hour for someone who has done it before. On a Complete kit the same two installers are looking at roughly 7 hours and 5.
For a shop, that gap is the quote. Two hours per bike that cannot be billed is the difference between a job that pays and one that does not, so knowing which tier you are installing, and who is installing it, lets you price honestly instead of guessing. Pairing a realistic estimate with the right platform-specific kit, such as these Stark Varg MXEX graphic kits, keeps a weekend build out of Monday.
A quick rule of thumb: budget the first-time figure for a new hire’s first two installs, then plan around the experienced number once they have the technique dialled in.
What Drives Install Time for Custom Dirt Bike Graphic Kits
Install time is rarely decided by the artwork. Two riders can order identical kits and finish hours apart, because the variables that matter sit in the plastics, the workshop, and the hands doing the work.
Surface area covered. A shroud-only set covers a fraction of the plastic that a full kit does. More square inches means more squeegee passes, more edge sealing, and more time chasing trapped air.
Decal count and curvature. Dozens of small decals on tight compound curves take longer than a few large flat panels. Front fenders and fork guards go quickly; radiator shrouds and airbox covers do not.
Plastic condition and surface preparation. Scuffed, porous, or adhesive-contaminated panels need cleaning, degreasing, and sometimes light sanding before any vinyl is applied.
Ambient temperature. Vinyl is more pliable in a warm workspace. Cold panels stiffen the film and slow conforming around edges and recesses.
Pre-cut and pre-masked kits. Model-specific sets, such as these KTM graphics kits, usually ship pre-cut with transfer tape, which removes trimming and alignment guesswork. Uncut sheets must be measured and trimmed on the bike.
Wet versus dry application. Wet mounting allows repositioning but adds squeegeeing and drying time. Dry application is faster but far less forgiving of mistakes.
Installer familiarity. Knowing the layout sequence, and which panel overlaps which, is what prevents rework.
As a benchmark, a standard full-plastic kit takes two to three hours for one person working steadily, and a Complete kit can run to a full day. Schedule the work for a weekend you are not riding rather than the evening before.
Which Zones Each Coverage Tier Actually Covers
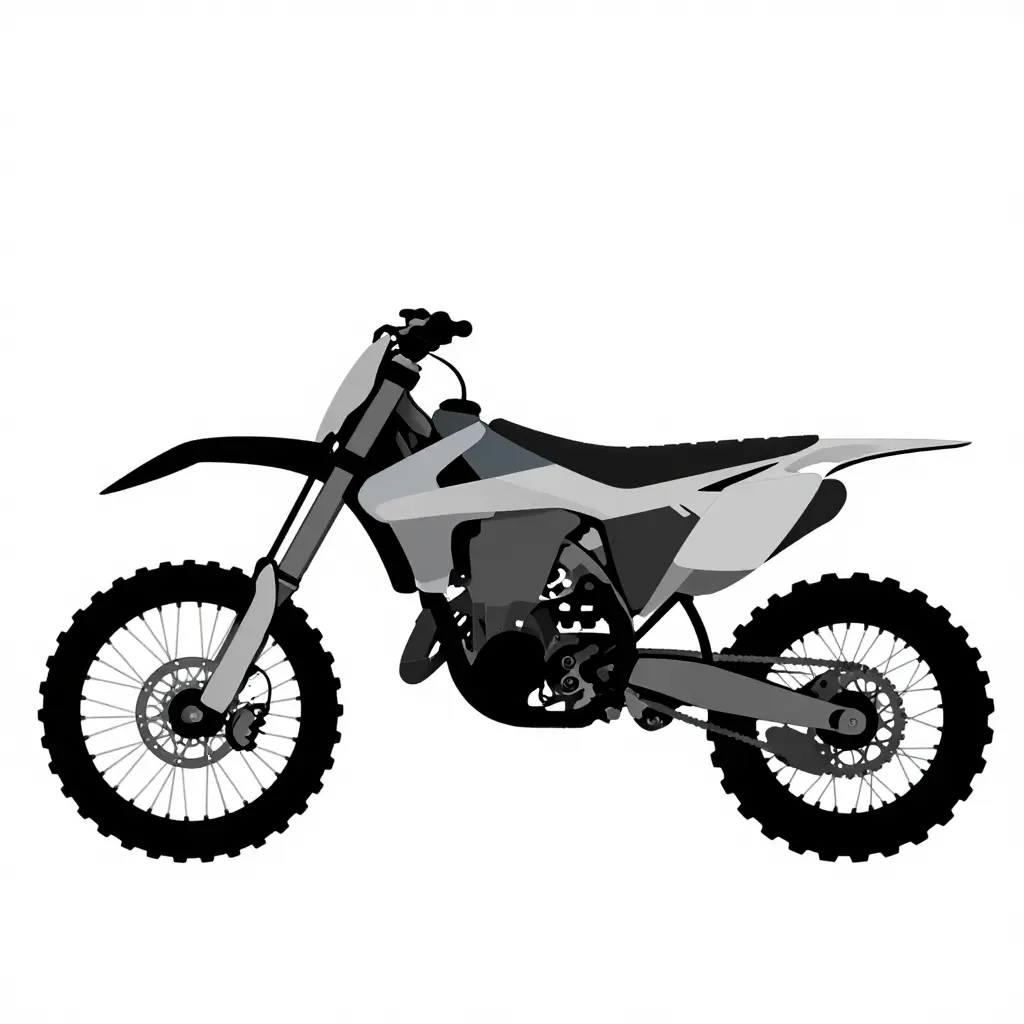
Before you pick a kit, it helps to see the bike as a set of six independent panels rather than one decal. Reading the schematic left to right:
- Front fender – the panel that takes the most roost, mud, and transport scuffs.
- Rear fender – first to fade from sun exposure on a bike that lives outside.
- Shrouds – the widest flat surface, so the biggest visual real estate.
- Number plates – small, curved, and the zone riders notice most when they are wrong.
- Fork guards – thin, high-wear, and often skipped by cheap kits.
- Swingarm – low-visibility but the difference between a “decal set” and a full wrap.
Entry tiers cover the shrouds, usually with nothing beyond one accent piece. Mid tiers add both fenders, the side panels and the airbox covers. Fork guards arrive with the full-body kit, number plates and swingarm decals with the Complete kit, and only that last tier covers all six zones. Each step adds panels with more curvature and more edges to seal, which is why price and install time step up rather than scale smoothly. Match the tier to how you actually ride: a fair-weather weekend trail bike rarely needs swingarm coverage, while a bike that gets pressure-washed every Sunday does. If you already know your model, browse KTM graphic kits to see how each tier is listed panel by panel.
Preparation and Tools
Preparation is the largest block of an install you control. Clean, flat, dry plastic reduces rework; contaminated or cold panels lift and force retries.
- Wash and degrease the plastics to remove dirt, oil, and old adhesive residue.
- Remove or loosen the panels you plan to cover for full edge access.
- Wipe each panel with isopropyl alcohol and let it flash off completely.
- Check panel temperature and keep the workspace above the recommended minimum.
- Dry-fit the decals before removing any backing to confirm alignment.
- Apply from the largest panel to the smallest so the layout stays consistent.
Basic tools: a squeegee for even pressure, a heat source for curved surfaces, clean lint-free cloths, and a knife for trimming edges. Pair these steps with fade-resistant vinyl decals and the job moves quickly, with fewer bubbles and less rework.
Where the Two-to-Three Hours Actually Go
Riders tend to assume the sticker work is the whole job. On a standard kit, most of the clock runs before a decal touches plastic. Here is the split for the two-to-three-hour benchmark:
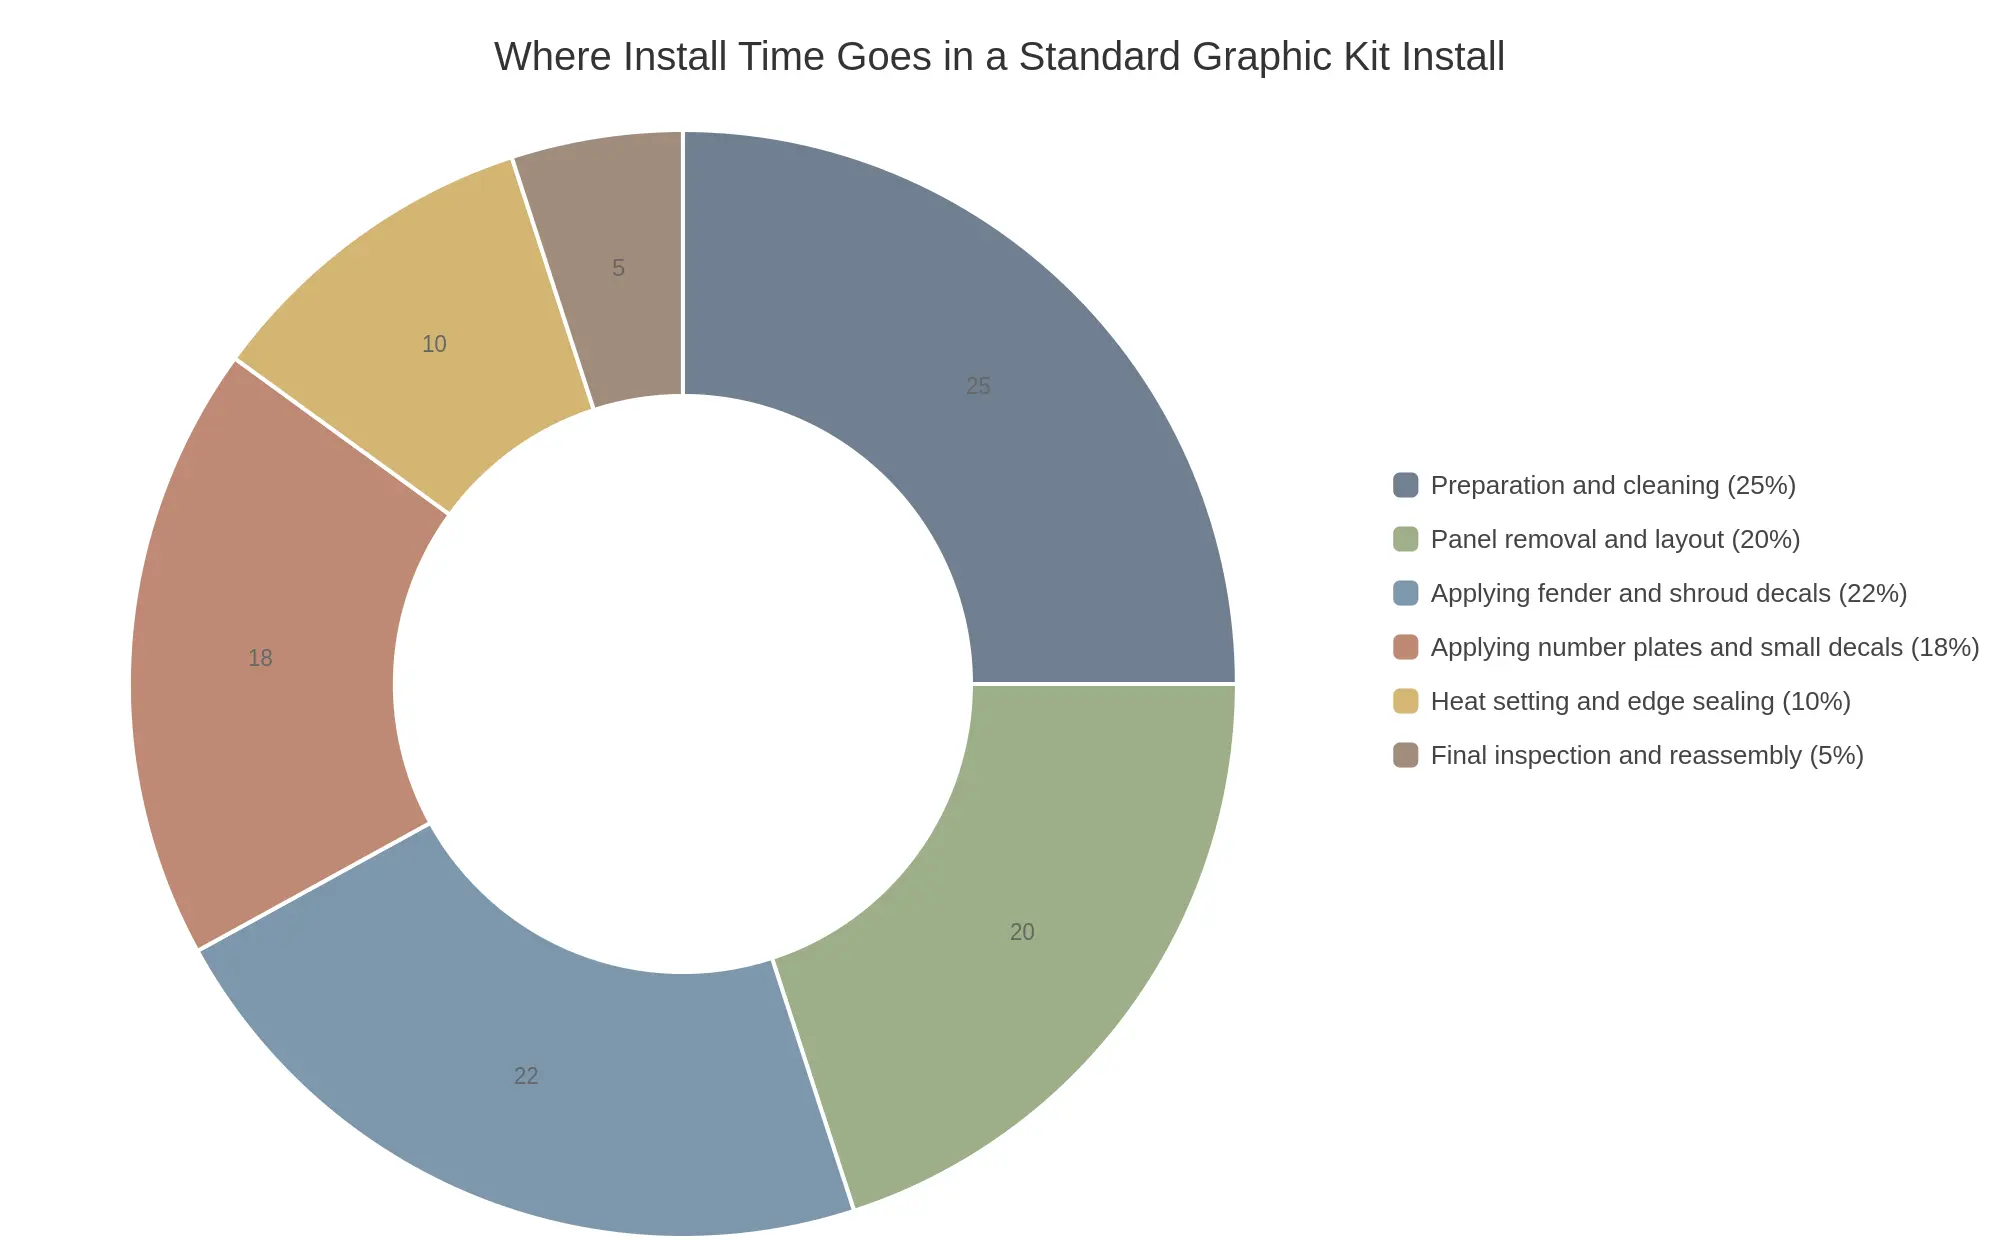
How to read it:
- Preparation and cleaning (25%) is the single largest block. Degreasing and de-waxing panels is unglamorous, but it is where most peeling failures are prevented.
- Panel removal and layout (20%) covers pulling shrouds and fenders plus dry-fitting pieces before any adhesive is exposed.
- Fender and shroud decals (22%) make up the visual bulk of the kit and reward a slow, squeegee-first technique.
- Number plates and small decals (18%) take longer than their surface area suggests, because each piece is set individually.
- Heat setting and edge sealing (10%) locks curves and wrapped edges so they survive pressure washing and roost.
- Final inspection and reassembly (5%) is the smallest slice – a quick bubble check, then bolting panels back on.
For weekend riders, the practical version: budget a full three hours the first time, and treat preparation as the main event rather than a warm-up. If you are still choosing coverage, browse full-coverage graphic kits so you know how many individual pieces you are signing up for.
Stage-by-Stage Install Time Guide
The doughnut chart splits a standard install into six stages that add up to two to three hours at a steady pace. Work through preparation and cleaning, panel removal and dry layout, large fender and shroud decals, number plates and small decals, heat setting and edge sealing, then final inspection and reassembly, in that order. The minute ranges below round the chart’s shares into blocks you can plan around, so they will not add up to the exact same total.
| Stage | Time range | Practical note |
|---|---|---|
| Preparation and cleaning | 30-45 min | Wipe every panel with a degreaser first; dust causes rework. |
| Panel removal and dry layout | 25-35 min | Tape pieces in place before peeling any backing paper. |
| Large fender and shroud decals | 25-40 min | Work from the centre outward to push trapped air to the edges. |
| Number plates and small decals | 20-30 min | Place these only once the big panels already look right. |
| Heat setting and edge sealing | 10-20 min | Keep the heat source moving so the film never stretches. |
| Final inspection and reassembly | 5-10 min | Check edges under good light before refitting bolts. |
First-time installers should add 30 to 45 minutes of buffer, concentrated in the shroud and fender decals and the dry layout, where hesitation costs the most time. Slow, careful positioning early is cheaper than restarting a panel.
The same ranges hold whether you fit a universal set or order custom dirt bike graphic kits for a specific model, so budget the buffer once and reuse it.
Durability and Coverage: Where Your Money Actually Goes
Coverage choices decide how long a kit earns its keep. Fade-resistant vinyl, plus lamination and UV protection, keeps colours honest through sun exposure and repeated wash cycles. Edge sealing is the main defence against lifting – a lifted corner is the first visible sign of failure – so wider coverage protects more surface, but it also adds more edges to seal and more time at installation.
That is the trade-off in plain business terms: labour hours against repeat-customer satisfaction. Prioritise high-wear zones such as shrouds and fork guards over blanket coverage on low-wear panels, where decals still protect the plastics underneath from scuffing. Compare full-coverage options in our KTM graphics kits before you quote the job.
Choosing the Right Coverage Tier for a Weekend Trail Riding Schedule
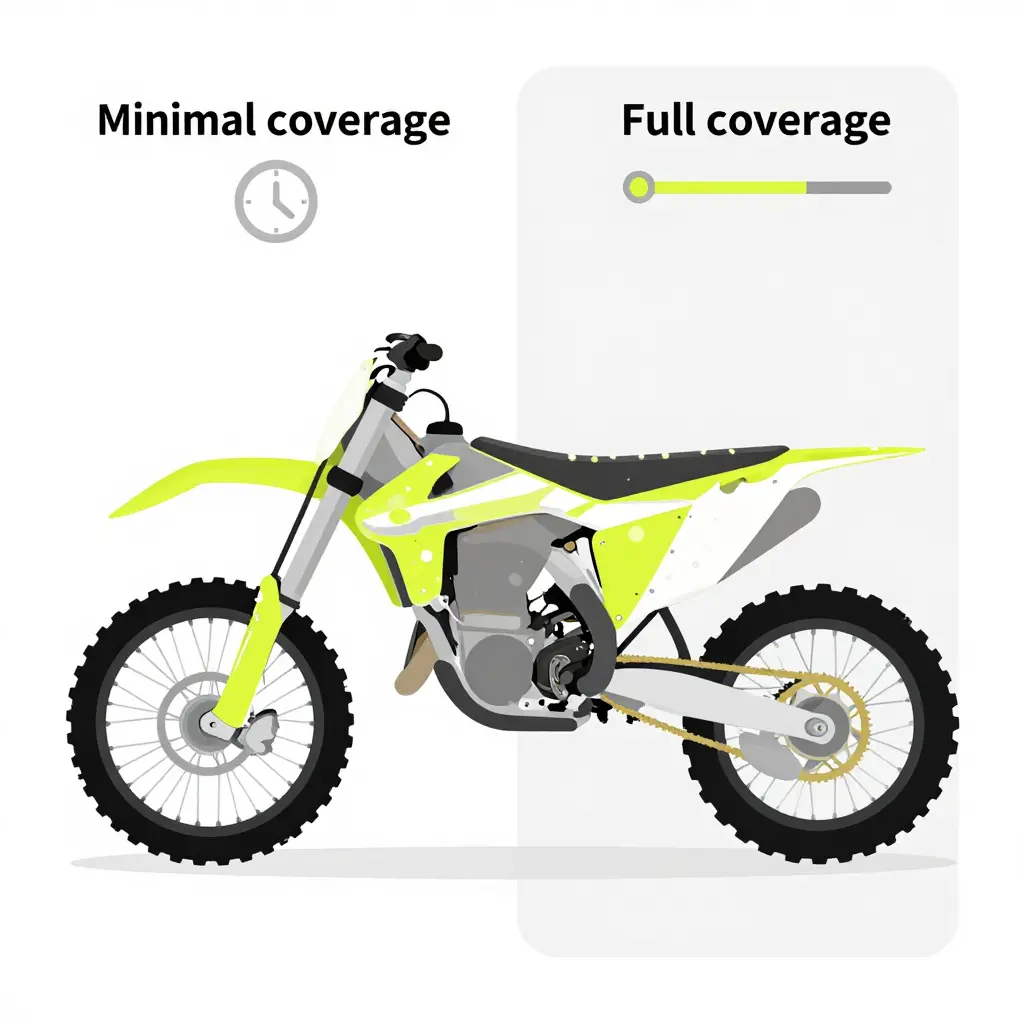
Start with three checks. Estimate the hours you can give to the install, because a full custom dirt bike graphic kit always runs longer than a shroud-only refresh. Count the plastics that genuinely need it, high-wear zones such as shrouds, fork guards and rear fenders first. Then pick the tier that fits both the time budget and how many installs you expect in a year: light coverage for one quick swap, fuller kits for riders refreshing several bikes.
- 79bike – full coverage, one focused weekend install
- eRide – mid tier, covers shrouds and fenders
- Stark Varg MXEX – full wrap for hard-used panels
- ReRode R1 – balanced mid tier, quick turnaround
- Arctic Leopard – full coverage
- KTM – tiered options from shroud-only to full kit
- Surron Light Bee – light kit, fits a short session
- Surron Ultra Bee – mid to full, plan most of a day
- Surron Hyper Bee – full coverage, high-wear focus
- Talaria XXX – entry tier, fast single-evening job
- Talaria MX3/MX4 – mid tier for mixed plastics
- Talaria MX5 – fuller coverage, several-hour install
- Talaria Komodo – full kit, prioritises heavy scuff areas
Frequently Asked Questions
How much surface area does a full graphic kit cover?
A Complete kit covers roughly 95 to 100% of the visible surfaces: shrouds, both fenders, side panels, number plates, fork guards and swingarm. A standard full-plastic kit covers about 60 to 70% of the same surfaces. Seat covers and engine cases are excluded.
How long does it take to install a complete kit for the first time?
A standard full-plastic kit takes two to three hours the first time and about 1.5 to 2 hours on a repeat. A Complete kit with rim, fork, number-plate and swingarm pieces runs five to seven hours the first time, and about five once you know the layout.
Can a partial kit be expanded into a full kit later without removing existing decals?
Yes. Partial and full kits share templates, so missing panels can be added later without removing decals. Match model, material, and color; replace damaged pieces rather than layering.
Does coverage affect how often a kit needs replacing?
Yes. A full kit spreads trail wear across more panels, while a partial kit leaves plastics exposed to fading and scratches. Fade-resistant materials help, but crashes matter more than coverage.
What is the minimum workspace temperature for a reliable install?
Work at 18°C (65°F) or warmer. Cold vinyl is stiff, so curves resist stretching and edges lift easily. Warm the room and decals first.
A graphics purchase comes down to two numbers: the share of the plastic a tier covers, and the installer hours it costs. Partial kits finish in an evening, mid-coverage sets take an afternoon, full wraps take a day. Preparation is the largest block of that time in every benchmark here, and the one you control most directly. Model-specific kit pages list each tier panel by panel, which makes the choice mechanical.
Plan the install for a weekend you are not riding: clean and prepare the panels beforehand, then lay graphics in daylight with time for edges to settle.